
17 Dollar Tree Fall Decor DIY Ideas on a Budget


Can you decorate your whole home for fall with Dollar Tree supplies? Yes, and the results can look far better than the price tags suggest. The secret is not buying armfuls of finished decor. It is buying simple base pieces, foam pumpkins, wreath forms, mason jars, wood beads, burlap, and finishing them yourself with paint, texture, and a little patience.
This list gives you 17 beginner-friendly Dollar Tree fall decor DIY ideas, each with a clear how-to and a tip for making it look polished. Most take under an hour and need nothing fancier than a hot glue gun and craft paint. Browse Dollar Tree’s craft aisle to see what is in stock near you, then pick the projects that fit your home. Start with the pumpkin topiary. It is the highest impact for the effort.
17 Dollar Tree Fall Decor DIY Ideas to Try
1. Stacked Pumpkin Topiary
Dollar Tree sells stackable foam pumpkin sets that are made for this project. Stack two or three, then spray paint them in a color that suits your porch: cream, matte black, terracotta, or metallic bronze. A dark base coat with a lighter metallic layer on top gives an aged, expensive-looking finish. Add a small bow of fall ribbon near the stem with hot glue.
Set the finished topiary in an urn or a weighted pot so it does not tip in the wind. A step-by-step pumpkin topiary tutorial walks through the painting technique if you want a visual guide. Pair it with the planters in our Halloween porch decor ideas for a full entry look.
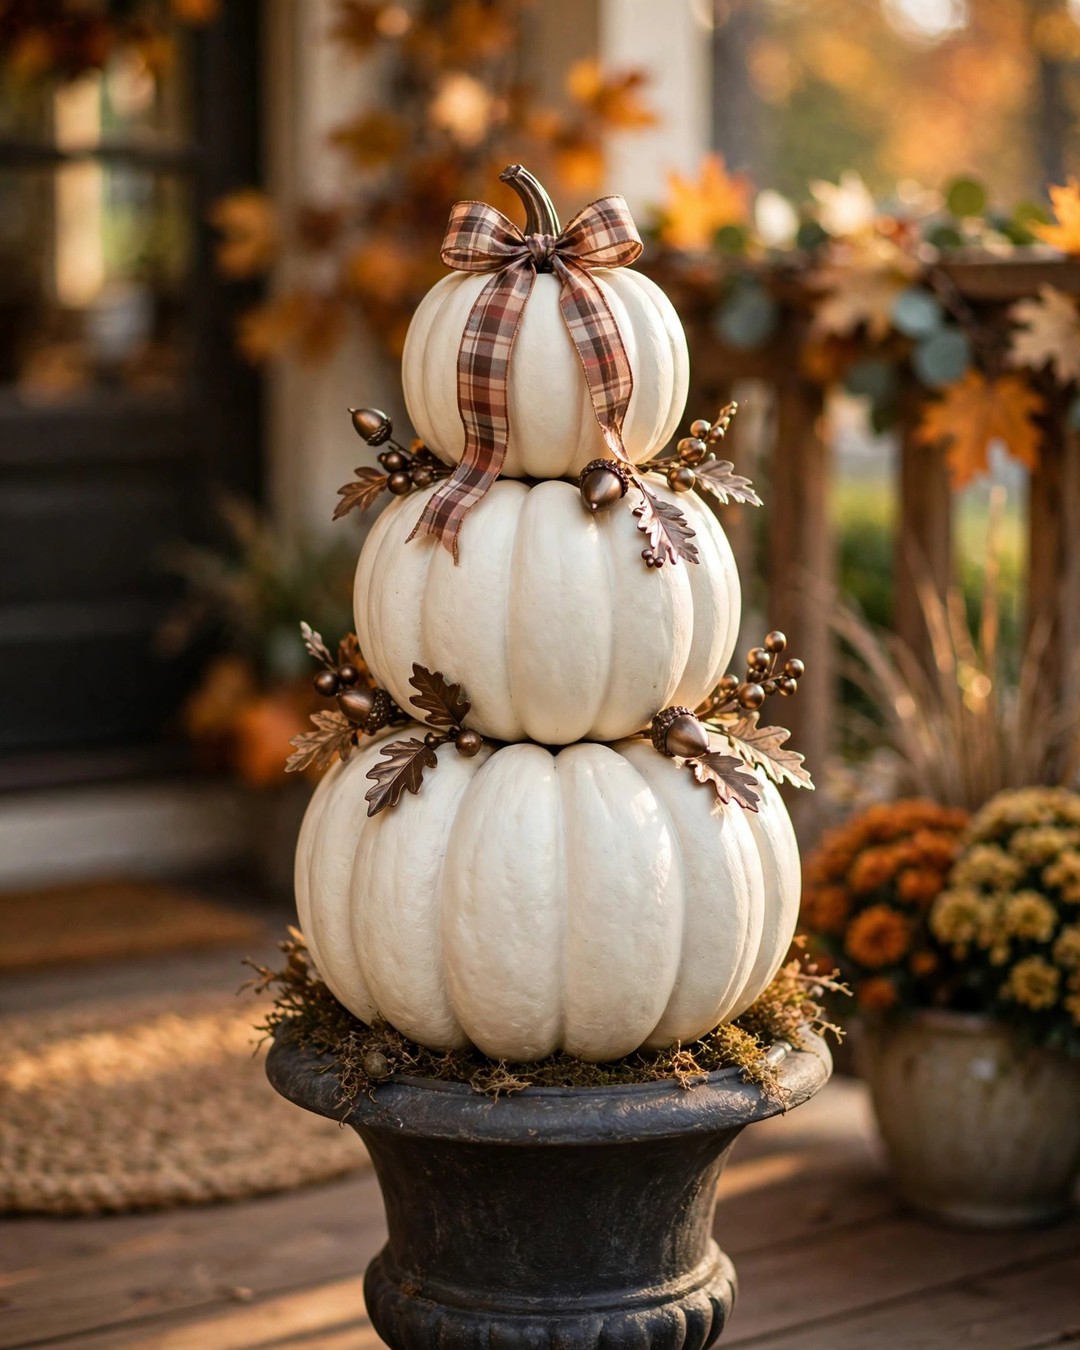
Tip: Tape off the stems before painting if you want them to stay brown. It is a small detail that makes the finished piece look more realistic.
2. Corn Husk Wreath
Wrap a foam wreath form with faux corn husks from the floral aisle, layering them in the same direction and overlapping generously. Hot glue each layer as you go so nothing shifts. Tuck in a few mini pumpkins, dried berries, and a raffia bow to finish.
The layered husks give a full, textured look that reads as natural rather than crafty. Hang it with a wide ribbon looped over a nail or an over-the-door hook. If the husks look flat in spots, add another layer. Fullness is the whole trick with this wreath.
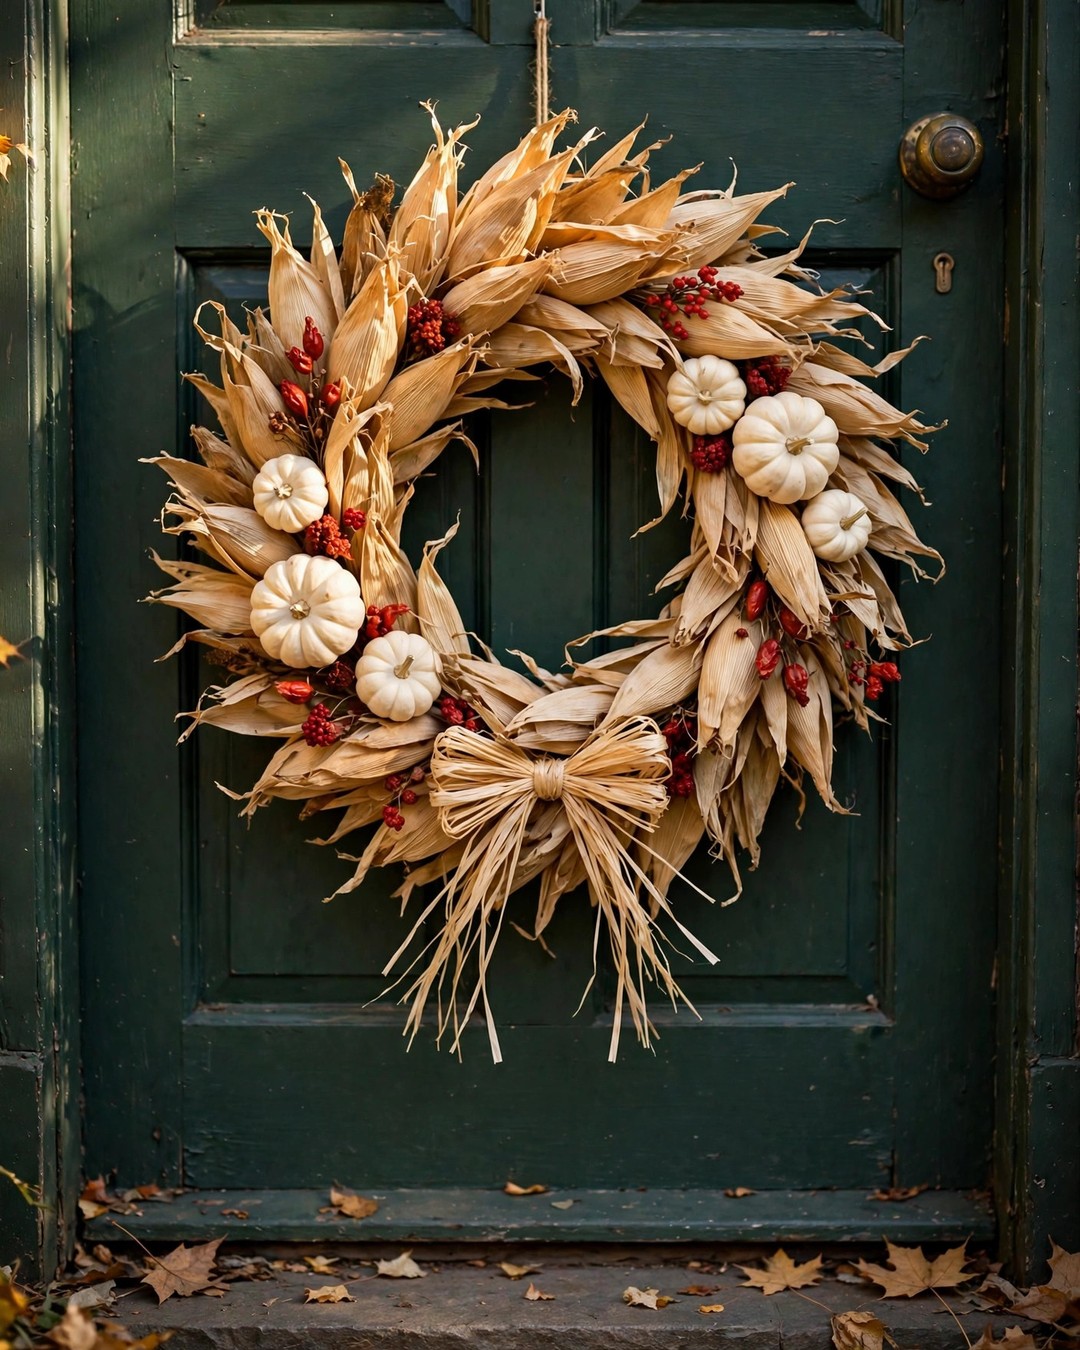
Tip: Work in small sections and press each husk firmly for a few seconds. Rushing the glue step is what makes wreaths shed later.
3. Pumpkin Candle Holders
Carve a shallow opening in the top of a foam pumpkin, just wide enough to nestle a pillar candle inside. Cluster two or three finished pumpkins on a wooden tray with some dried leaves scattered around the base. Use battery-operated candles so the foam never meets a real flame.
This is one of the most elegant Dollar Tree projects for the money. The warm glow through the candlelight makes the whole arrangement feel intentional. Vary the pumpkin heights for a better silhouette, and keep the tray itself simple so the pumpkins stay the focus.
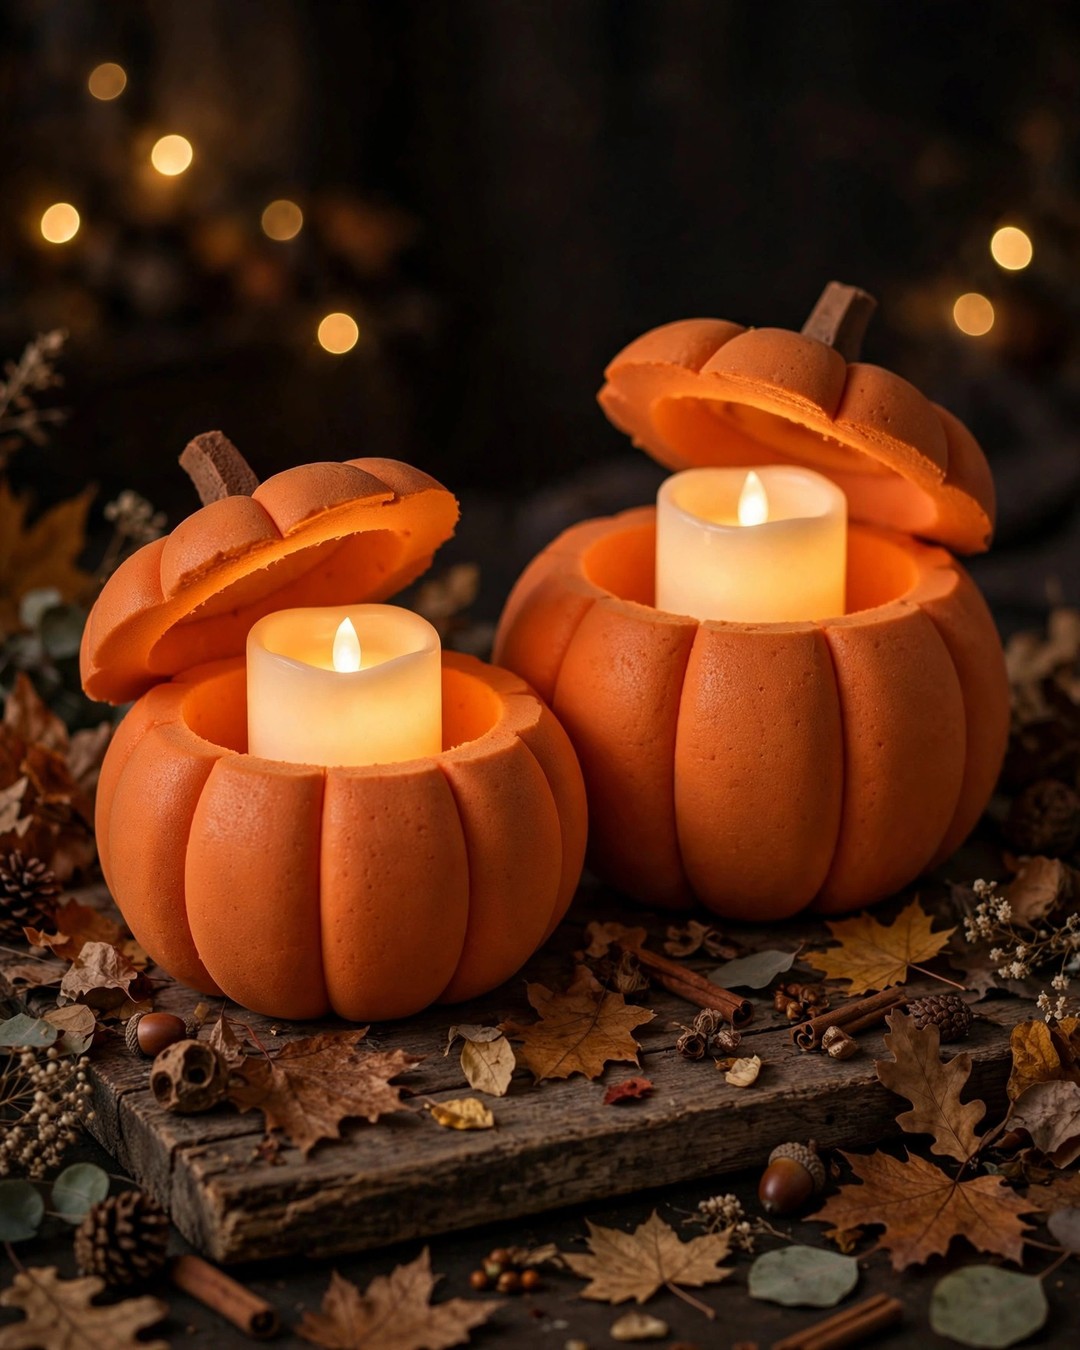
Tip: Choose candles with a built-in timer. They light themselves at dusk and you never have to remember.
4. Wood Bead Pumpkins
Thread wood beads onto pipe cleaners in orange, cream, or white, then shape the pipe cleaner into a round pumpkin form. Twist the ends together at the top, add a brown pipe cleaner stem and a small green leaf cut from felt, and you have a mini pumpkin that costs almost nothing.
These are perfect for tiered trays, shelves, and table settings where a full-size pumpkin would overwhelm. Make them in two or three colors for a collected look. Kids can help with the threading, which makes this a good family craft afternoon.
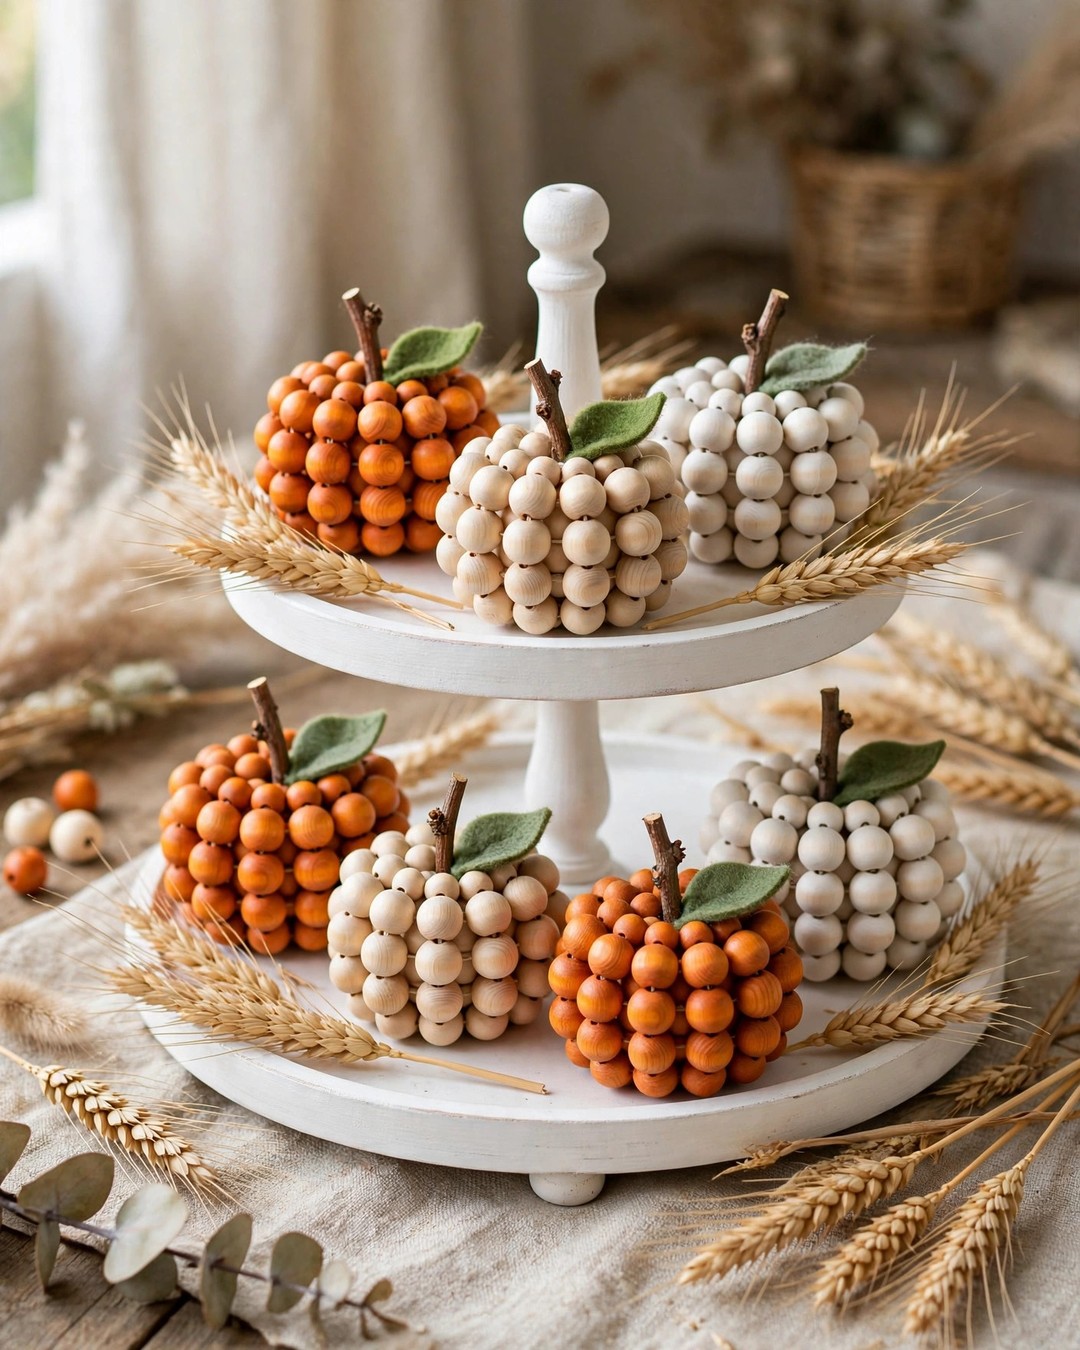
Tip: Use two pipe cleaners twisted together for larger pumpkins. A single one buckles under the weight of the beads.
5. Fall Floral Arrangement
Combine silk sunflowers, burgundy mums, and orange roses from the floral aisle in a galvanized bucket, a ceramic pitcher, or a plain vase you already own. Trim the stems to different heights and arrange the tallest in the center for a natural, garden-fresh shape.
Faux florals look far more realistic when the container has some character, so skip the plain plastic vase. Bend a few stems slightly so they do not all stand at attention. Three types of flowers plus one filler, like eucalyptus stems, is plenty.
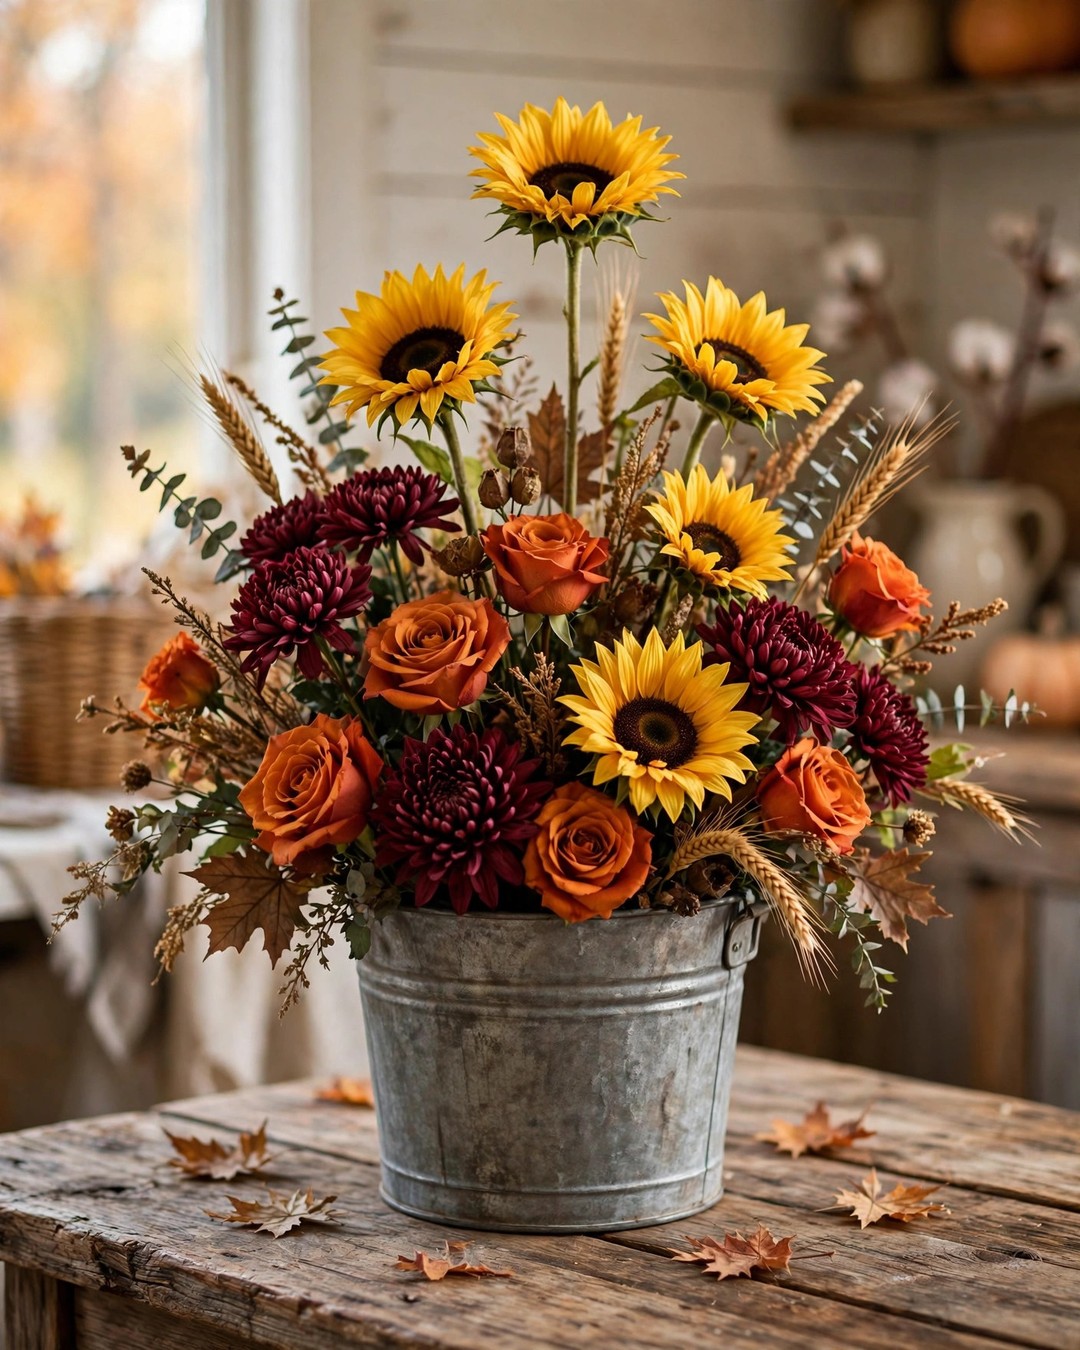
Tip: Put a piece of floral foam or crumpled paper inside the container first. It holds stems exactly where you put them.
6. Harvest Basket Centerpiece
Line a wicker basket with a fall-colored cloth napkin or a piece of burlap, then fill it with faux gourds, pinecones, and mini pumpkins. Place it on the dining table or kitchen island as an instant centerpiece that takes about fifteen minutes to assemble.
The trick is layering: larger pieces at the bottom, medium in the middle, and small accents tucked into the gaps. Turn the best-looking side of each gourd outward. When the season ends, the basket goes back to everyday use.
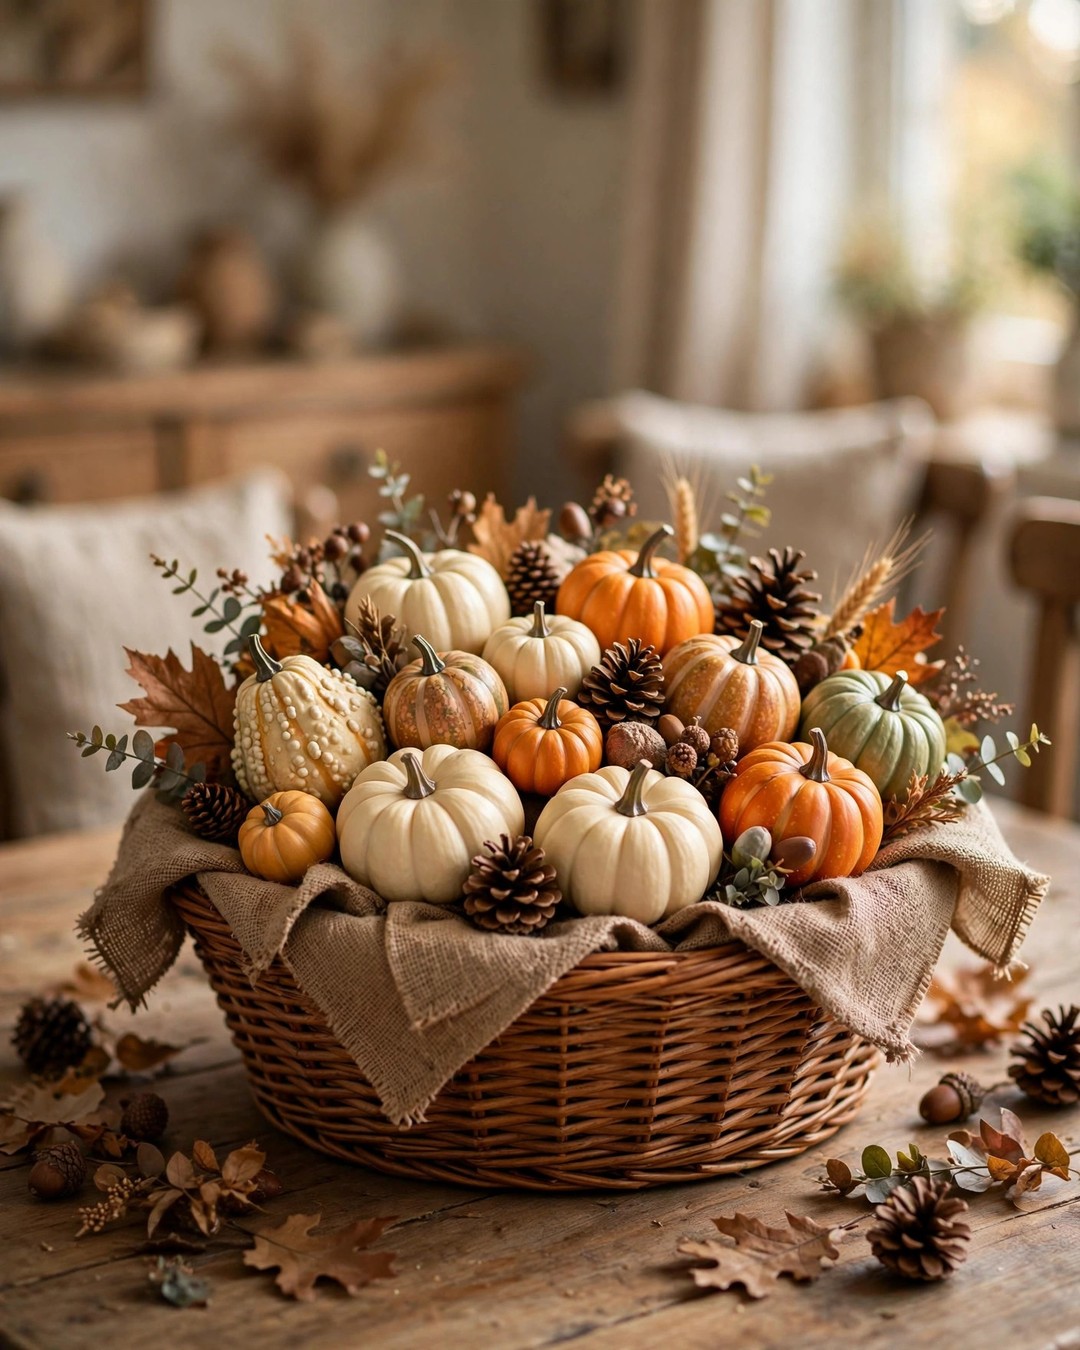
Tip: Tuck a small battery-operated string of fairy lights into the basket. The glow through the gaps looks wonderful after dark.
7. Painted Mason Jar Luminaries
Paint the outside of mason jars with thin coats of orange, amber, or cream craft paint, leaving the glass slightly translucent. Once dry, wrap twine around the neck, drop in a battery tea light, and line them along a mantel, windowsill, or table.
Two thin coats beat one thick coat every time. Thick paint goes on streaky and blocks too much light. A set of three jars in graduated sizes looks better than a row of identical ones.
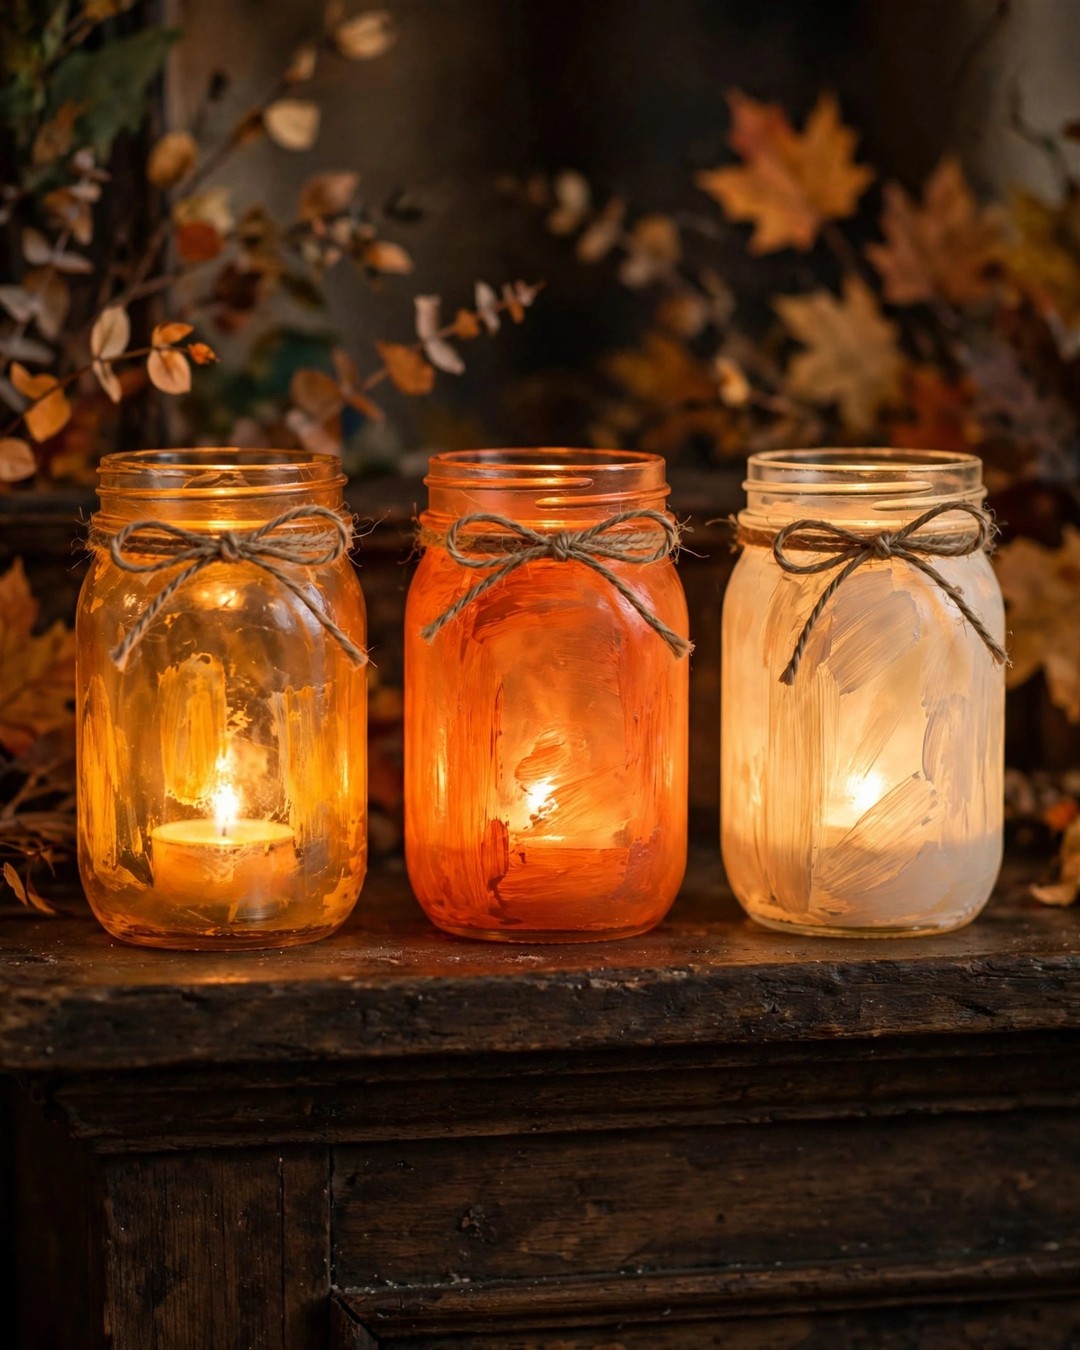
Tip: Sand the painted jar lightly with fine sandpaper after drying for a distressed, vintage finish.
8. Burlap Table Runner With Stenciled Leaves
Cut a length of burlap to fit your table, fold the raw edges under, and secure them with fabric glue or a quick hem. Stencil fall leaves down the center with craft paint in rust, mustard, and olive, spacing them unevenly for a natural scattered look.
Burlap frays, so seal the cut edges with a line of clear-drying glue before you start stenciling. The runner dresses up the table underneath every other decoration on this list, which makes it one of the hardest-working projects here.
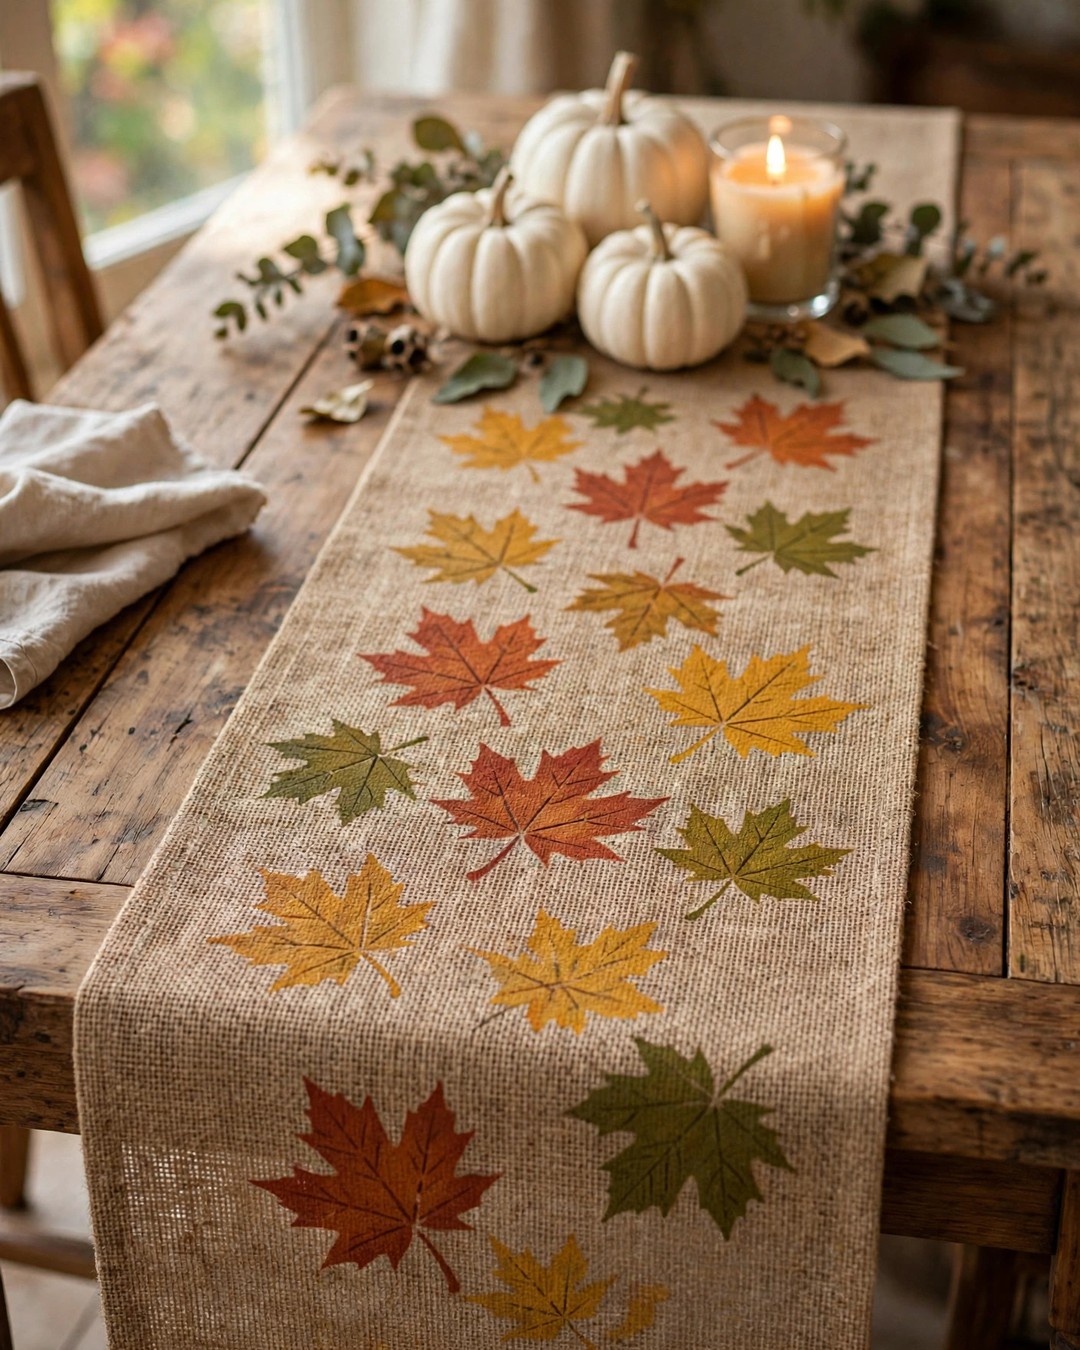
Tip: Dab the stencil brush almost dry before applying paint. Too much paint bleeds under the stencil edges.
9. Mini Pumpkin Place Card Holders
Hot glue a small piece of wire or a mini clothespin to the top of each mini faux pumpkin, then slide in a handwritten name card. Set one at each place setting for a fall dinner table that feels thoughtful without much effort.
Paint the pumpkins first if you want them to match your table palette: cream for neutral tables, metallic gold for something dressier. Guests can take them home, which makes them a favor as well as decor.
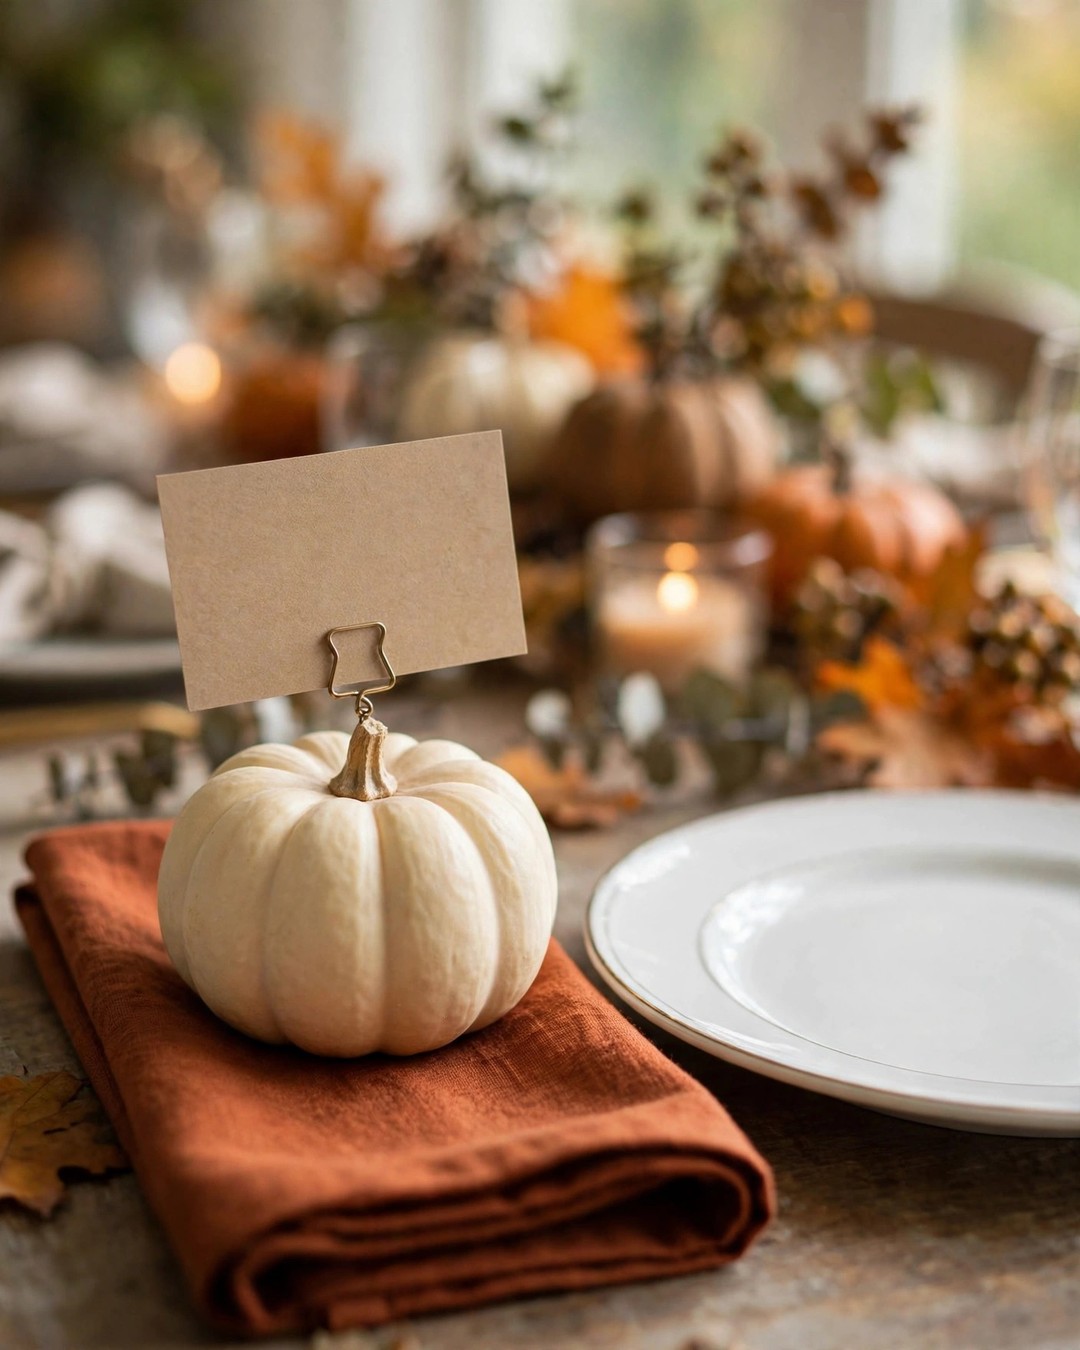
Tip: Write the names with a metallic marker on kraft paper cards. It is readable and looks far nicer than ballpoint on white.
10. Faux Leaf Garland for the Mantel
String faux fall leaves onto twine or thin jute rope, spacing them a few inches apart and alternating colors. Drape the finished garland across the mantel in a loose swag, letting the ends hang down slightly on each side.
Mix two or three leaf types, maple, oak, and birch, so it does not look flat and repetitive. Anchor each end with a small pumpkin or candlestick so the garland looks settled. Our fall living room decor ideas show how a garland pulls a whole mantel together.

Tip: Twist the twine once around each leaf stem instead of gluing. The leaves stay put and you can rearrange them next year.
11. Chalkboard “Hello Fall” Sign
Paint a small wood plaque with chalkboard paint, two coats, letting each dry fully. Once cured, write “Hello Fall” with a chalk marker and add a few leaf doodles in the corners. Lean it on a shelf, a tiered tray, or the entryway table.
Chalk markers write brighter than real chalk and survive light bumps, and they still wipe off with a damp cloth when you want a new message. A thin wood frame glued around the edge makes the sign look finished rather than handmade.
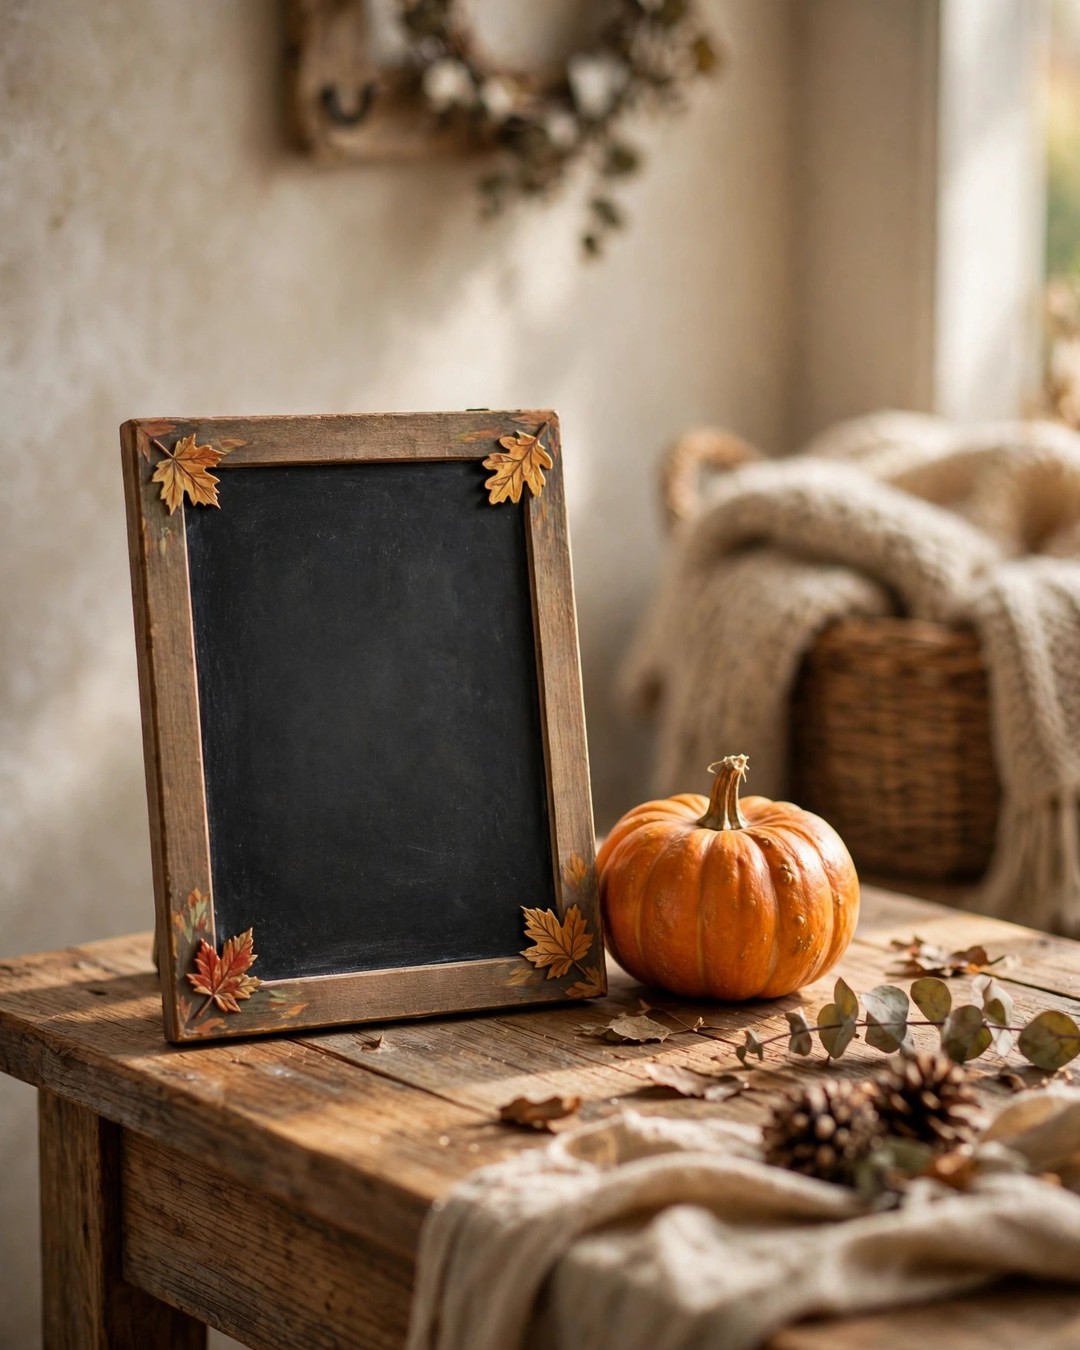
Tip: Condition the chalkboard first by rubbing chalk over the whole surface and wiping it off. It prevents ghosting from your first message.
12. Scented Pinecone Bowl
Fill a wooden or ceramic bowl with pinecones, then add a few drops of cinnamon or clove essential oil and toss to coat. Tuck cinnamon sticks and dried orange slices between the pinecones for a bowl that looks like fall and smells like it too.
Refresh the scent every couple of weeks with a few more drops of oil. Set the bowl on a coffee table or entryway console where people will actually catch the fragrance. Real pinecones work, but bake them at low heat for an hour first to remove any hitchhikers.
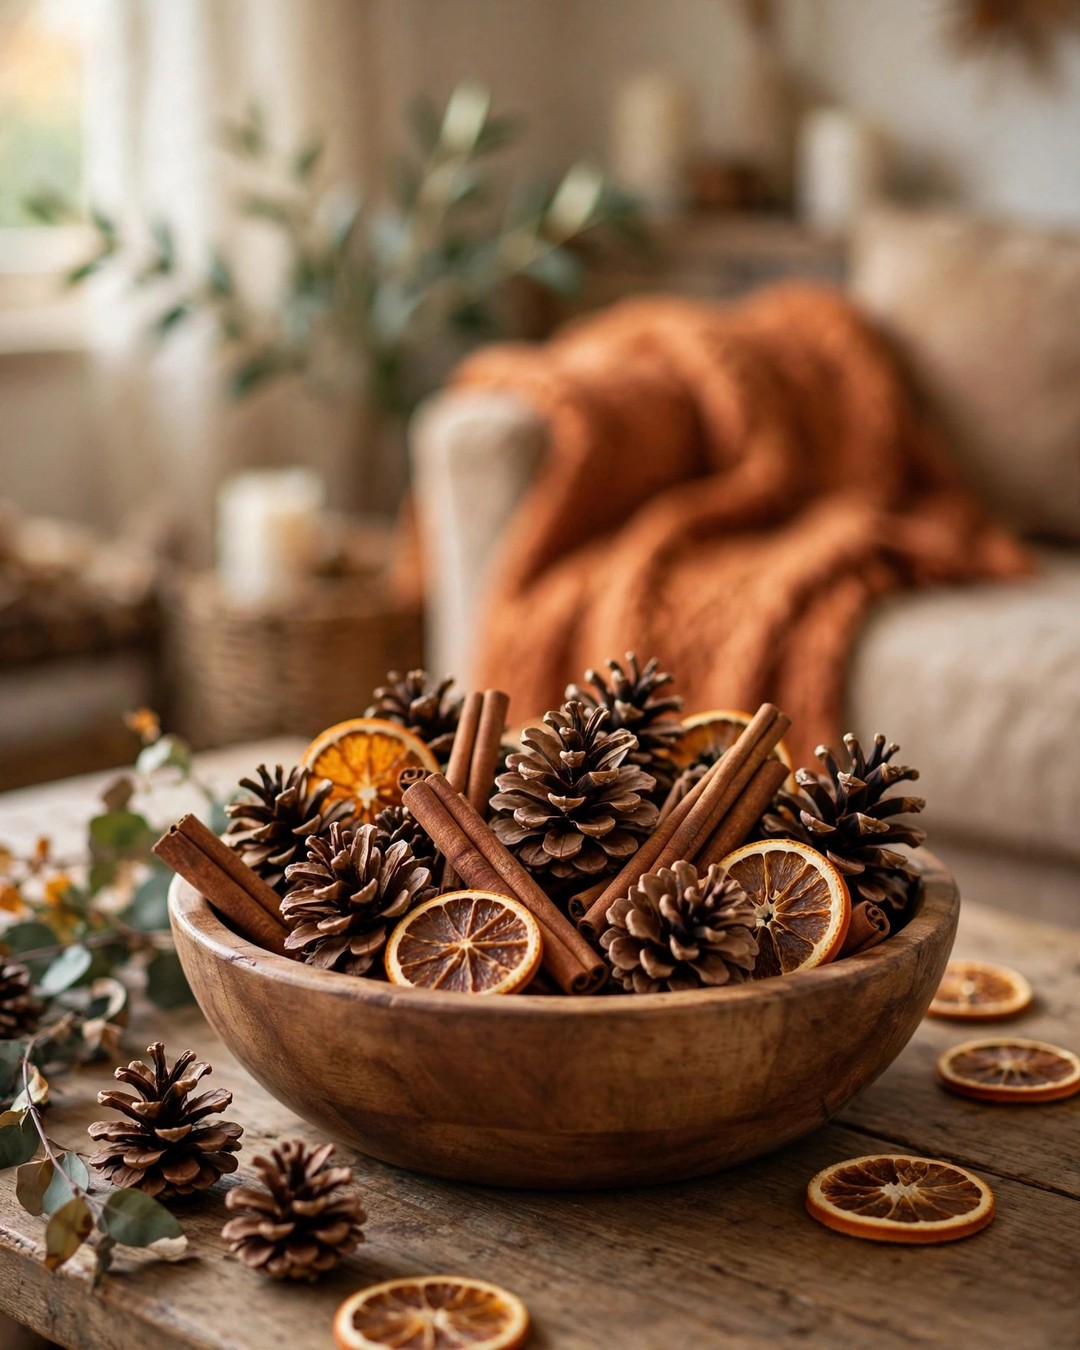
Tip: Keep the bowl away from direct sun. Heat fades the scent oils much faster.
13. Acorn Napkin Rings
Thread wood beads onto elastic cord, then hot glue a faux acorn to the front of each ring. Slide them onto rolled cloth napkins for a table setting detail that guests always comment on.
Make the rings slightly snug so they grip the napkin without sliding off. Six matching rings take about twenty minutes once you find your rhythm. Store them in a small box after the season so the acorns do not get crushed.
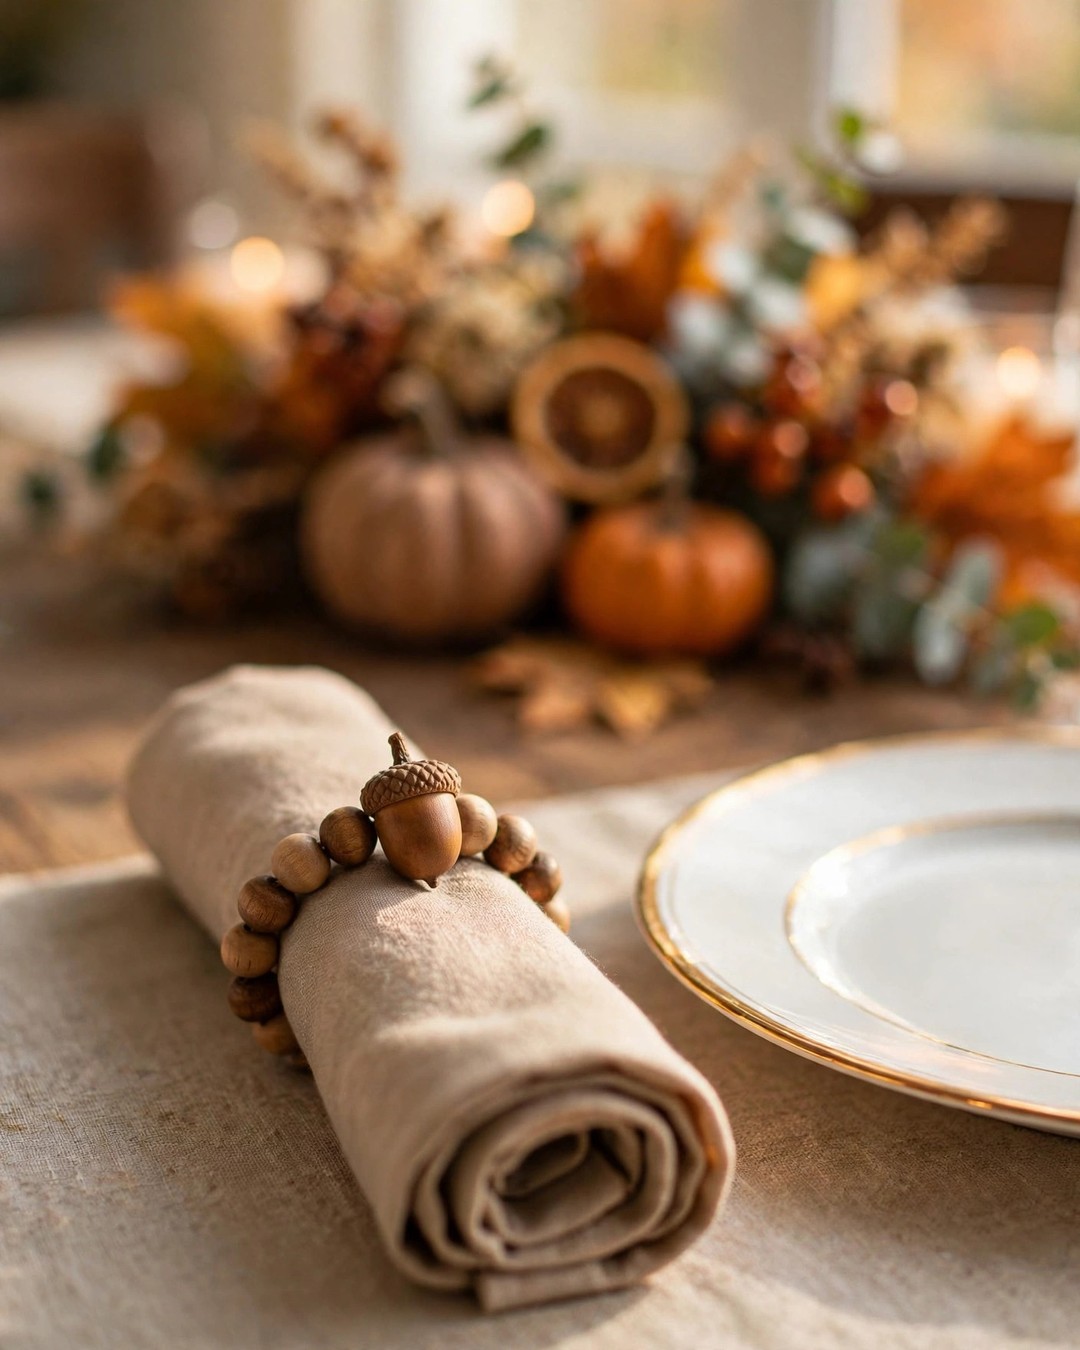
Tip: Paint the wood beads before threading. It is much faster than painting the finished ring.
14. Fall Tiered Tray Styling
A two- or three-tier tray from the kitchen aisle becomes a fall display with the right small pieces: mini pumpkins, a wood bead garland draped over the edge, a tiny chalkboard sign, and a small candle. Work from large to small, placing the biggest items first.
Leave some empty space on each tier. A crowded tray reads as clutter, not styling. Odd numbers of objects per tier look best. Swap one or two pieces at Halloween and again at Thanksgiving to stretch the tray through the whole season.
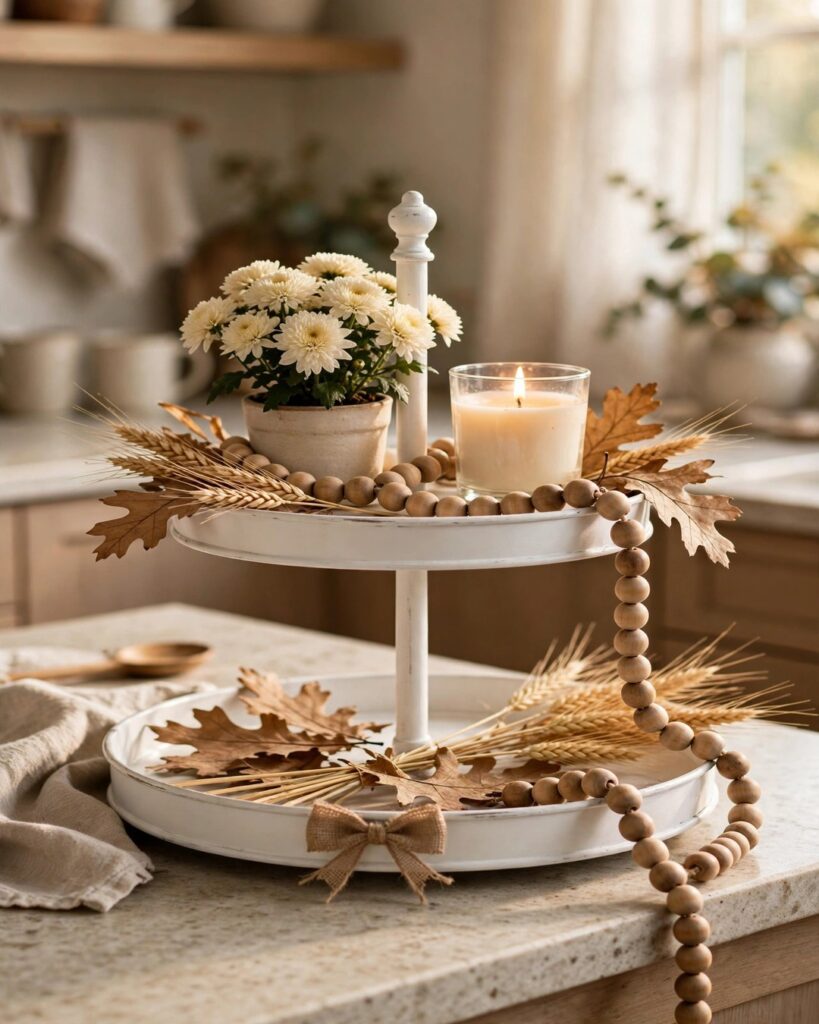
Tip: Put the tray where you will see it daily, like the kitchen counter. It is the decoration you will enjoy most.
15. No-Sew Fabric Pumpkins
Cut a circle of fabric, an old flannel shirt or a Dollar Tree bandana works, and gather it around a ball of stuffing or crumpled paper. Tie it tightly at the top with twine, then tuck a cinnamon stick in as the stem.
Flannel, plaid, and drop cloth all give a cozy farmhouse look. Make them in three sizes and cluster the group on a shelf or windowsill. No sewing, no glue gun, just scissors and twine.
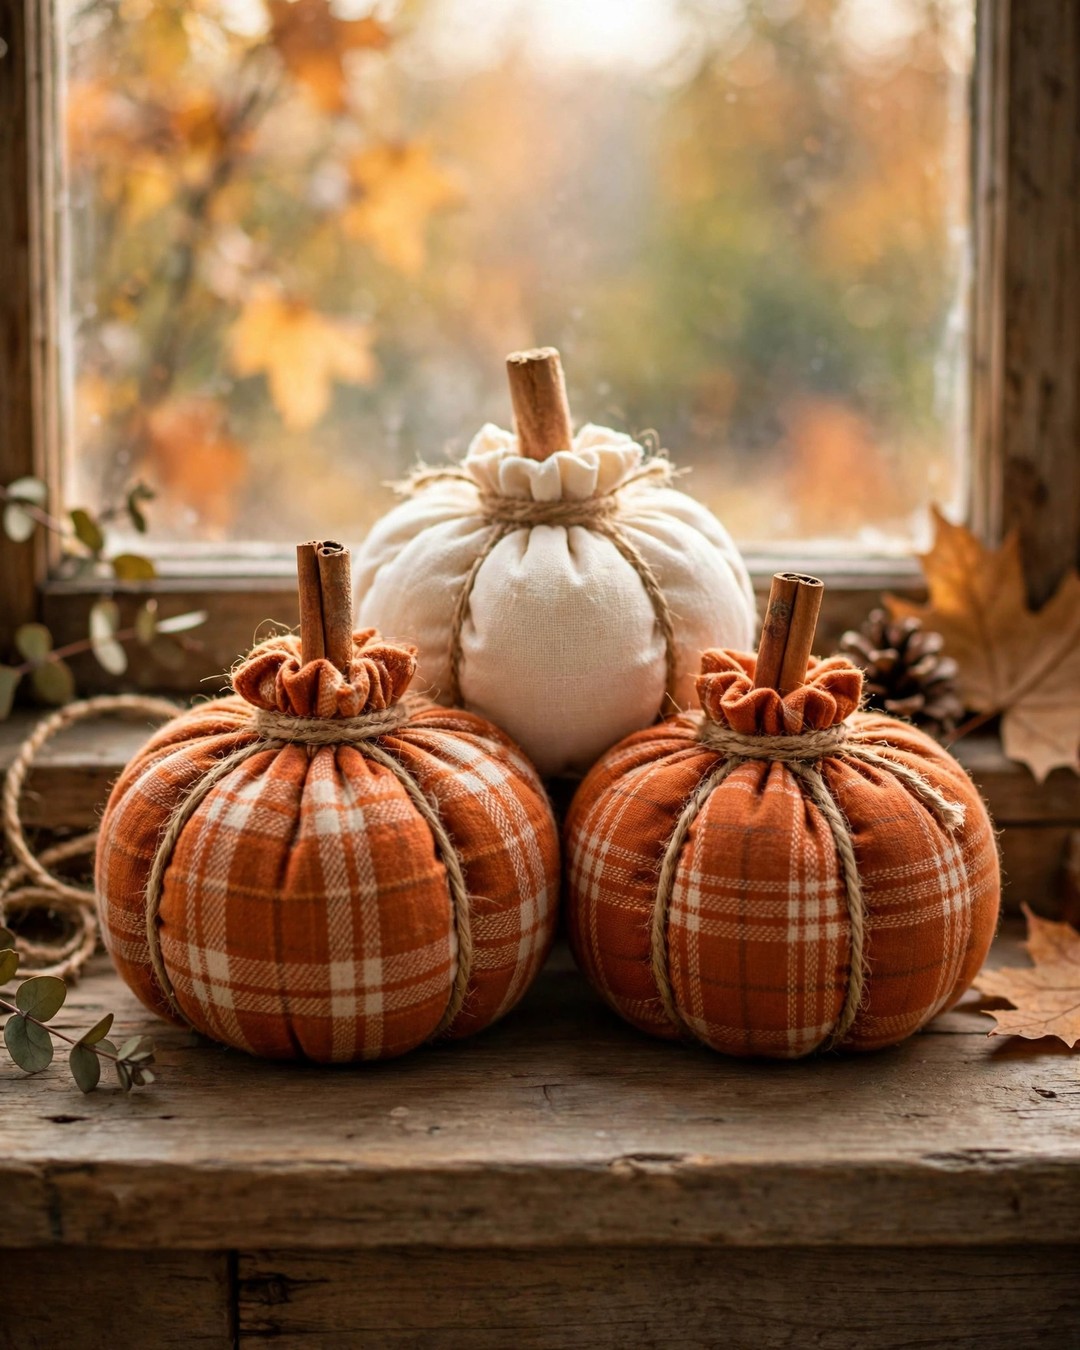
Tip: Wrap the twine around the pumpkin vertically a few times before tying to create realistic pumpkin segments.
16. Painted Leaf Coasters
Paint plain wood slices with simple leaf shapes in fall colors, or paint the whole slice and add a leaf silhouette in a contrasting shade. Seal each coaster with a clear matte sealer so condensation does not ruin the paint.
These double as decor when stacked in a small pile on the coffee table. Make a set of four or six so they are actually useful. A coat of sealer on the bottom too keeps them from sticking to furniture.
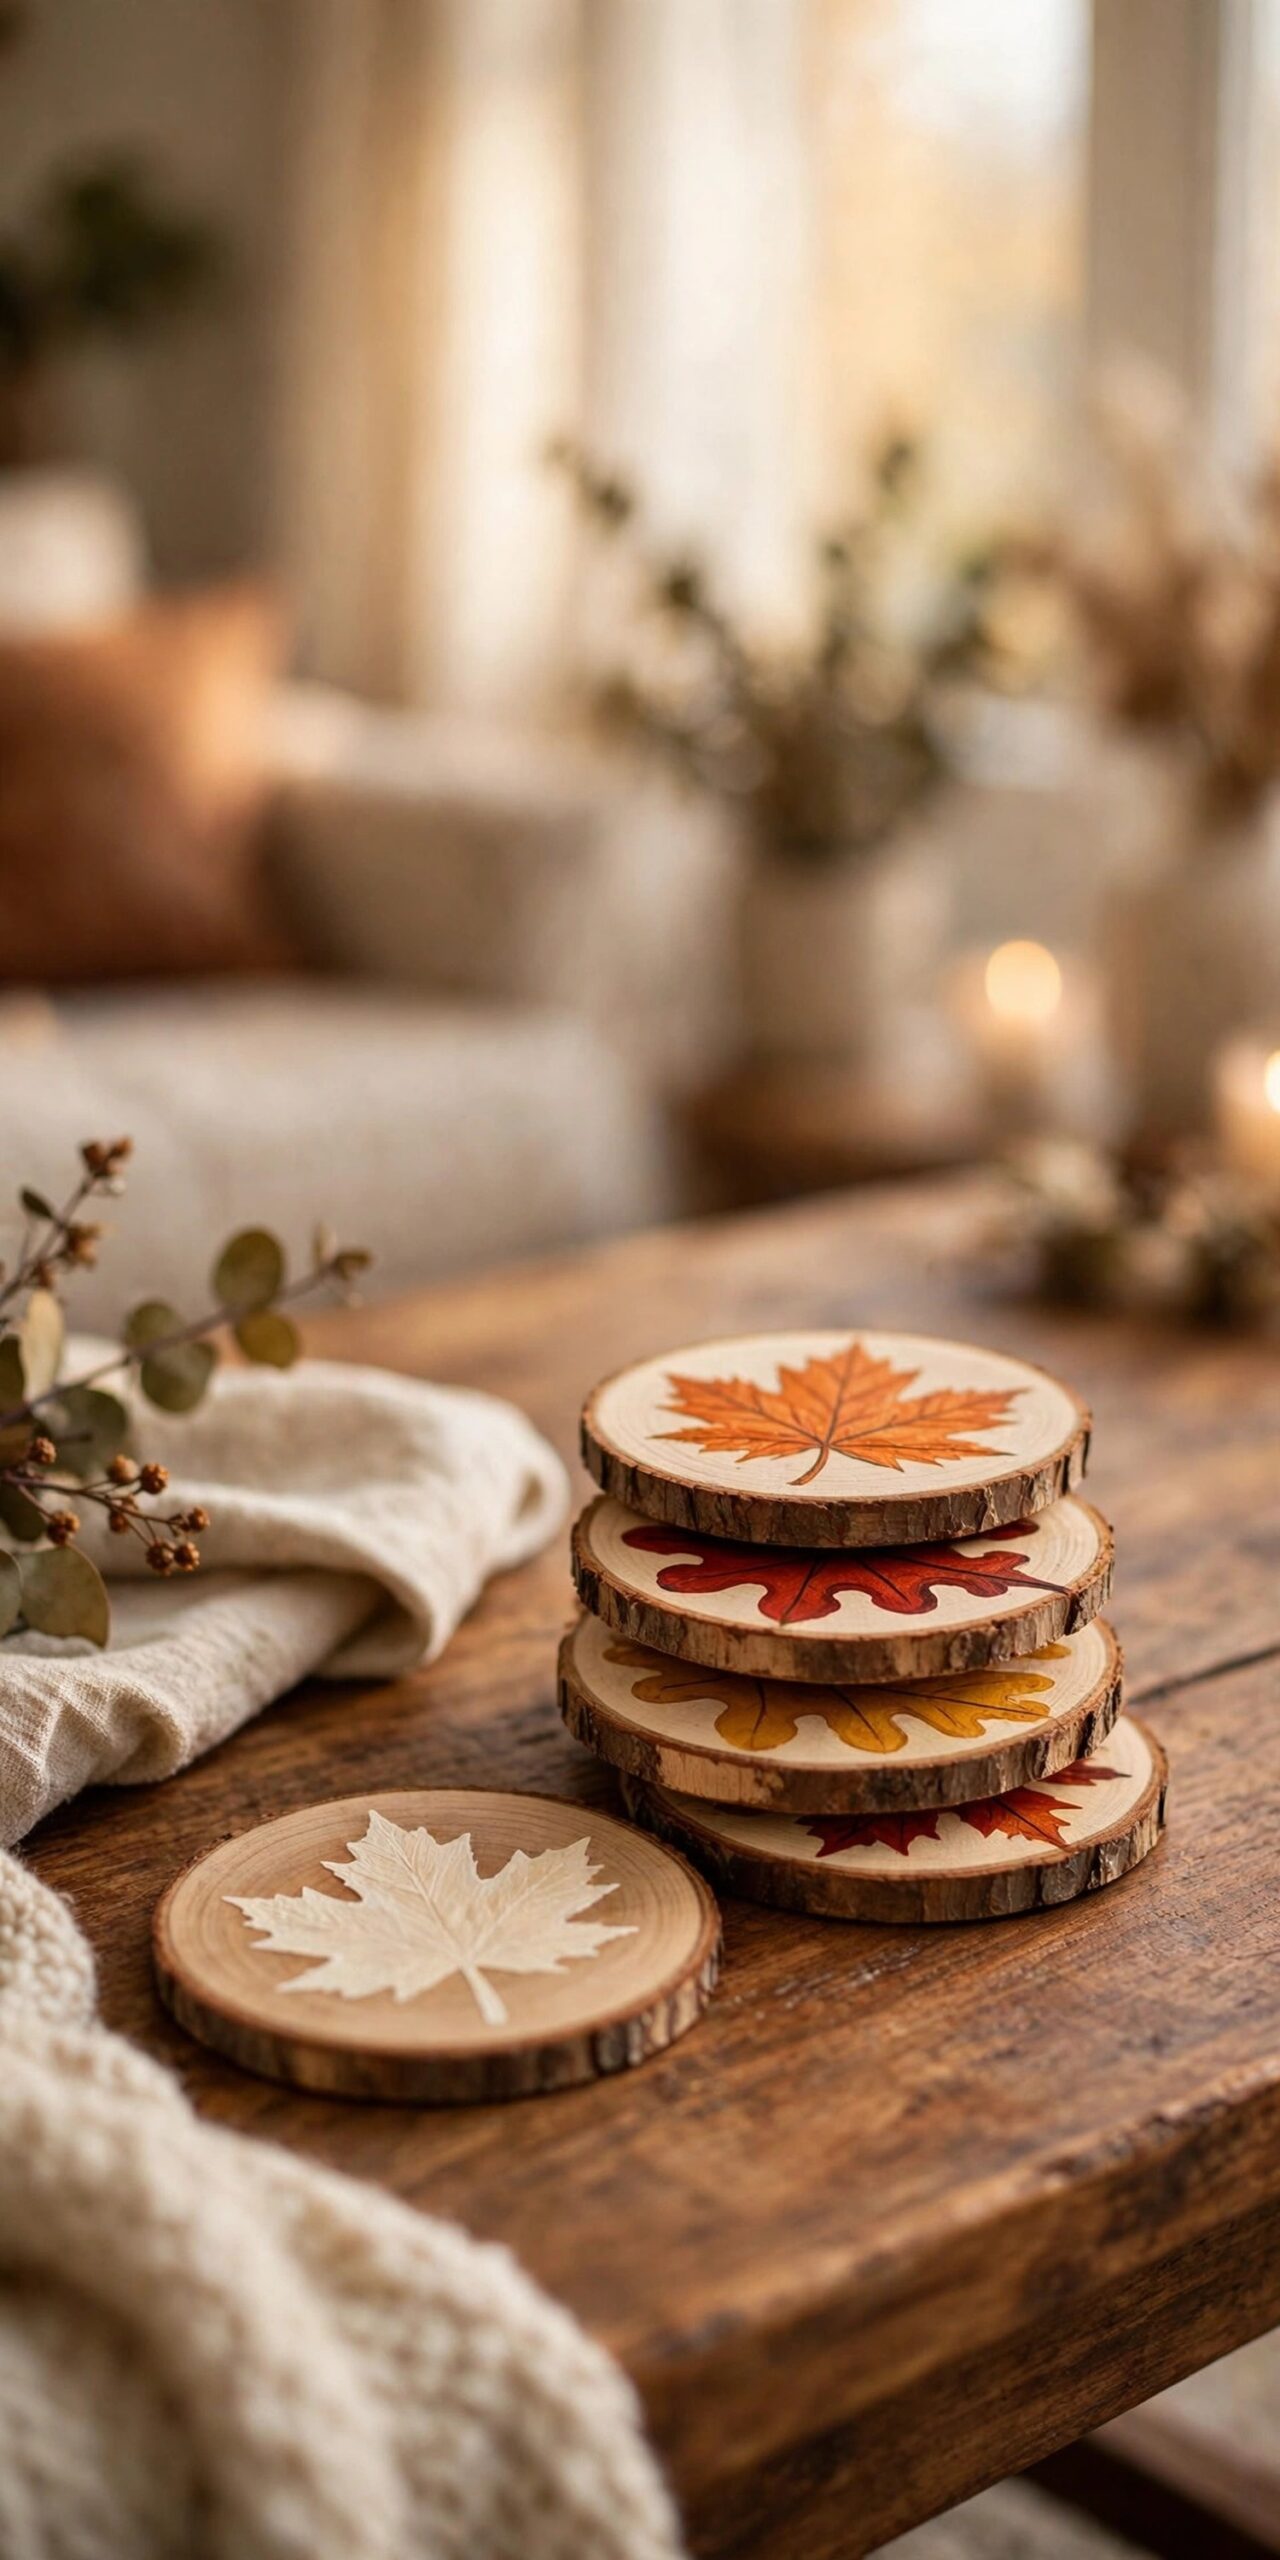
Tip: Trace real leaves onto the wood with a pencil first. Freehand leaves tend to look like blobs.
17. Dried Orange Slice Garland
Thread dried orange slices onto twine, alternating with cinnamon sticks and small faux leaves. Hang the garland on the mantel, across a window, or along a staircase railing for a classic fall look with almost no cost.
Dry your own orange slices in the oven on the lowest setting for a few hours, flipping once, or buy them ready-made in the floral aisle. Space the slices a few inches apart so each one shows. The garland stores flat in tissue paper and comes back out next year.
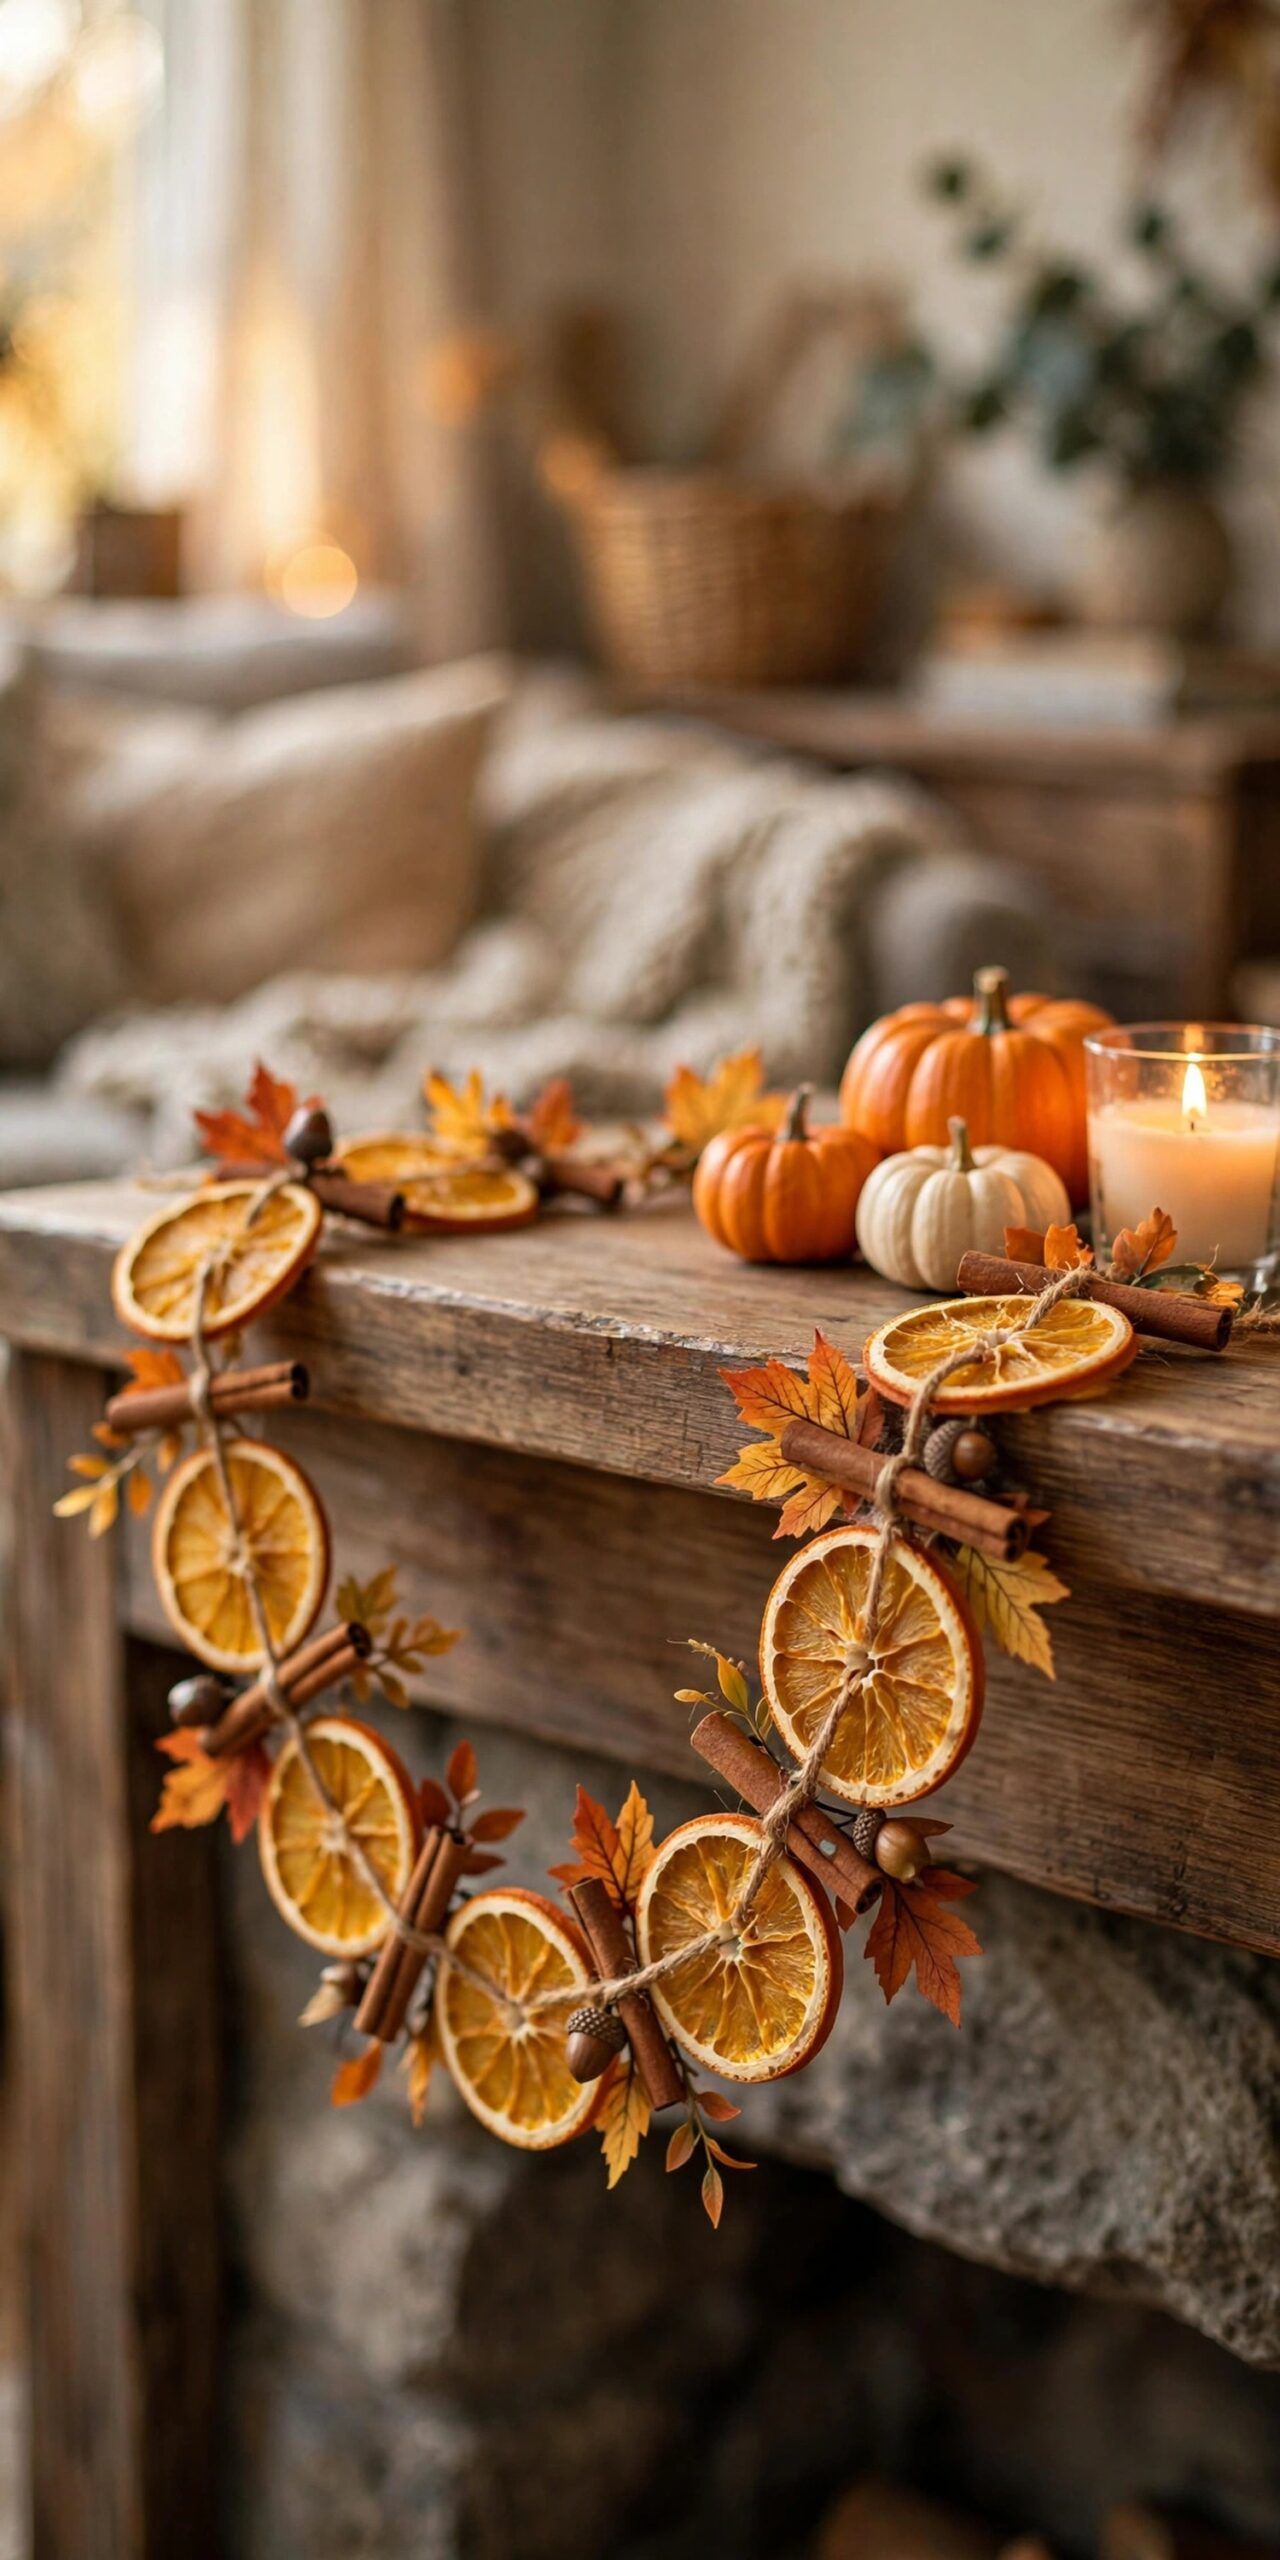
Tip: Add a drop of orange essential oil to each slice before hanging for a garland that smells as good as it looks.
Quick Comparison: Cost and Time
Use this table to plan your crafting session. Start with the quick wins, then tackle a longer project on the weekend.
| Idea | Main Dollar Tree supplies | Time needed |
|---|---|---|
| 1. Stacked pumpkin topiary | Stackable foam pumpkins, spray paint, ribbon | About an hour |
| 2. Corn husk wreath | Foam wreath form, faux corn husks, mini pumpkins | About an hour |
| 3. Pumpkin candle holders | Foam pumpkins, battery pillar candles | 30 minutes |
| 4. Wood bead pumpkins | Wood beads, pipe cleaners, felt | 45 minutes |
| 5. Fall floral arrangement | Silk flowers, bucket or vase | 20 minutes |
| 6. Harvest basket centerpiece | Wicker basket, faux gourds, pinecones | 15 minutes |
| 7. Painted mason jar luminaries | Mason jars, craft paint, tea lights | About an hour |
| 8. Burlap table runner | Burlap, stencil, craft paint | About an hour |
| 9. Mini pumpkin place cards | Mini pumpkins, wire, kraft cards | 30 minutes |
| 10. Faux leaf garland | Faux leaves, twine | 30 minutes |
| 11. Chalkboard fall sign | Wood plaque, chalkboard paint, chalk marker | 45 minutes |
| 12. Scented pinecone bowl | Bowl, pinecones, essential oil | 15 minutes |
| 13. Acorn napkin rings | Wood beads, faux acorns, elastic cord | 20 minutes |
| 14. Fall tiered tray | Tiered tray, mini decor pieces | 30 minutes |
| 15. No-sew fabric pumpkins | Fabric, stuffing, twine, cinnamon sticks | 45 minutes |
| 16. Painted leaf coasters | Wood slices, craft paint, sealer | About an hour |
| 17. Dried orange slice garland | Orange slices, twine, cinnamon sticks | 30 minutes |
Frequently Asked Questions
What are the best Dollar Tree supplies for fall DIYs?
Foam pumpkins, wreath forms, mason jars, wood beads, burlap, faux florals, and battery candles are the most versatile bases. They take paint and glue well and show up in the fall aisle every year. Buy the base pieces first, then plan projects around what you found.
How do I make Dollar Tree decor look expensive?
Three things make the biggest difference: a restrained color palette, layered paint finishes instead of one flat coat, and good styling. Stick to muted fall tones like cream, rust, olive, and bronze rather than bright orange. A dark base coat with a lighter dry-brush layer on top adds the depth that cheap finishes lack.
How much do these projects cost?
Most need only a few dollars in Dollar Tree supplies plus basics like craft paint and a glue gun that many crafters already own. Even starting from zero, few projects need more than what fits in one small shopping basket. The topiary is the priciest because of spray paint, and even that stays well under a typical store-bought equivalent.
Are Dollar Tree foam pumpkins good for crafting?
Yes, for decorative projects. The foam carves easily, holds paint well, and is light enough to stack and hang. They are not meant to look real up close, so paint them in solid colors or metallics rather than trying to fake a real pumpkin skin. Seal painted pumpkins if they will sit outside.
How long do Dollar Tree fall crafts last?
Indoor pieces last for years if you store them well: wrap fragile items in tissue, keep them in a dry box, and avoid stacking heavy things on top. Outdoor pieces face sun and rain, so expect one to two seasons from them. Battery candles and fairy lights usually need fresh batteries each fall.
When does Dollar Tree stock fall decor?
Fall craft supplies typically appear in mid to late summer and sell through October. The popular items, foam pumpkins, wreath forms, and velvet pumpkin picks, go first. Shop early in the season for the best selection, and check back weekly since restocks happen through September.
Final Thoughts
Fall decorating on a Dollar Tree budget works because the projects are simple and the materials are forgiving. Pick three or four ideas that fit your home, gather the supplies in one trip, and spend a relaxed afternoon making them. Style what you made, stand back, and enjoy the part where nobody believes it came from the dollar store. For more ways to carry the season through the house, our fall living room decor ideas pick up where these crafts leave off.