
15 Fall Dining Table Centerpiece Ideas

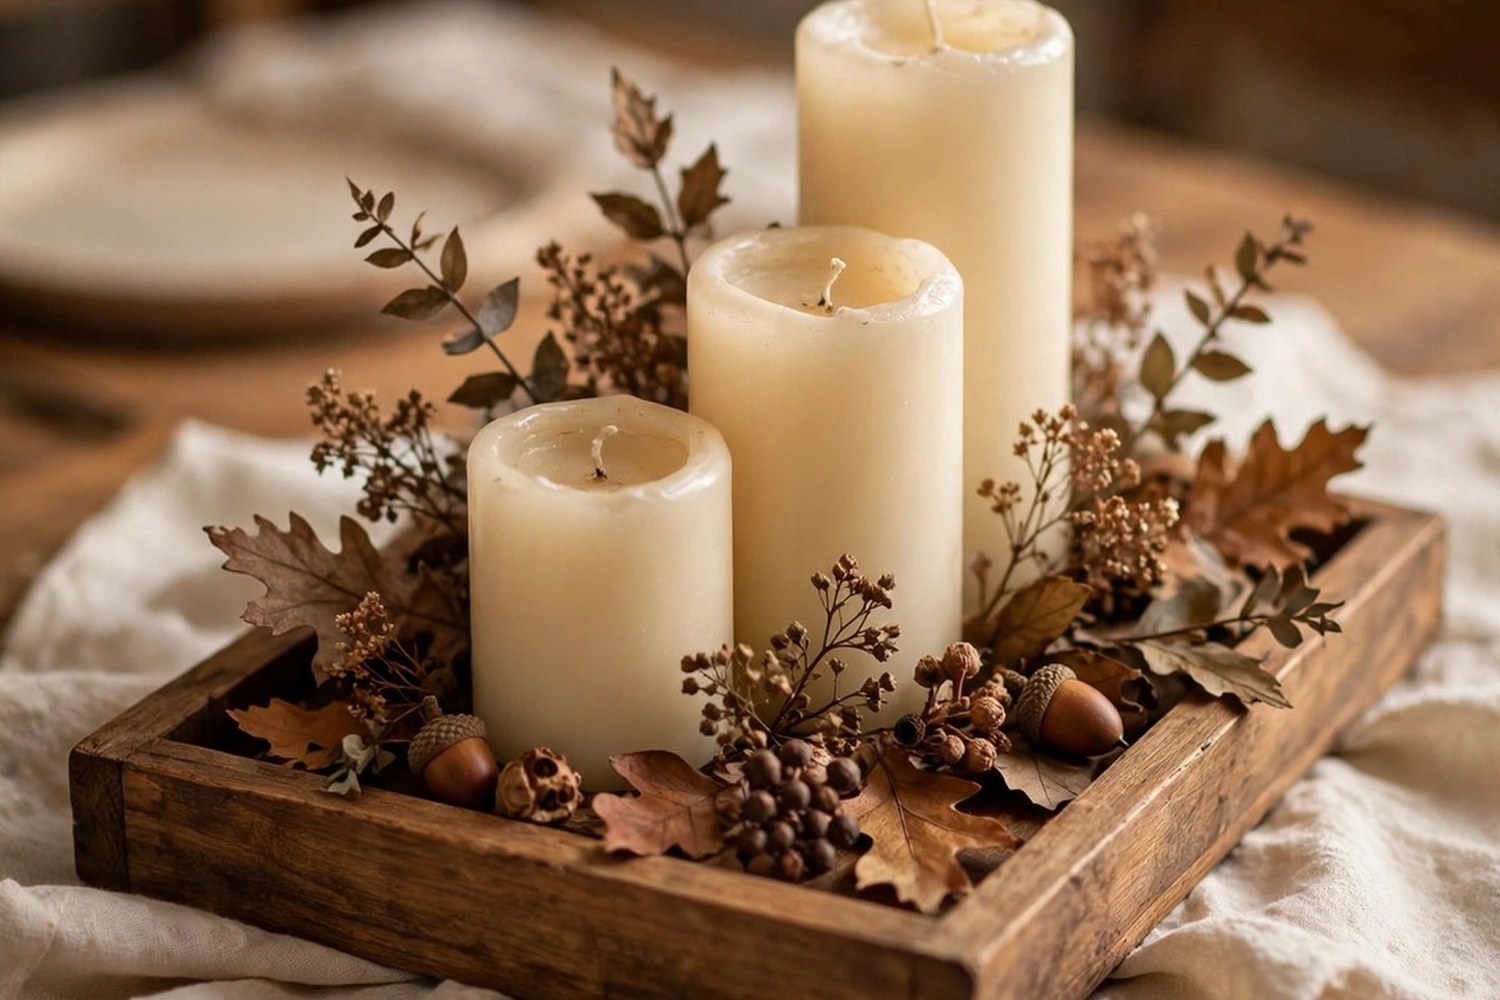
A centerpiece has one job: make the table feel finished without getting in the way of dinner. The trick is the one-tray rule. Build the whole arrangement on a single tray, board, or runner, and you can lift the entire thing off in one move when the serving dishes arrive. These 15 fall dining table centerpiece ideas use that rule with pumpkins, candles, wheat, and harvest fruit. Most come together in under 20 minutes. Start with the tray, then check out the ideas ahead and pick the one that fits your table.
Key Takeaways
- Build every centerpiece on one tray or runner so it lifts off in a single move at serving time.
- Keep the center under 12 inches tall so guests can see each other across the table.
- Group in odd numbers and repeat two or three colors for a pulled-together look.
- Mix one tall element with low fillers for balance without blocking views.
- Style once in October, then swap small accents to carry the centerpiece to Thanksgiving.
1. Anchor Everything on One Tray
A tray is the simplest foundation a centerpiece can have. Wood, rattan, or aged metal all work. Set it in the middle of the table and build only inside its edges. The boundary stops the arrangement from sprawling, and when dinner is served, you lift one tray instead of clearing ten small objects.
Size it to the table. A 24-inch tray suits a standard six-seat table, while a round table wants a round tray or a large charger used as a base. Line it with a folded linen napkin or a scrap of burlap to stop things sliding and to add a soft layer under hard objects. If you love a fully styled table from edge to edge, my fall table decor ideas layer the whole surface, but the centerpiece itself still starts here.

Tip: Pick a tray with low sides or no sides at all. High edges hide the bottom layer of your arrangement from anyone sitting down.
2. Cluster Mini Pumpkins and Gourds
Odd numbers are the oldest styling trick in the book, and pumpkins prove why. Group five or seven mini pumpkins and gourds right on the tray, mixing orange, white, and dusty green heirlooms in different sizes. The variety makes the cluster look gathered from a farm stand instead of unpacked from a box.
Nestle the pieces close so they read as one mound, then tuck dried leaves or small pinecones into the gaps. Keep the tallest pumpkin under about eight inches so the cluster stays low and conversational. Real minis last for weeks indoors away from heat vents, and faux ones in matte finishes come back out next year.

Tip: Turn each pumpkin so the stem tilts slightly and the best side faces out. Ten seconds of rotating beats ten dollars of extra decor.
3. Set Pillar Candles on Wood Slices
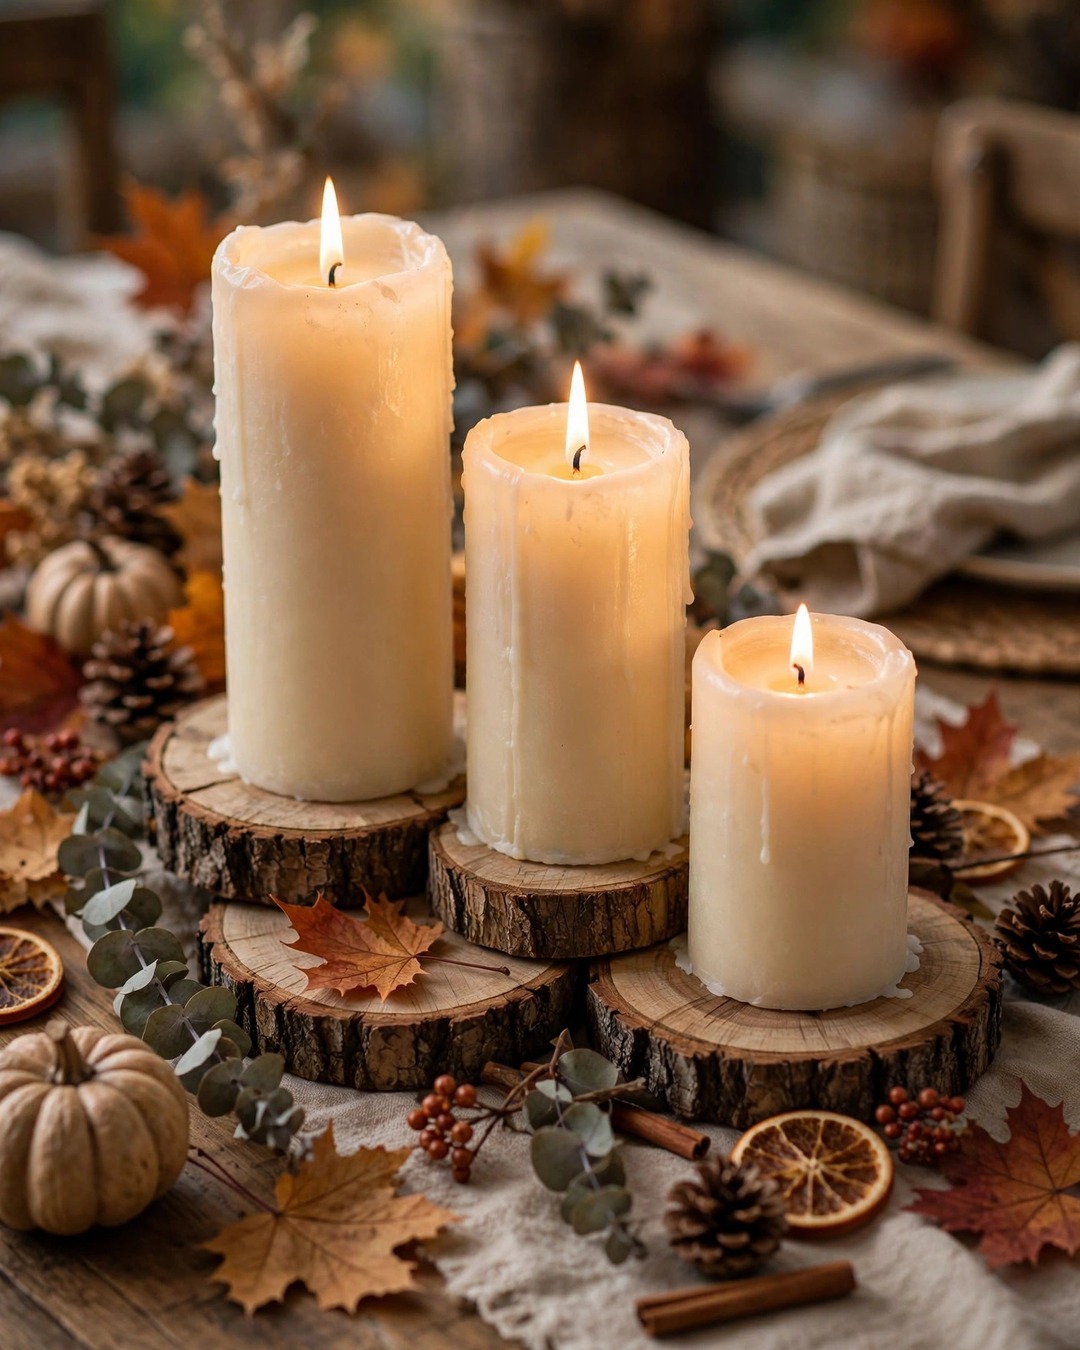
Wood slices do double duty as decor and protection. Set two or three on the tray, top each with a pillar candle in cream or warm white, and you have a centerpiece with almost no styling skill required. The rough bark edge against smooth wax is the whole look.
Vary the candle heights by an inch or two so the flames sit at different levels. A 3-inch, 4-inch, and 6-inch pillar grouped tight reads as one arrangement instead of three lonely candles. Keep dried leaves and wheat a few inches from any open flame, or swap in flameless pillars for the same glow with zero worry.
Tip: Rub a little coconut oil on cut wood slices once a season. It deepens the grain and keeps the edges from looking thirsty.
A centerpiece should earn its place at every meal, not just look pretty in photos.

4. Stand a Wheat Bundle in a Ceramic Crock
For height on a tiny budget, nothing beats dried wheat. Tie a generous bundle with twine, fan it out, and stand it in a ceramic crock or stoneware pitcher at the center of the tray. The golden tones warm up the whole table in seconds, and the height draws the eye without blocking it, since stems stay airy.
Keep the bundle to one side of the tray rather than dead center so the arrangement feels natural. Tuck two or three mini pumpkins at its base to ground it. If wheat sheds too much for your taste, preserved eucalyptus gives the same vertical line with no mess. For the mantel version of this look, my fall mantel decor ideas use the same bundle trick at a bigger scale.

Tip: Give the bundle a firm shake outside before bringing it in. Loose chaff falls now, not on the mashed potatoes later.
5. Light a Lantern with a Flameless Candle
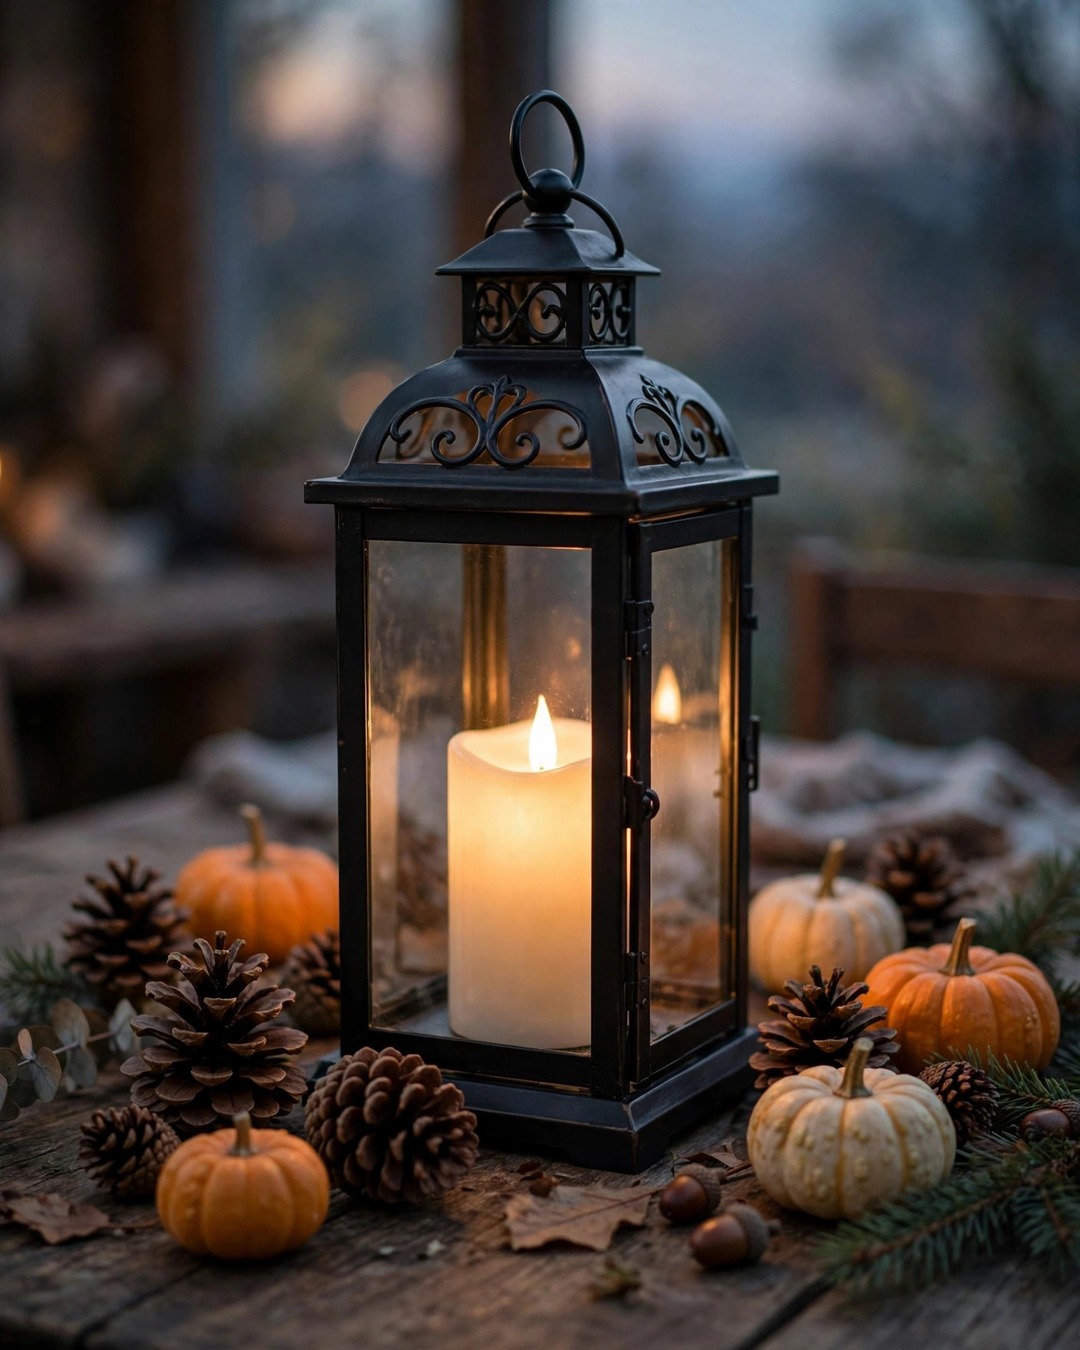
A lantern is the lowest-effort glow you can buy. Set a black or aged-brass lantern in the middle of the tray, drop in a flameless pillar candle, and switch it on at dusk. The glass panels throw soft light in every direction while keeping the flame look safely enclosed.
Surround the base with a ring of small pinecones, acorns, or mini pumpkins to tie it to the season. One medium lantern suits a four-seat table; a long table wants two smaller ones spaced apart. Battery candles with built-in timers light themselves every evening, which feels a little magical the first week.
Tip: Choose warm-white LEDs labeled 2700K or lower. Cooler bulbs read as office light and fight the whole fall mood.
Match the Centerpiece to Your Style
Pick a lane before you start gathering pieces. Everything gets easier once the palette is decided.
| Style | Palette | Start with |
|---|---|---|
| Cozy farmhouse | Cream, rust, wood | Wood tray, mini pumpkins, pillar candles |
| Modern neutral | Ivory, taupe, black | Stone tray, white pumpkins, black lantern |
| Classic harvest | Orange, gold, red | Woven tray, mixed gourds, amber votives |
6. Fill a Basket with Apples and Squash
The harvest basket is fall you can eat. Pile red apples, small squash, and a few pears into a low woven basket and set it on the tray. The mix of round shapes and glossy skins looks abundant with zero arranging skill, and guests can actually grab a piece of fruit.
Line the basket with a linen napkin first so the fruit does not roll and the weave stays clean. Tuck a few dried leaves around the edges for color contrast. Quiet Joy at Home’s fall harvest display layers a basket like this with tall branches for extra height, which works beautifully on a larger table.

Tip: Refresh the top layer of fruit weekly and eat the evidence. A harvest basket that never gets touched starts to look like a museum piece.
7. Lay a Knit Throw as the Runner
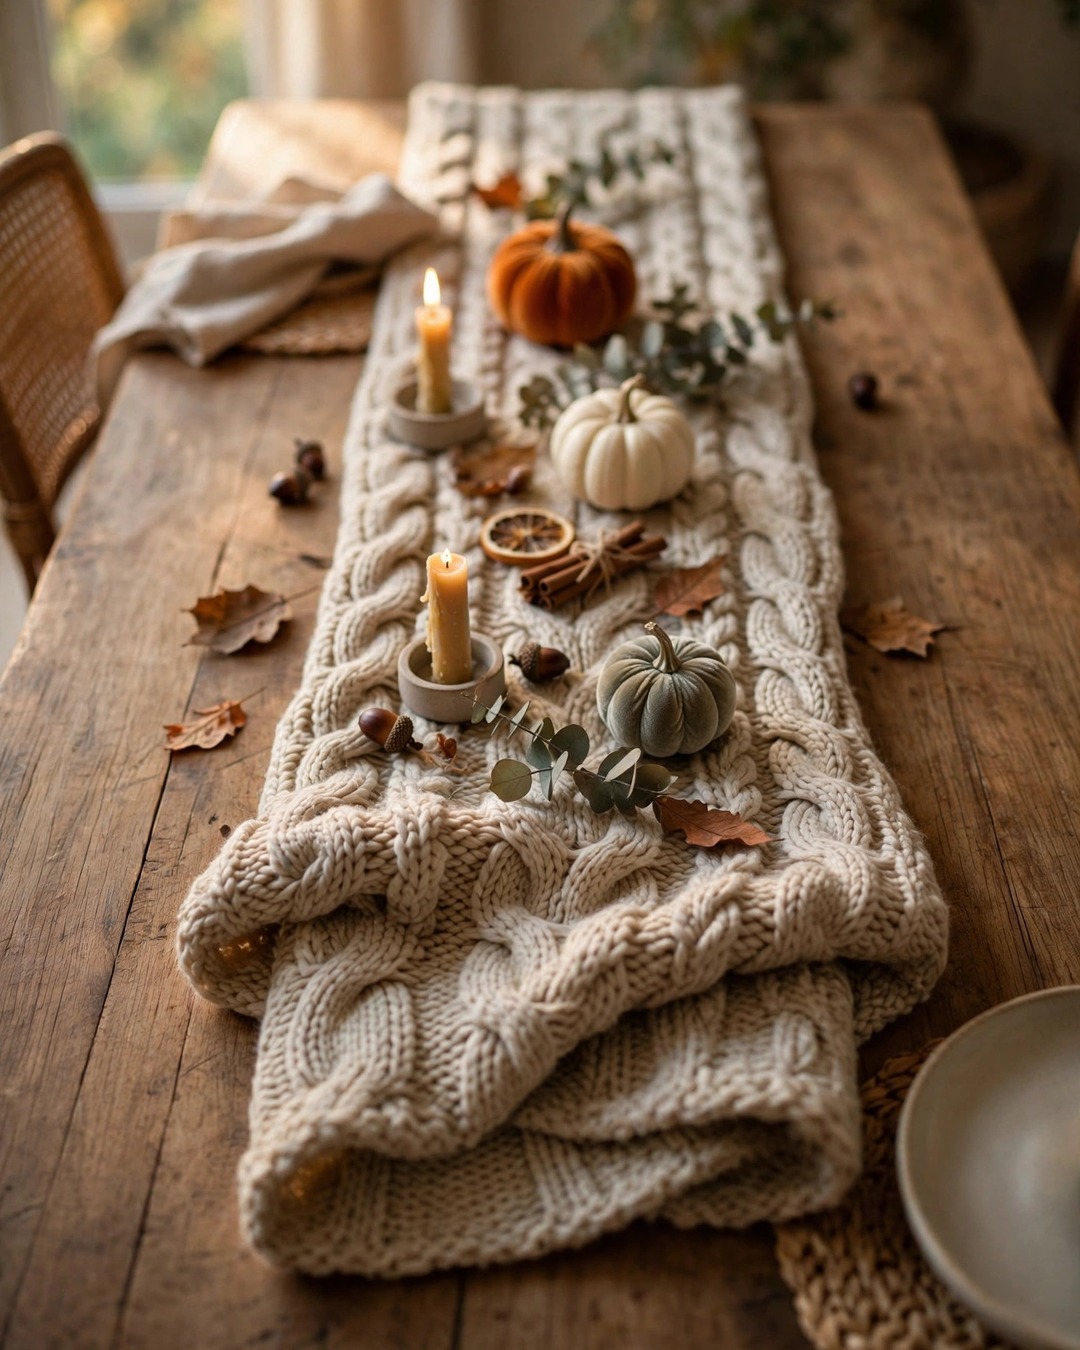
A chunky knit throw brings instant coziness that a flat runner cannot match. Fold it lengthwise and lay it down the center of the table under the tray. The texture catches light and shadow, which makes even a simple pumpkin cluster look styled.
Choose cream, oatmeal, or warm gray so it stays neutral under colorful decor. Let the ends drape over the table edges for a relaxed feel. Because knit is thick, keep the centerpiece pieces low and stable on top of it, or set the tray directly on the wood and let the throw peek out on both sides instead.
Tip: A throw with a loose weave can snag on rough pumpkin stems. Fold the snag-prone edge under so only the smooth side faces up.
The best centerpieces are built from things you already own, styled with intention.
8. Fill a Hurricane with Cinnamon and Orange
A glass hurricane turns pantry staples into decor. Stand cinnamon sticks upright inside, add dried orange slices around them, and top it with a small flameless tea light or leave it unlit. The layers of brown and amber read as pure fall through the glass.
Build it in three quick layers:
- Pour a base of whole cloves or star anise for scent and texture.
- Stand the cinnamon bundles upright in the center.
- Slide dried orange slices between the bundles and the glass.
Set the hurricane on the tray and let it carry the whole arrangement on a small table. When the season ends, the contents go back in the spice drawer.
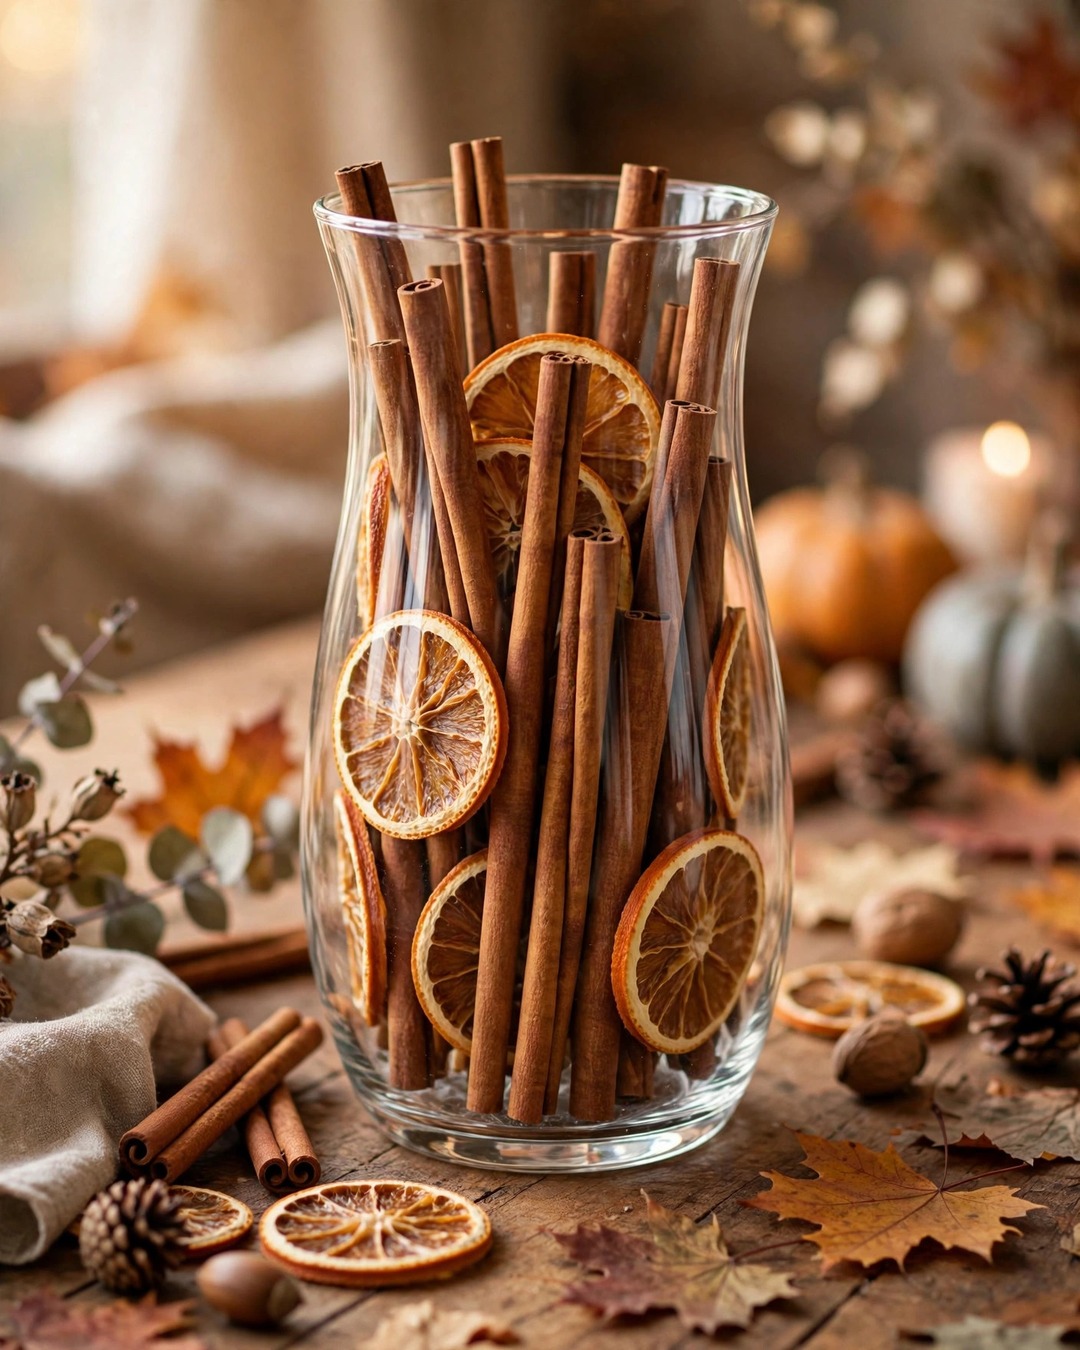
Tip: Dry orange slices in a low oven until leathery. Thick or damp slices fog the glass from inside.
9. Put Mums in a Vintage Pitcher
Chrysanthemums are the official flower of fall, and a five-dollar grocery-store bunch goes a long way. Trim the stems short and pack them tight into a vintage pitcher, ceramic jug, or mason jar so the blooms form a low dome. Rust, gold, and deep red mums echo the season without a single pumpkin.
Keep the arrangement under ten inches tall so it never blocks conversation. Change the water every two days and mums will hold for over a week. When the blooms fade, the pitcher stays on the tray and gets refilled with dried wheat for the rest of the season.

Tip: Buy mums still in bud rather than fully open. They last twice as long and open right on schedule for your dinner party.
Fresh vs Faux: What Actually Lasts
Mix both. Put real where guests look closely and faux where it just fills space.
| Element | Fresh lasts | Fresh lasts |
|---|---|---|
| Mini pumpkins | Weeks indoors | Years |
| Mums | 7 to 10 days | Forever, but looks flat |
| Wheat and dried stems | All season | All season |
| Fall leaves | Days before curling | All season |
10. Go All-White with Pumpkins
Skip orange entirely for a calm, modern fall look. Group white and cream pumpkins in odd numbers on the tray, mixing smooth and ribbed varieties in different sizes. Tuck in a few sprigs of dried eucalyptus so the white does not float against the table.
This palette works in dining rooms that stay neutral year-round. Add one metallic accent, like a small brass candlestick or gold-rimmed votive, to keep it from feeling flat. The monochrome cluster photographs beautifully, which is a bonus if the table ends up on social media.

Tip: Limit the whole arrangement to three colors max: white, one green, one metallic. Restraint is what makes monochrome look deliberate.
11. Add Height with Tall Branches
One tall element gives a centerpiece presence without crowding the table. Stand a few bare or berry-dotted branches in a clay vase or stoneware bottle at the back of the tray. The vertical line draws the eye up and makes the whole table feel designed.
Keep branches to one side so sightlines stay open across the middle. Foraged branches are free and better than store-bought: look for interesting shapes, not perfection. A vase with some visual weight keeps tall stems from tipping when someone bumps the table.

Tip: Cut branches a few inches taller than you think. You can always trim, and a little extra height reads as intentional.
Height belongs at the back or the side, never in the middle of the conversation.
12. Build Height with Wood Slices
Risers create levels without bulk. Stack two or three wood slices in different diameters, offset like steps, and set small pumpkins, votives, or a tiny vase on each level. The staggered heights make a small tray feel like a styled vignette.
Rustic wood slices topped with pinecones and faux leaves are a classic autumn move. From My Carolina Home’s autumn table layers them under ceramic pumpkins and crackle glass votives for a centerpiece that works from September through Thanksgiving with small swaps.

Tip: Put the tallest stack at the back of the tray and step down toward the front. The cascade keeps every piece visible.
13. Cluster Crackle Glass Votives
Crackle glass multiplies candlelight. Group five to seven votive holders in amber, gold, or smoky tones tight together on the tray and drop a tea light in each. Lit at dusk, the textured glass throws a warm, dappled glow that flat glass cannot match.
Odd numbers and varied heights keep the cluster from looking like a grid. Mix in two or three mini pumpkins or pinecones between the votives so it reads as fall, not just candles. Flameless tea lights with timers mean the whole cluster lights itself every evening.

Tip: Wipe the inside of each votive with a dry cloth before the season starts. Dust dulls the crackle effect more than you would expect.
One-Tray Bases Compared
Any of these works. Pick the one that matches your table and your storage space.
| Base | Best for | Watch out for |
|---|---|---|
| Wood tray | Farmhouse and rustic tables | Heavy when fully styled |
| Woven basket tray | Casual, textured looks | Only fits a tight cluster |
| Large charger | Small or round tables | Only fits a tight cluster |
| Linen runner | Long tables | Does not lift off in one move |
Light the candles twenty minutes before guests arrive, and the table does the entertaining for you.
14. Fill a Low Bowl with Pomegranates and Figs
Deep red fruit brings a richness pumpkins cannot. Pile pomegranates, figs, and dark plums into a low wooden or ceramic bowl and set it at the center of the tray. The jewel tones glow against candlelight and feel a step more grown-up than orange.
Mix in a few sprigs of dried leaves or wheat to break up the round shapes. Whole pomegranates last for weeks at room temperature, so the bowl holds from October into November. When fruit starts to soften, move it to the kitchen and refill with pinecones.

Tip: Cut one pomegranate open and set it crown-up on top. The ruby seeds catch the light and sell the whole bowl.
15. Make the Centerpiece Edible
The most practical centerpiece is one guests can eat. Lay a long serving board down the middle of the table and arrange bread, cheese, grapes, figs, and nuts in loose rows. It decorates the table and serves the first course at the same time.
Build it in three quick passes:
- Set the big items first: bread loaves, cheese wedges, small bowls of olives.
- Fill the gaps with fruit clusters and handfuls of nuts.
- Tuck in rosemary sprigs and dried leaves for the fall finish.
Refresh the board as guests graze and it never looks picked over. For the full-table version of seasonal styling around it, my fall living room decor ideas carry the same warm palette into the next room.

Tip: Put anything crumbly on small plates within the board. Crumbs on bare wood are charming for exactly one meal.
Frequently Asked Questions
How tall should a dining table centerpiece be?
Keep it under 12 inches for everyday dining so guests can see each other. One taller element, like branches in a vase, is fine if it sits at the back or side of the tray where it never blocks a sightline. When in doubt, sit in a chair and check before guests arrive.
How do I keep a centerpiece from getting in the way at dinner?
Build it on one tray, board, or runner. When the serving dishes come out, the whole arrangement lifts off in a single move and goes to the sideboard. That is the entire one-tray rule, and it solves nearly every complaint about centerpieces.
Should I use real or faux pumpkins in a centerpiece?
Mix them. Real mini pumpkins last for weeks indoors and add natural color variation. Faux pumpkins in matte finishes never rot and come back out next year. Put real ones where guests look closely and faux ones in background clusters.
How do I make a centerpiece last from October to Thanksgiving?
Build the base from long-lasting pieces: tray, dried wheat, faux leaves, candles, wood slices. In November, swap the small accents: trade Halloween touches for deeper napkins, add pomegranates or name cards, and the same centerpiece carries the holiday.
What can I use as a centerpiece base if I do not have a tray?
A large charger, a cutting board, a folded knit throw, or even a length of burlap works. The job of the base is to define the boundary and make the arrangement liftable, so anything flat and sturdy qualifies.
How do I style a centerpiece for a small or round table?
Go vertical instead of wide. One tight cluster: a small tray or charger, three to five pieces, one candle. A single lantern surrounded by mini pumpkins, or one hurricane with cinnamon and orange, is plenty on a table for four.
Final Thoughts
A fall centerpiece does not need to be elaborate to earn its place. Pick one tray, add pumpkins or candles or wheat, keep it low, and stop when the table makes you want to sit down. Start with the idea that fits your week, and let the rest wait for next year. The best centerpieces look gathered over time, not bought in one trip.