
16 DIY outdoor Halloween decorations

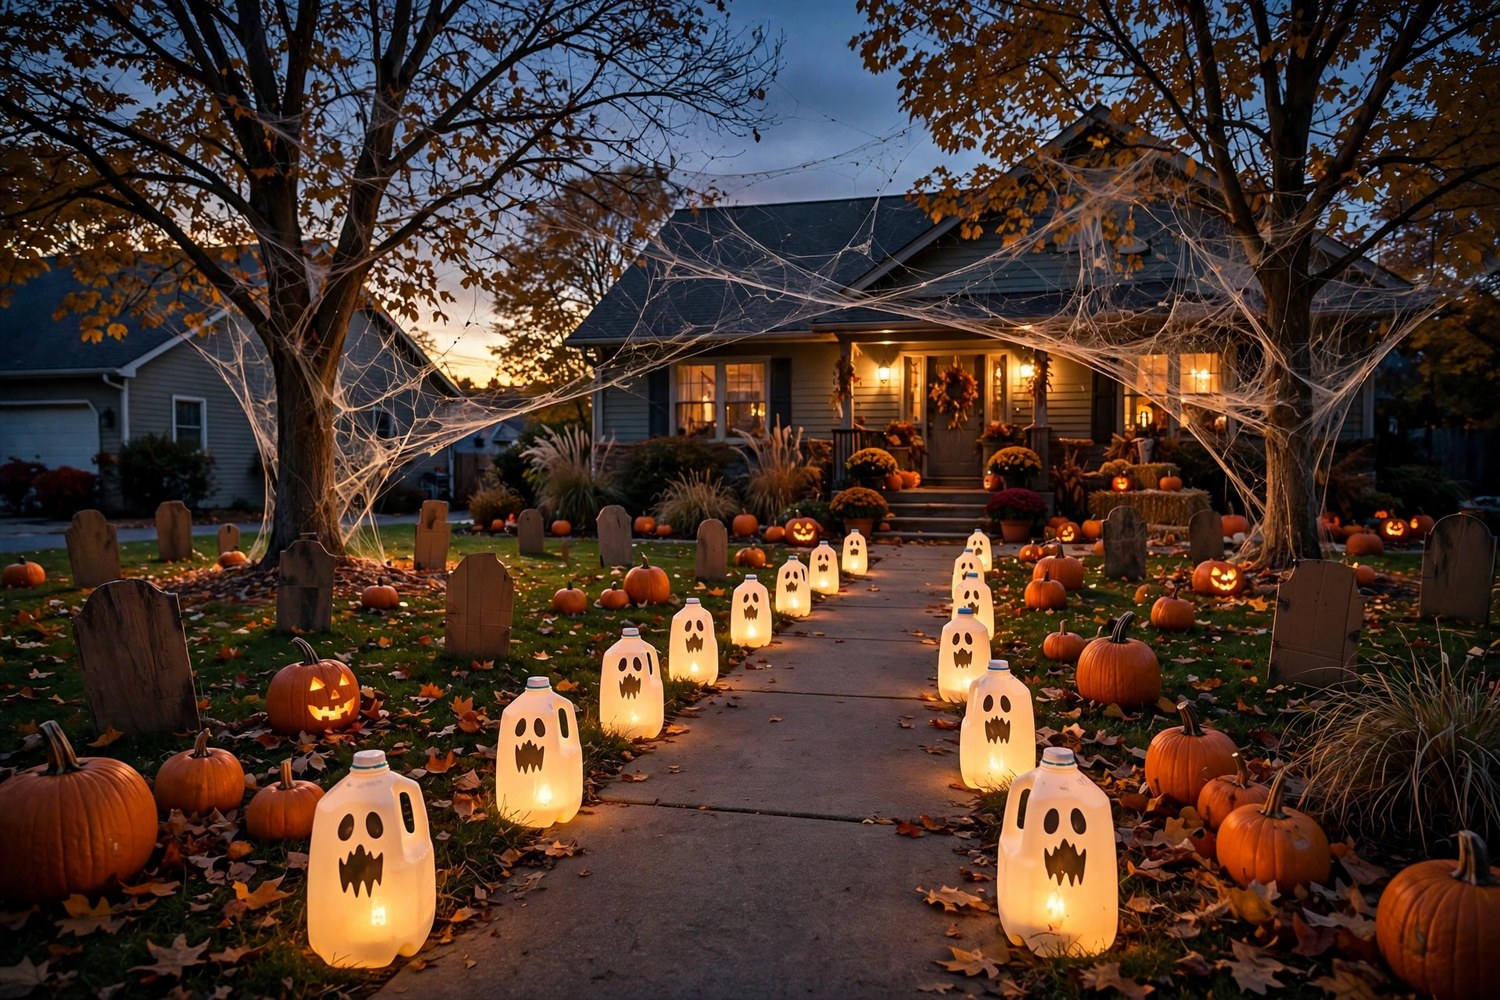
Can you fill your whole yard with Halloween decorations without spending a fortune at the big-box store? Yes, and the homemade versions often get more compliments than the expensive ones. A row of glowing milk-jug ghosts, a giant spider web stretched between two trees, and a few tombstones cut from cardboard can turn an ordinary front yard into the house kids talk about all October. You do not need building skills. Most projects use things already in your garage, plus a few cheap supplies.
This guide gives you 16 DIY outdoor Halloween decorations that hold up outside in wind and rain. Every project includes simple steps and a weatherproofing tip, so your work still looks good on Halloween night. Pick three or four favorites and spend a weekend on them. If your porch needs attention too, our 13 Halloween porch decor ideas pair perfectly with these yard projects.
1. Milk Jug Ghost Luminaries
Save your empty milk jugs for a week and you have the makings of the easiest glowing ghosts on the block. Rinse the jugs, draw simple ghost faces on them with a black permanent marker. Two oval eyes and a wavy mouth is all it takes. Then drop a battery-operated LED tea light inside each one. Line them along your walkway or around a tree. At night they glow with a soft, spooky light.
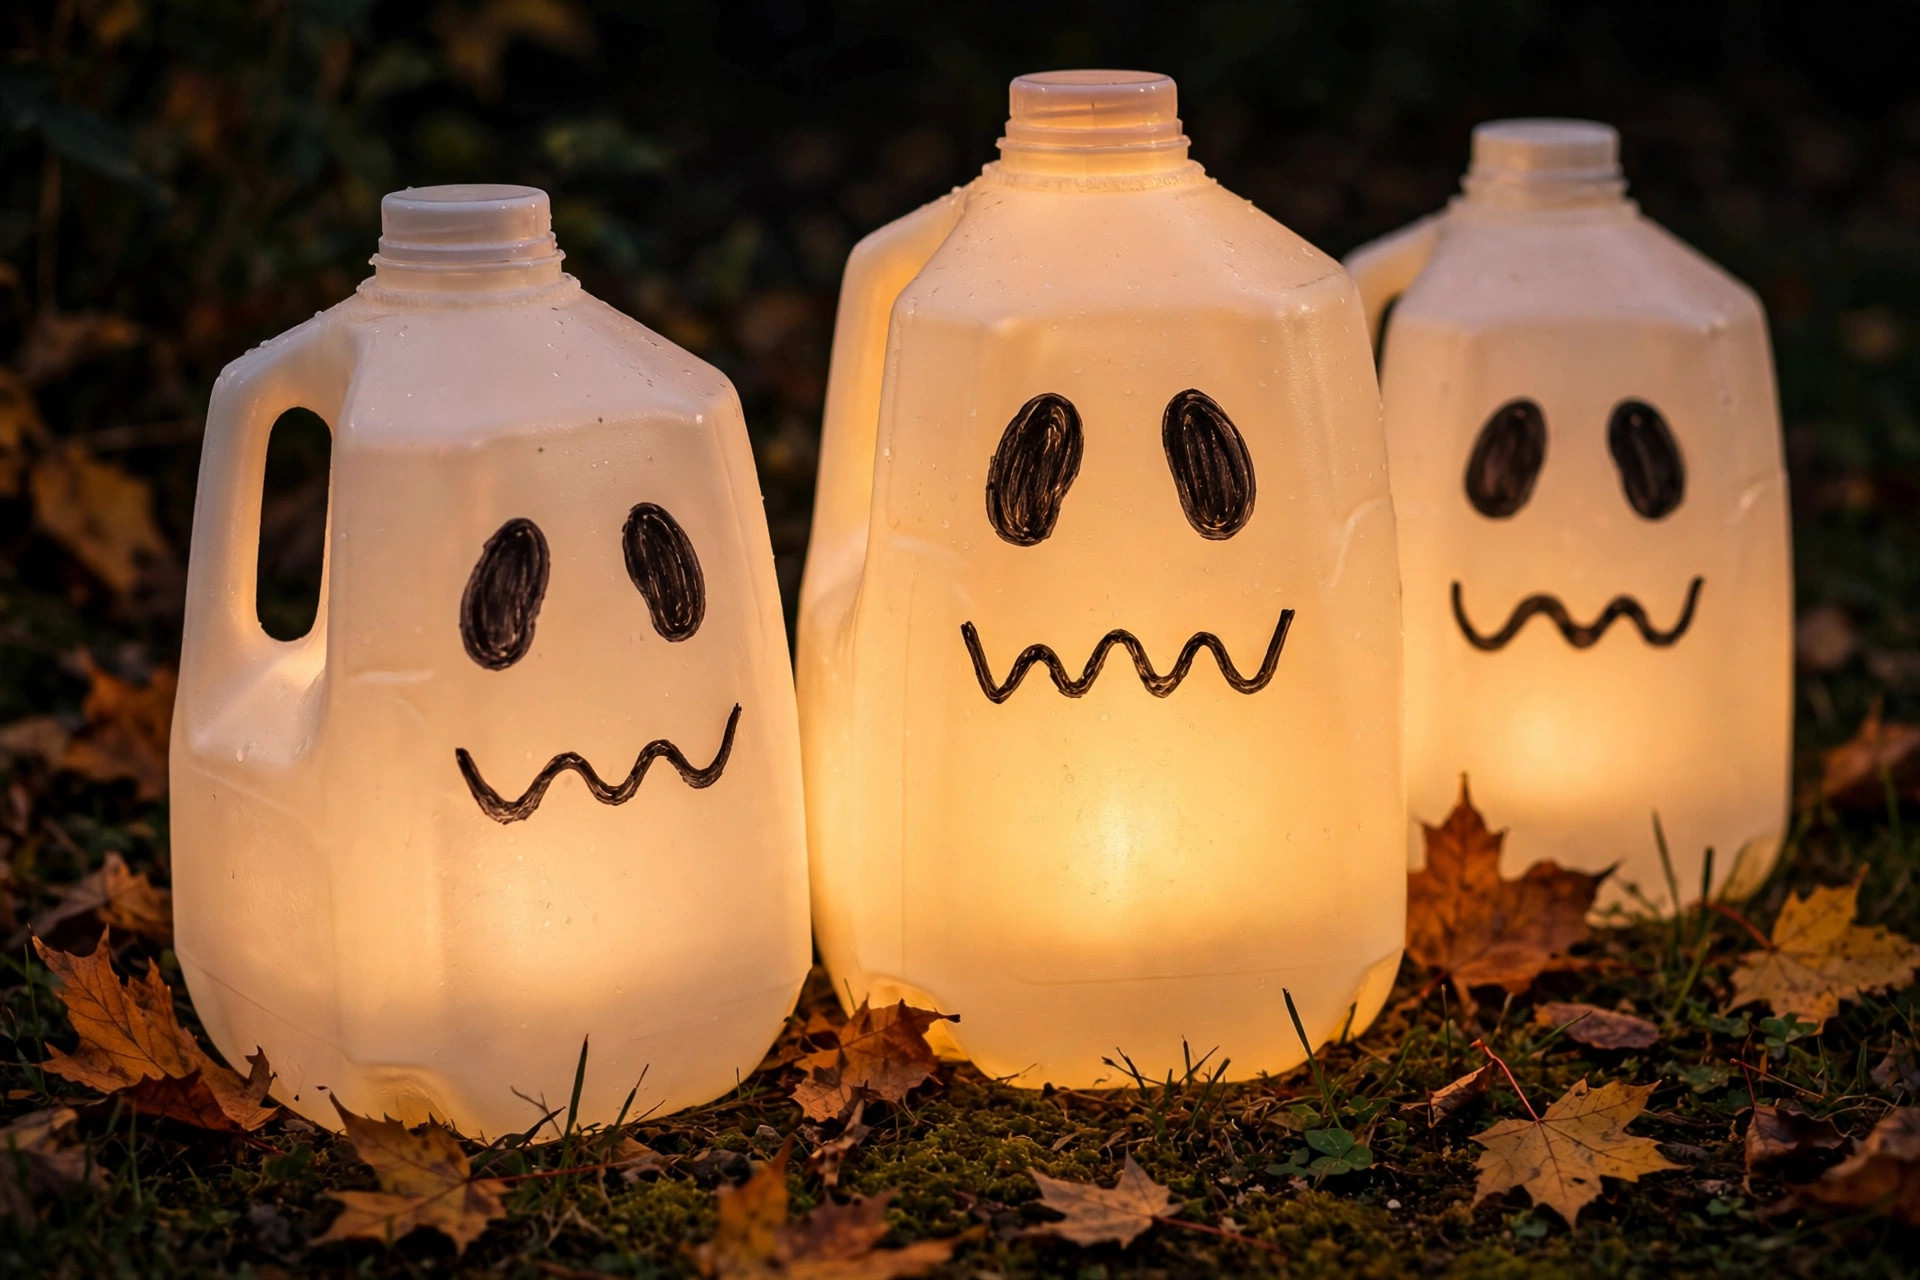
Use only LED lights inside, never real candles; plastic and flame are a bad combination, and the jugs can tip in wind. To keep them from blowing away, fill each jug with an inch of sand or a few pebbles before adding the light. The faces survive rain just fine, but bring the tea lights inside during heavy storms. Kids love drawing the faces, which makes this a perfect family-afternoon project.
2. Tomato Cage Ghosts
Those wire tomato cages from the garden shed make perfect ghost bodies. Flip a cage upside down so the wide end sits on the ground, drape a white sheet, tablecloth, or painter’s drop cloth over it, and tie it loosely at the “neck” with twine. Add black felt eyes, and you have a ghost that stands on its own and sways in the breeze. Make three or five in different heights for a little ghost family.
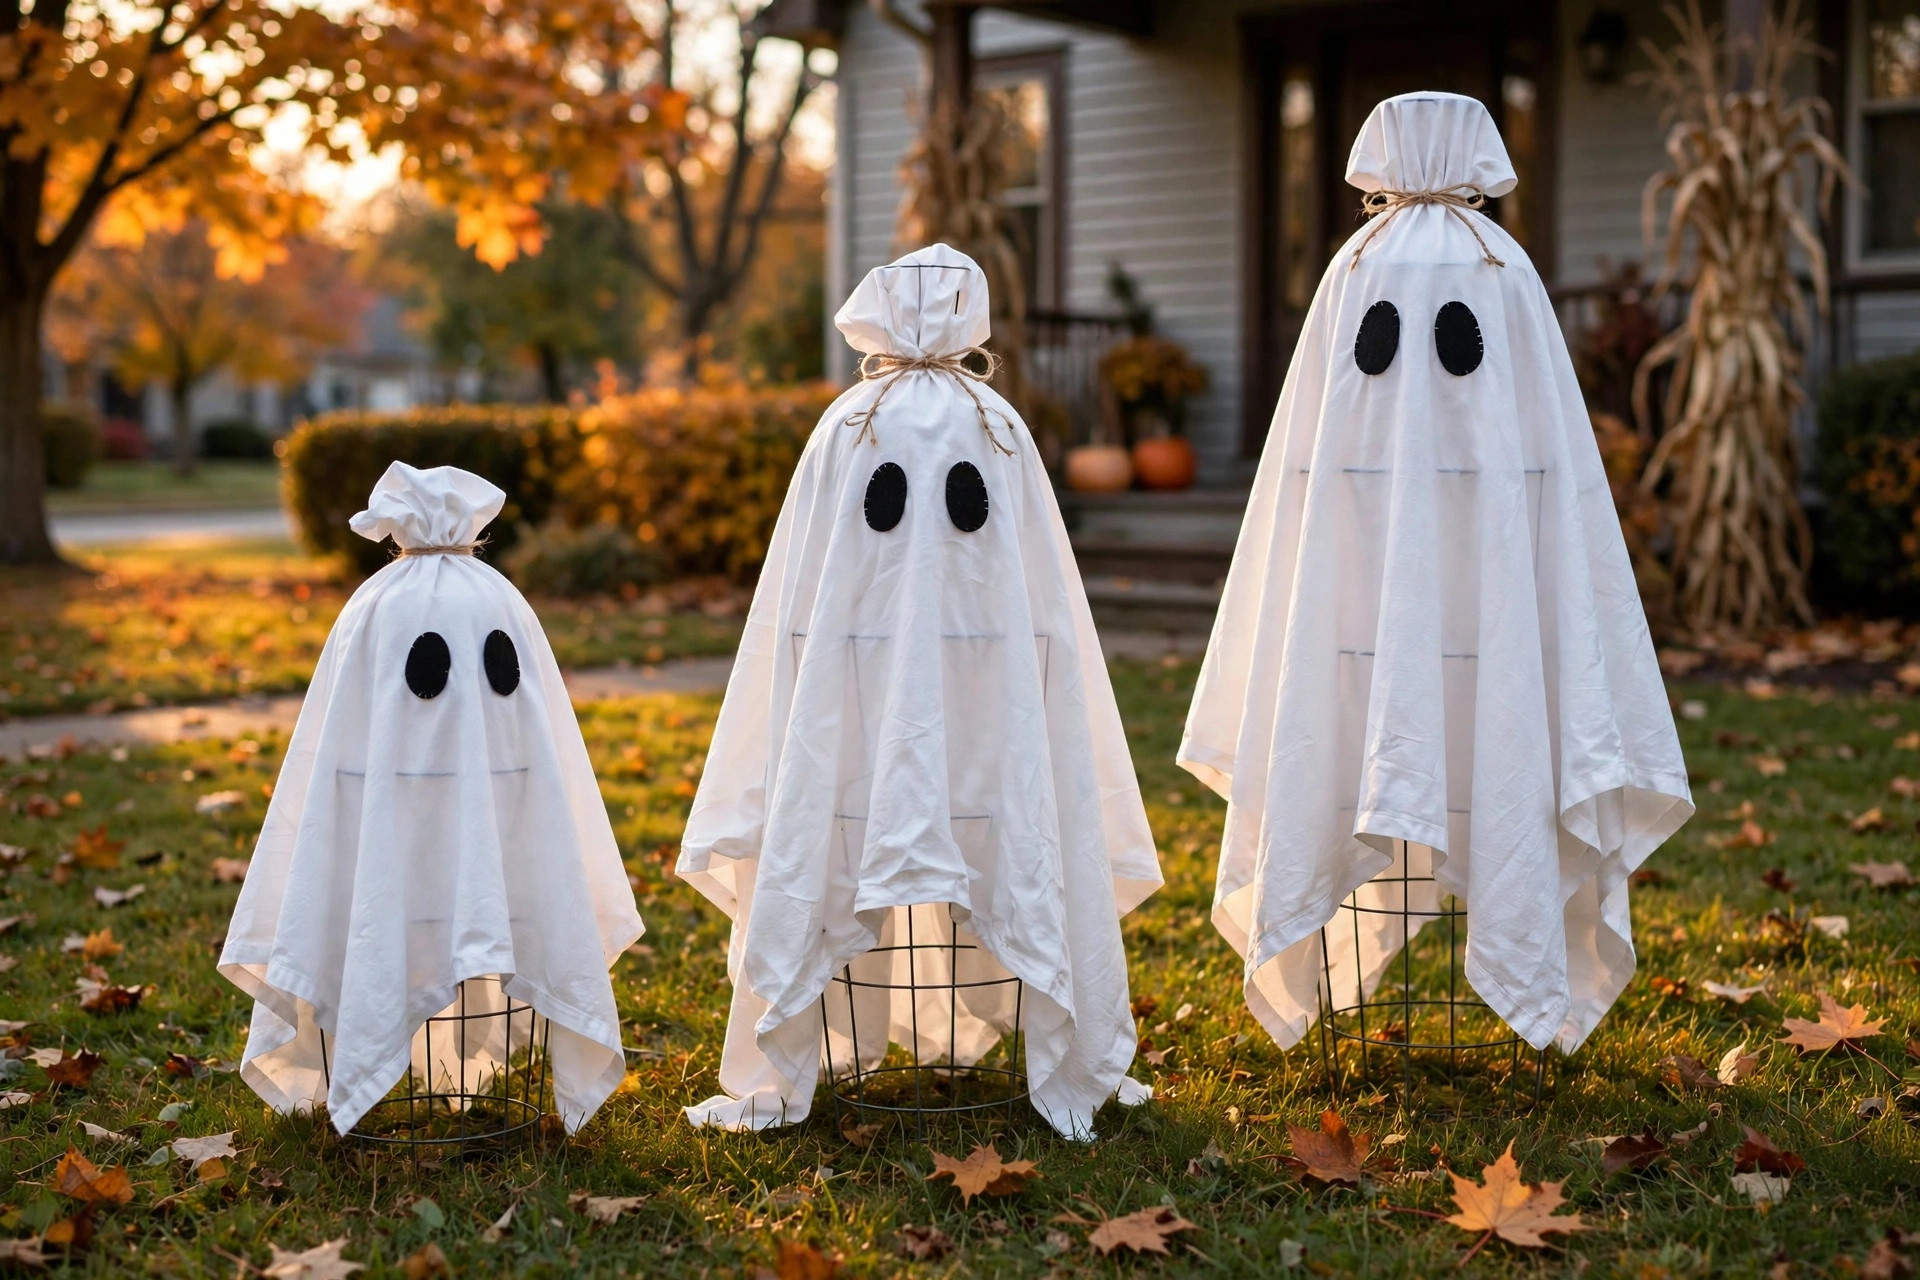
Push the cage legs a few inches into the soil so wind does not topple them, or set a brick inside the base for weight. A thrifted flat sheet costs very little and covers two or three ghosts. Our thrift store decor guide has tips for finding fabric cheap. If rain is forecast, the ghosts dry quickly and go right back up. For a glowing effect, tuck a solar garden light under each ghost.
3. Cardboard Tombstones
A graveyard scene is a Halloween classic, and cardboard tombstones are nearly free to make. Cut tombstone shapes from large cardboard boxes (rounded tops, pointed tops, a cross shape) and paint them gray with cheap craft paint. Add funny epitaphs with a black marker: “I. M. Gone”, “Barry M. Deep”, “Rest in Pieces”. Stick them in the ground with wooden paint stirrers or dowels taped to the back.
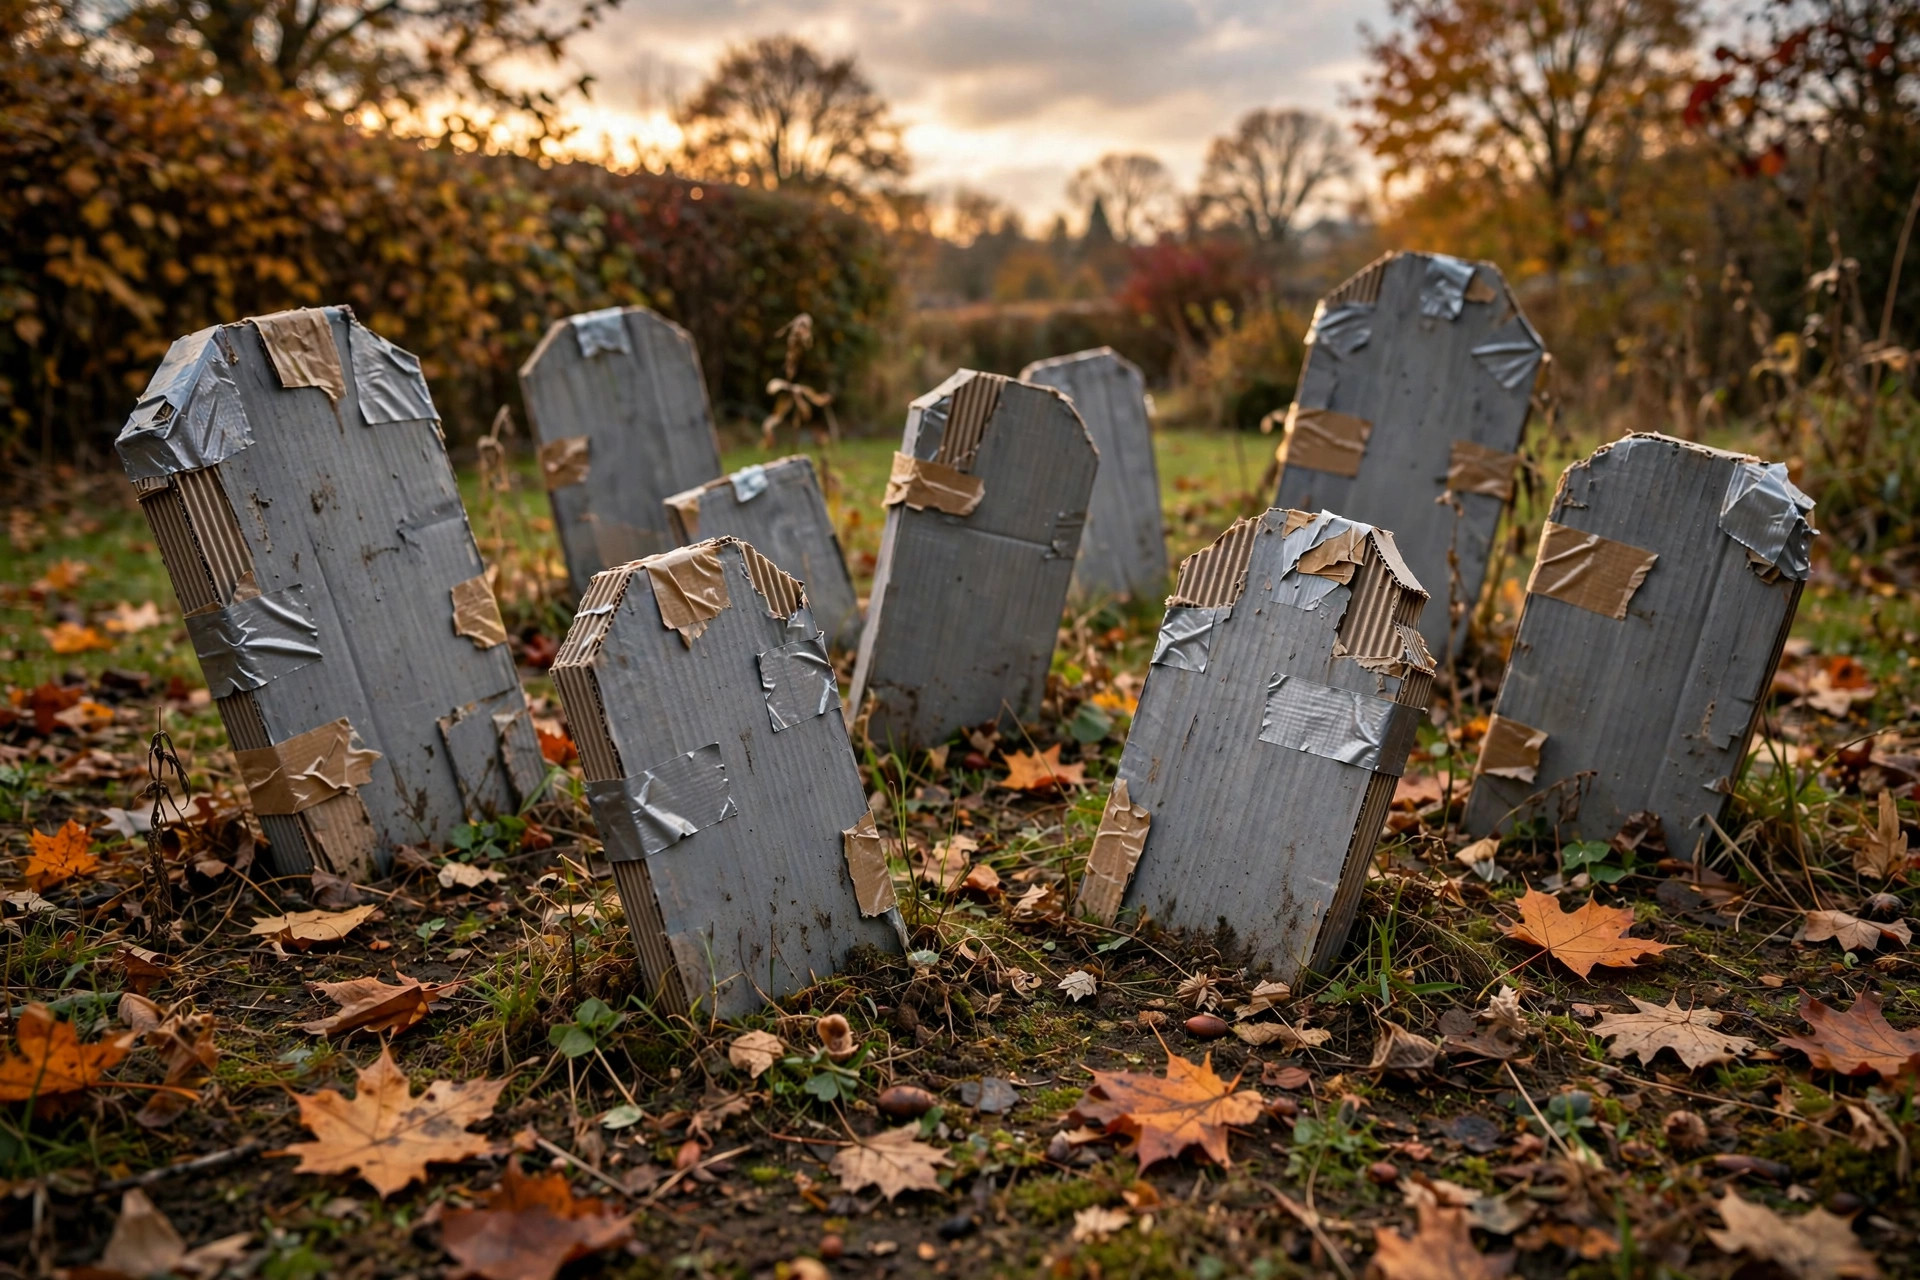
Plain cardboard will not survive October rain, so seal both sides with a clear outdoor sealer or wrap the finished stones in clear packing tape. Even better, trace your cardboard shapes onto foam board from the dollar store, which shrugs off water on its own. Angle the stones slightly and vary their heights for a convincingly old, crooked graveyard. Cluster them in one corner of the yard. A dense little cemetery reads spookier from the street.
4. Trash Bag Spider Webs
Those giant spider webs sold in stores are just stretched-out fabric, and you can make the same thing from black trash bags. Cut a bag into a large circle, fold it like a paper snowflake, and cut out curved notches along the folds. When you unfold it, you have a web. Stretch it between two trees or across a bush, and pin the edges with clothespins.
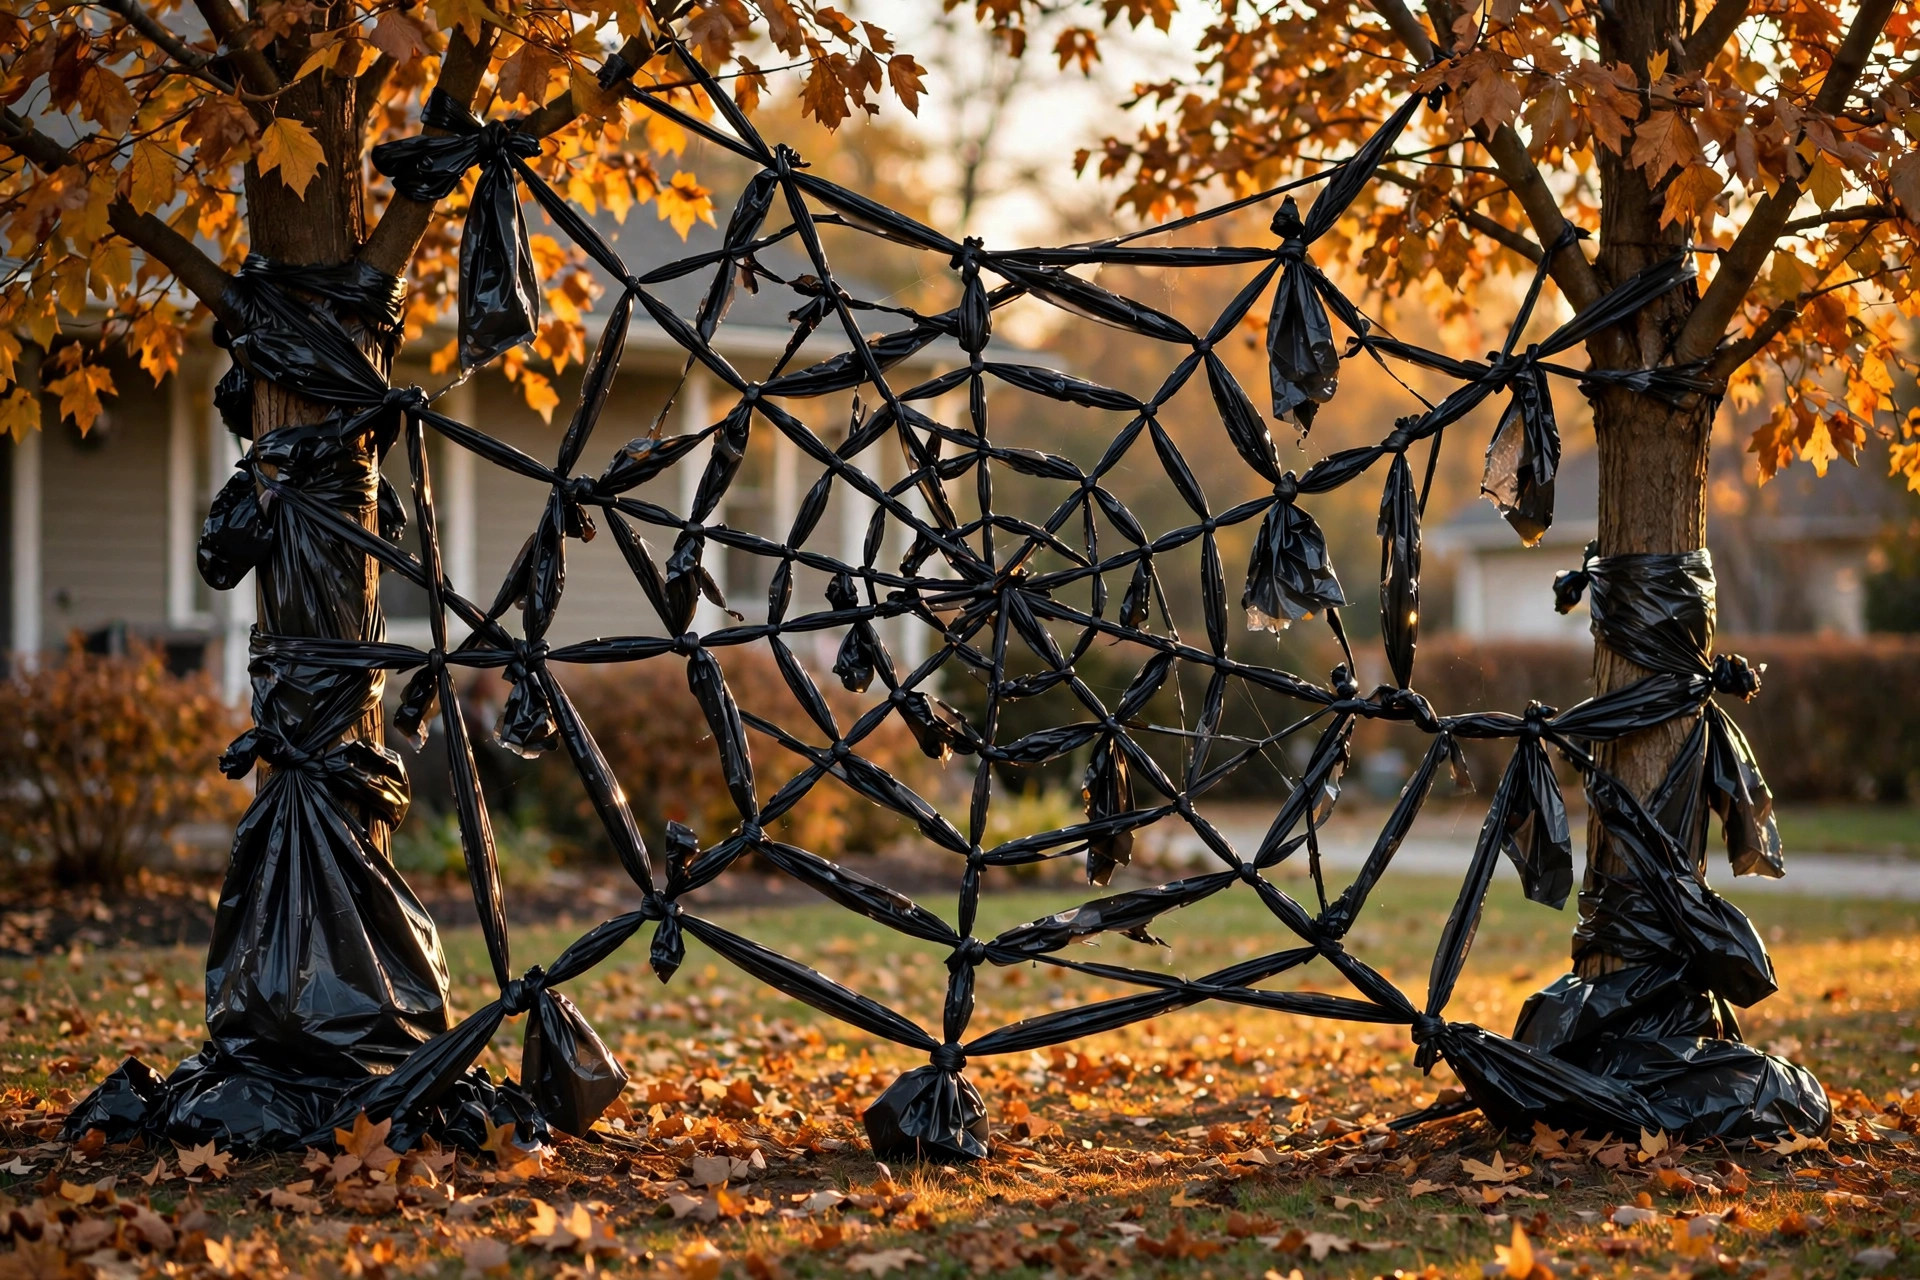
Make the web as big as you dare. A six-foot web between trees stops traffic. Cut the notches generously; too-small cuts make the web look sparse, while big scoops give you that classic thick-web look. Trash bag plastic handles rain without complaint. Add one of the giant spiders from the next idea and the scene is complete.
5. Giant Trash Bag Spiders
Every giant web needs a giant spider. Stuff two black trash bags with crumpled newspaper or leaves (one big round bag for the body, one smaller for the head) and tie them together. For legs, bend eight strips of black poster board or painted pool noodles, then tape them around the body so they arch outward. Hang the spider in the middle of your trash-bag web with fishing line.
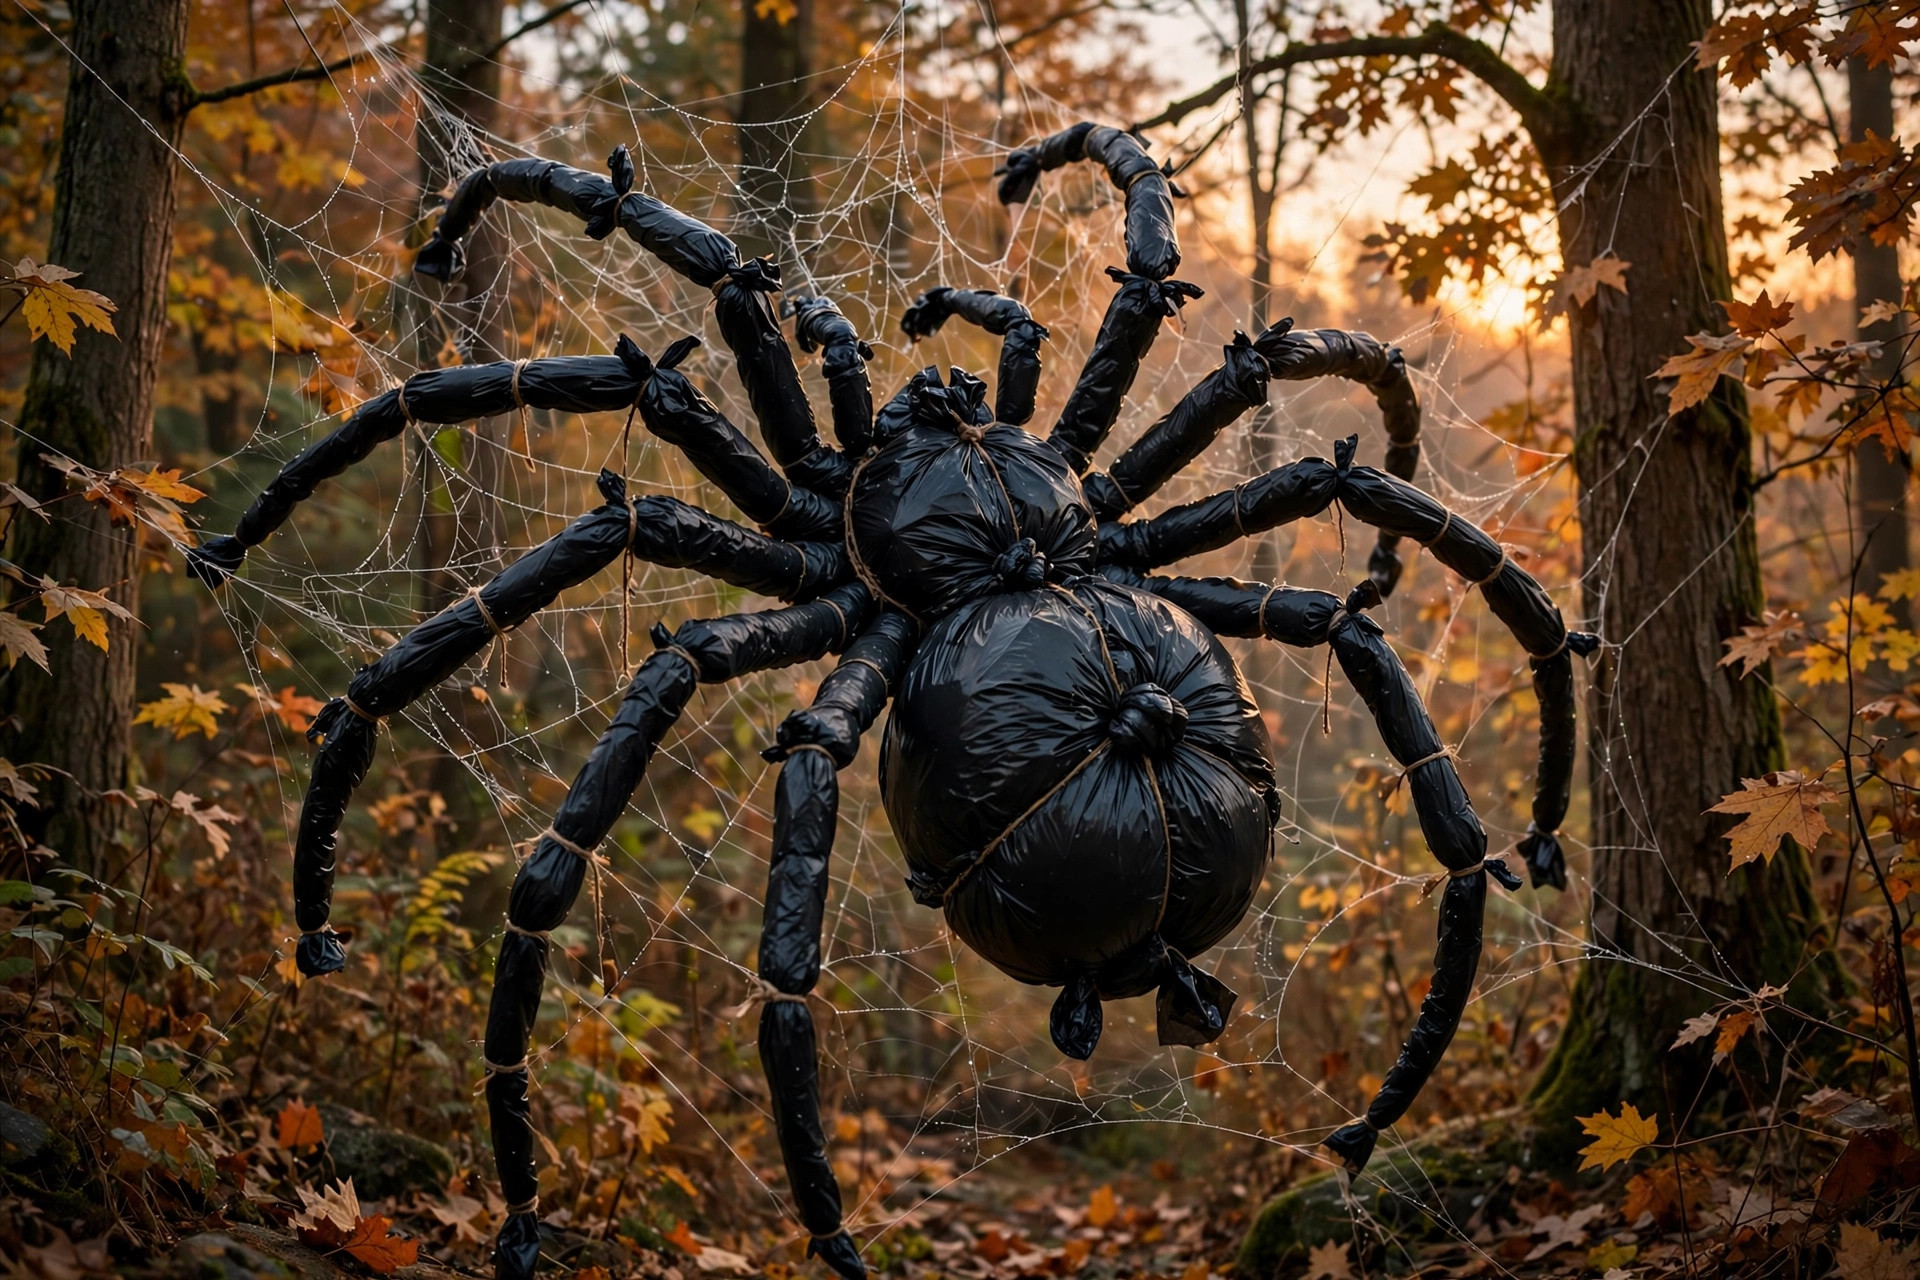
Keep the spider light so the web holds it; newspaper stuffing is better than anything heavy. If it hangs from a tree branch, use dark fishing line, which disappears at night and makes the spider look like it is floating. Bring it under cover in heavy wind, since eight big legs catch a lot of air. This is the project neighbors will ask about, so be ready to share the secret.
6. Floating Witch Hats With Lights
Witch hats hovering over the yard with glowing lights underneath look like pure magic, and the trick is embarrassingly simple. Buy inexpensive witch hats, poke a small LED string light up inside each one, and hang them from tree branches or a porch overhang with clear fishing line at different heights. From the street, the lines vanish and the hats appear to float and glow.
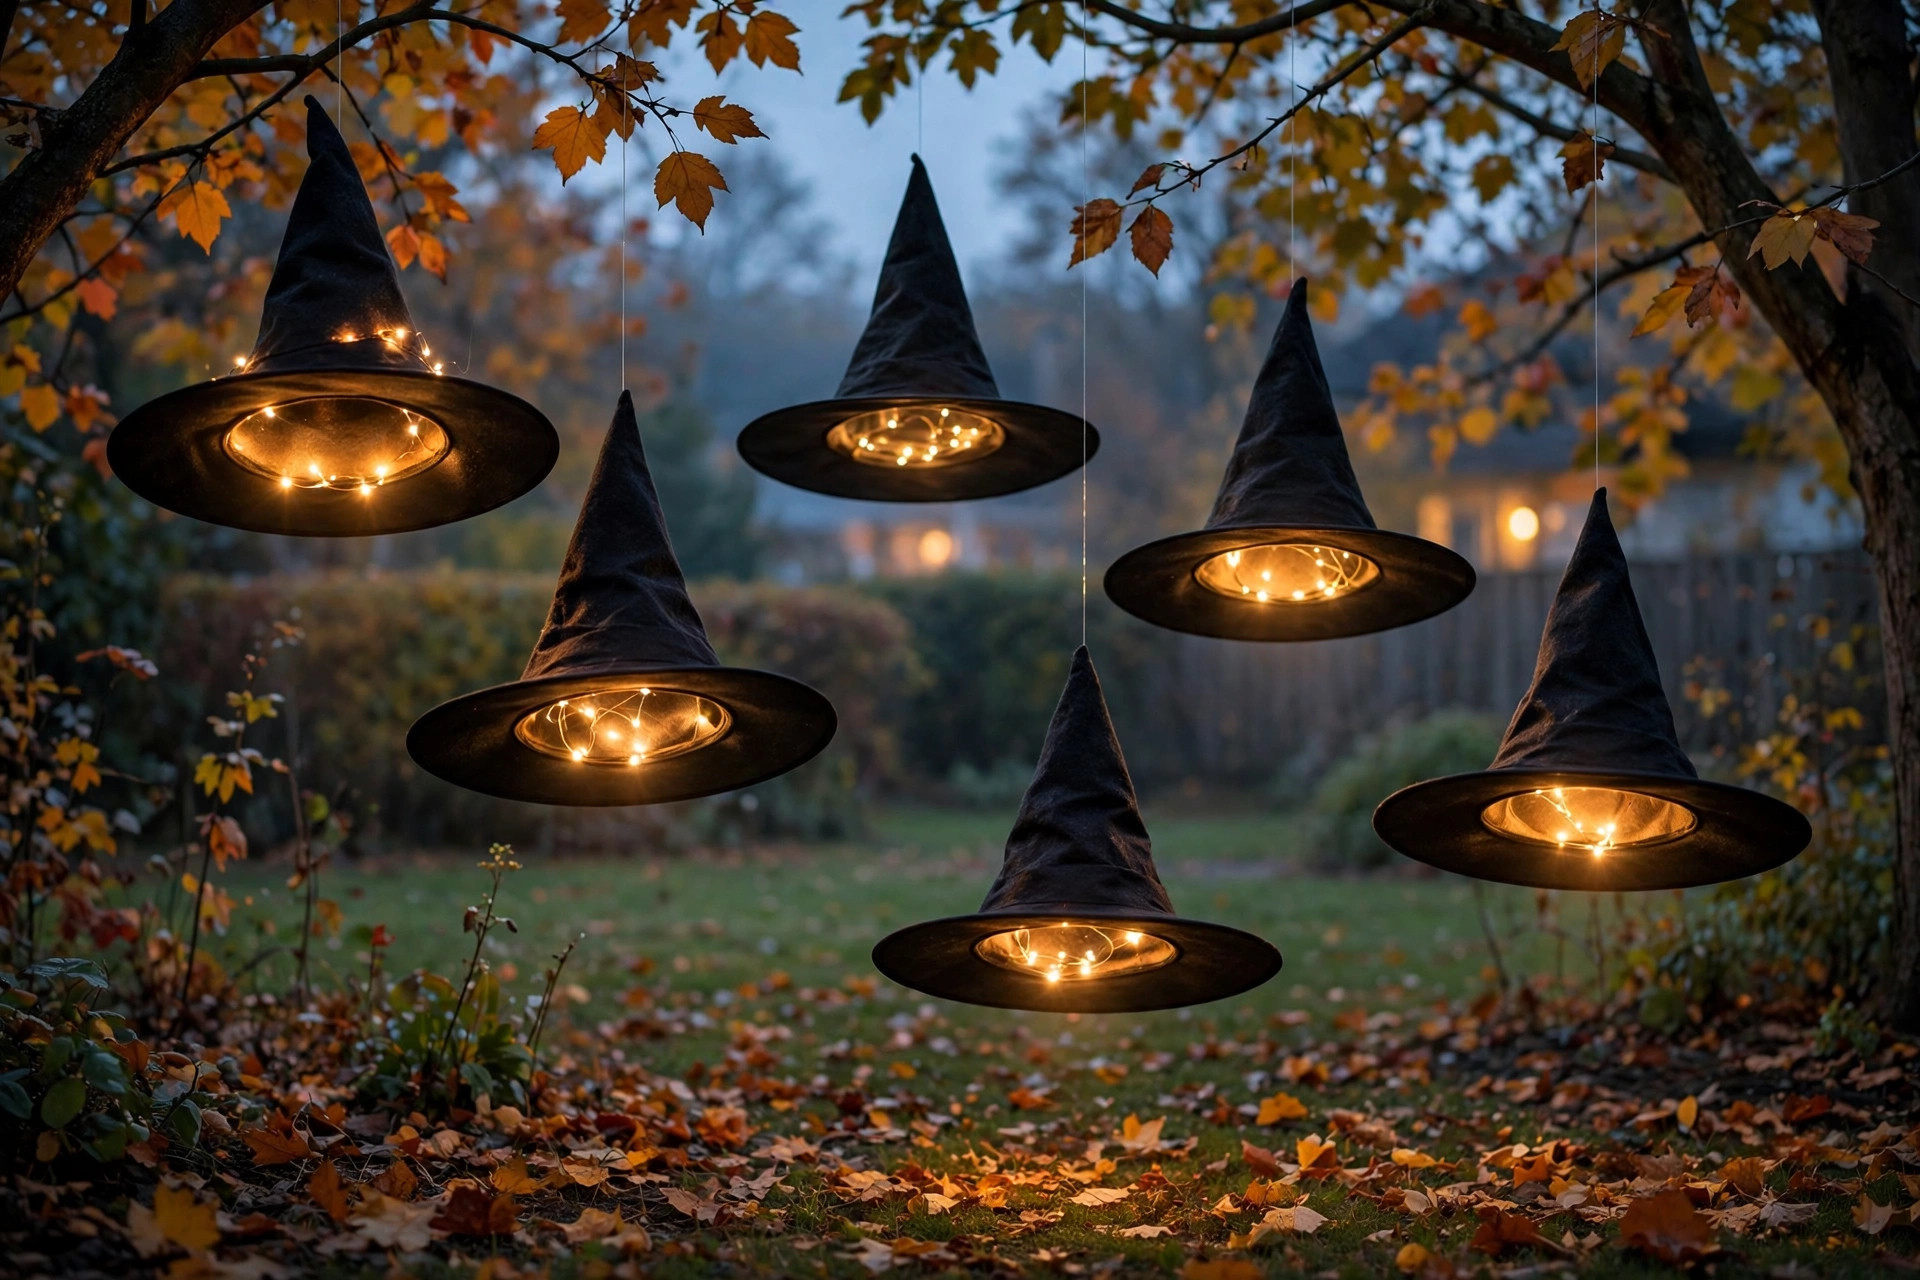
Hang the hats where they will not tangle: at least a few feet apart and away from walkways where tall guests might bump them. Battery-operated fairy lights keep you from running extension cords across the yard, and a built-in timer means they light themselves at dusk. If your hats are thin felt, double them up or add a cardboard cone inside so they keep their pointy shape in damp weather.
7. PVC Candy Corn Lawn Stakes
Candy corn is the happiest Halloween icon, and oversized candy corn stakes lining the driveway are pure fun. Cut PVC pipe into two-foot lengths, paint the bottom third orange, the middle yellow, and leave the top white, or paint the whole thing white and add the colored bands. Cap the top with a foam cone painted white, then push the stakes into the ground along your path.
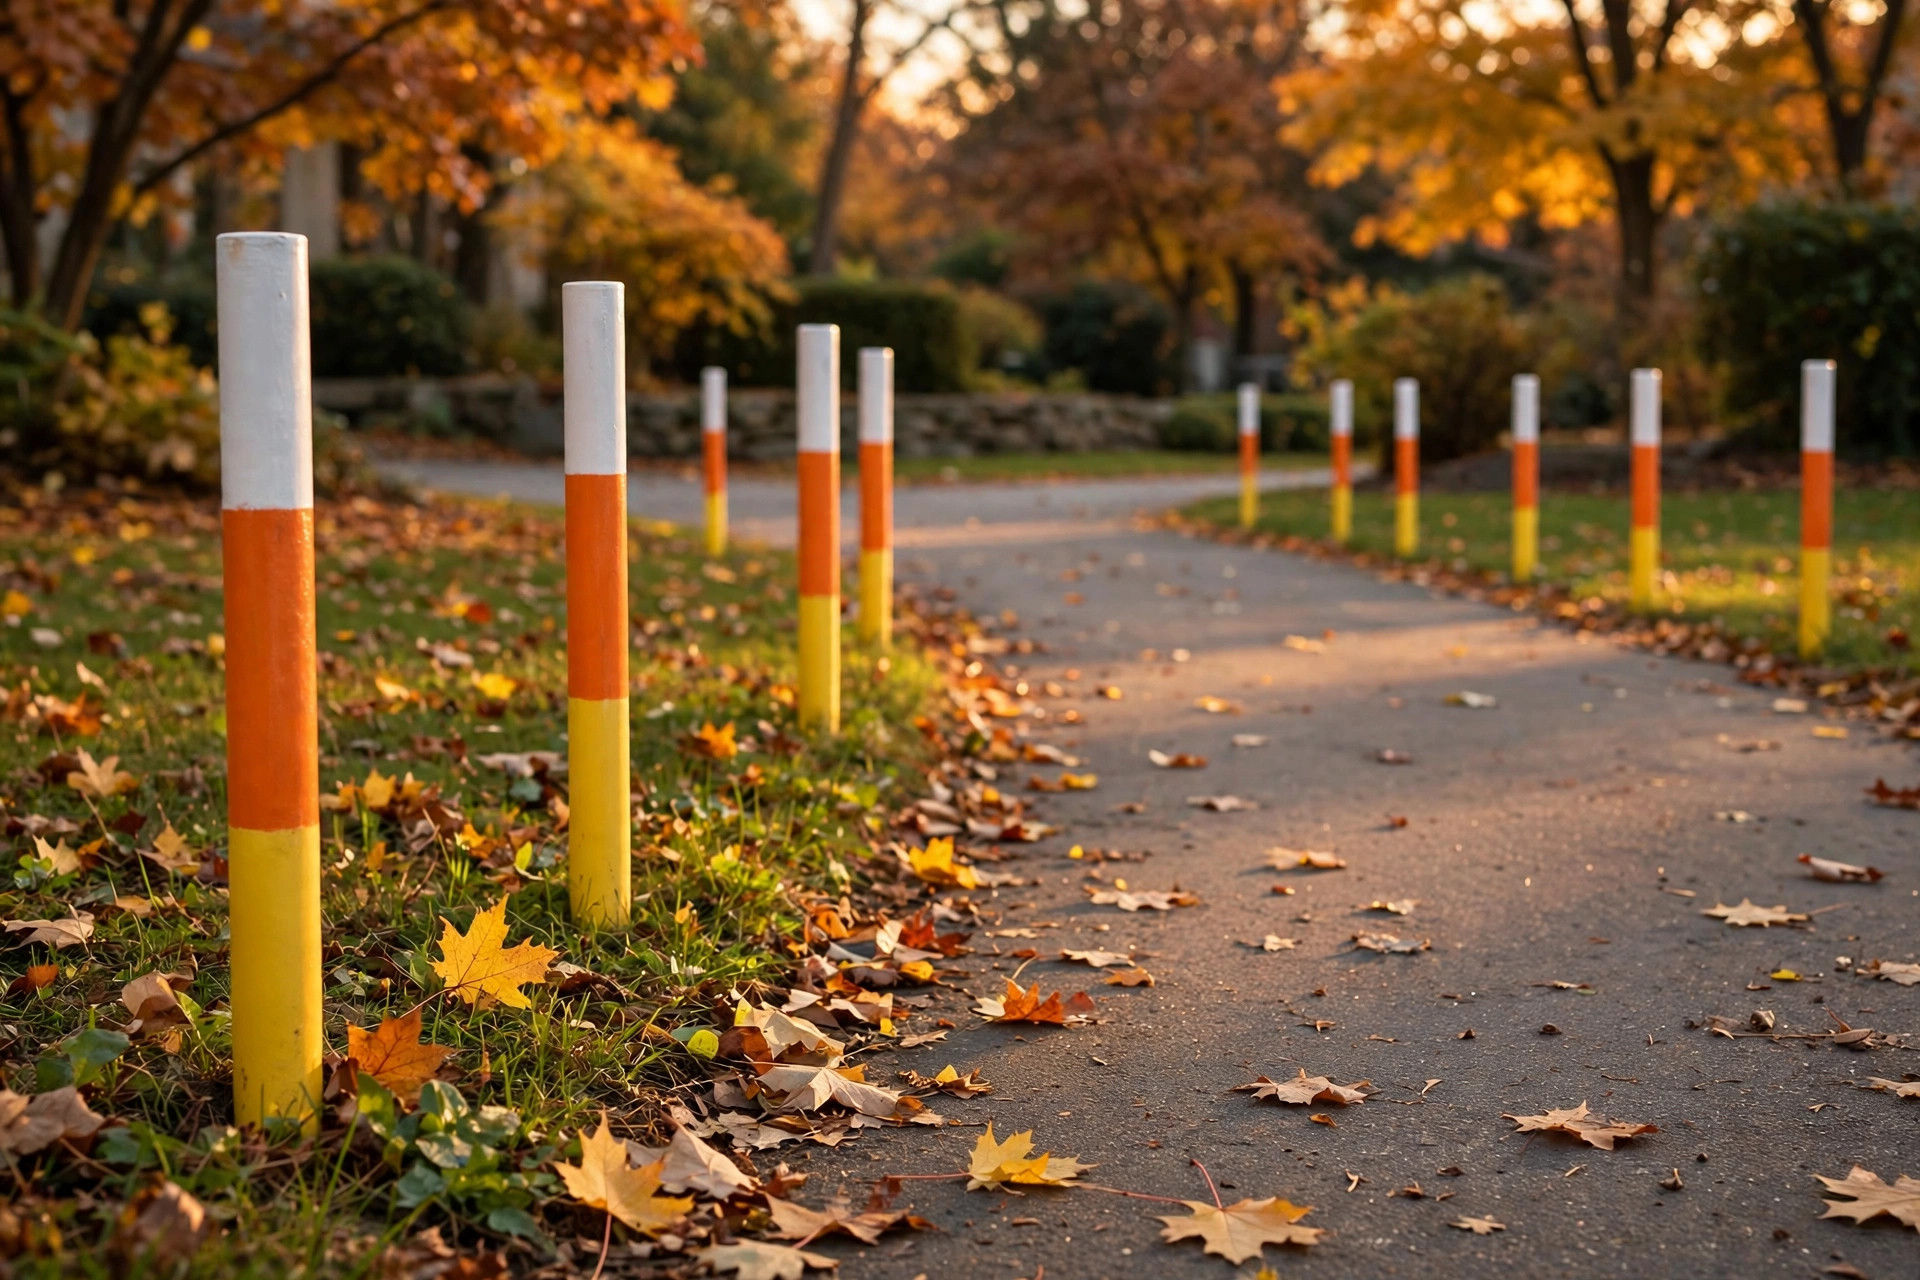
Sand the PVC lightly before painting so the paint grips, and use outdoor spray paint so the colors survive rain. Space the stakes evenly for a tidy look, or cluster them in groups of three at different heights. These store flat and come back out every year. Add a set of the milk-jug ghosts between them for a glowing path.
8. Glowing Eyes in the Bushes
This is the simplest scare on the list and one of the most effective. Take empty toilet paper or paper towel rolls, cut pairs of spooky eye shapes into them (angled slits, round cartoon eyes, jagged monster eyes) and slide a glow stick inside each roll. Tuck the rolls deep into your bushes and shrubs after dark. Passersby see only pairs of glowing eyes staring out of the darkness.
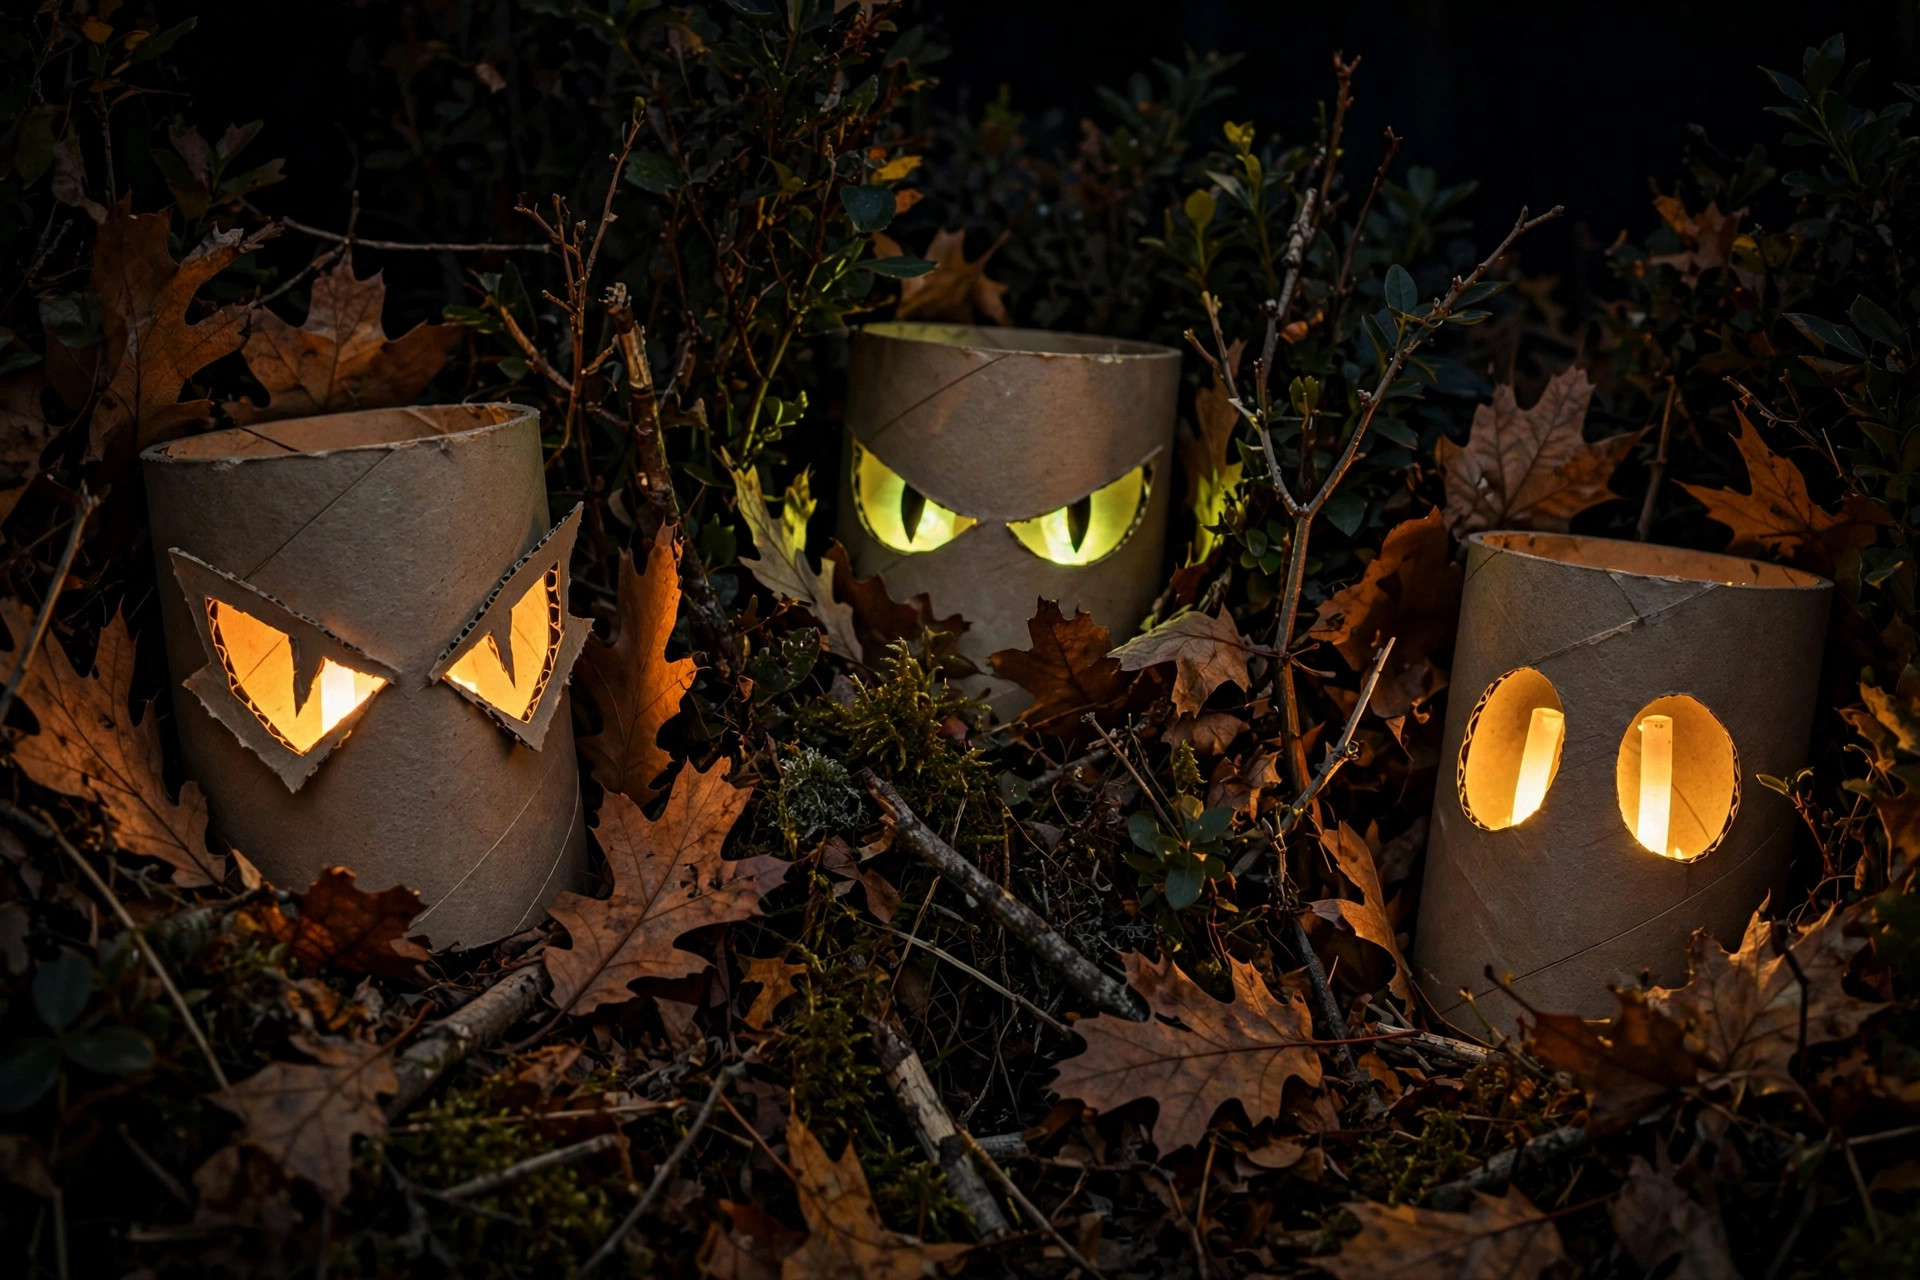
Cut several different eye shapes for variety; a bush with three different “creatures” is creepier than matching pairs everywhere. Activate the glow sticks just before trick-or-treaters arrive so they are brightest at peak hours. This costs almost nothing and takes minutes, which makes it the perfect last-minute addition on Halloween afternoon. The rolls stay hidden, so rain does not matter much, but the effect only works after dark.
9. Cheesecloth Hanging Ghosts
While the porch version drapes cheesecloth over railings, the yard version hangs ghosts from trees. Cut a square of white cheesecloth, drape it over a small foam ball or a wad of newspaper, tie it at the neck with twine, and add felt eyes. Hang a dozen of them from a tree branch at different lengths with fishing line. They spin slowly in the breeze like a flock of little spirits.

Double-layer the cheesecloth so each ghost reads clearly from the street. Hang the ghosts high enough that they do not tangle in anyone’s hair. Seven feet and up is safe. They handle light rain fine and dry fast, but take them down before a real storm since wet cheesecloth gets heavy. At night, aim a spotlight or a string of lights at the tree and the ghosts glow against the dark branches.
10. Funny Skeleton Scenes
Poseable plastic skeletons are a Halloween staple, and the fun is in the staging. Pose yours doing something unexpected: raking leaves, walking the dog (a stuffed animal on a leash), grilling at a tiny toy barbecue, or climbing out of a cardboard coffin. Change the scene every few days and neighbors will check daily for the new episode.
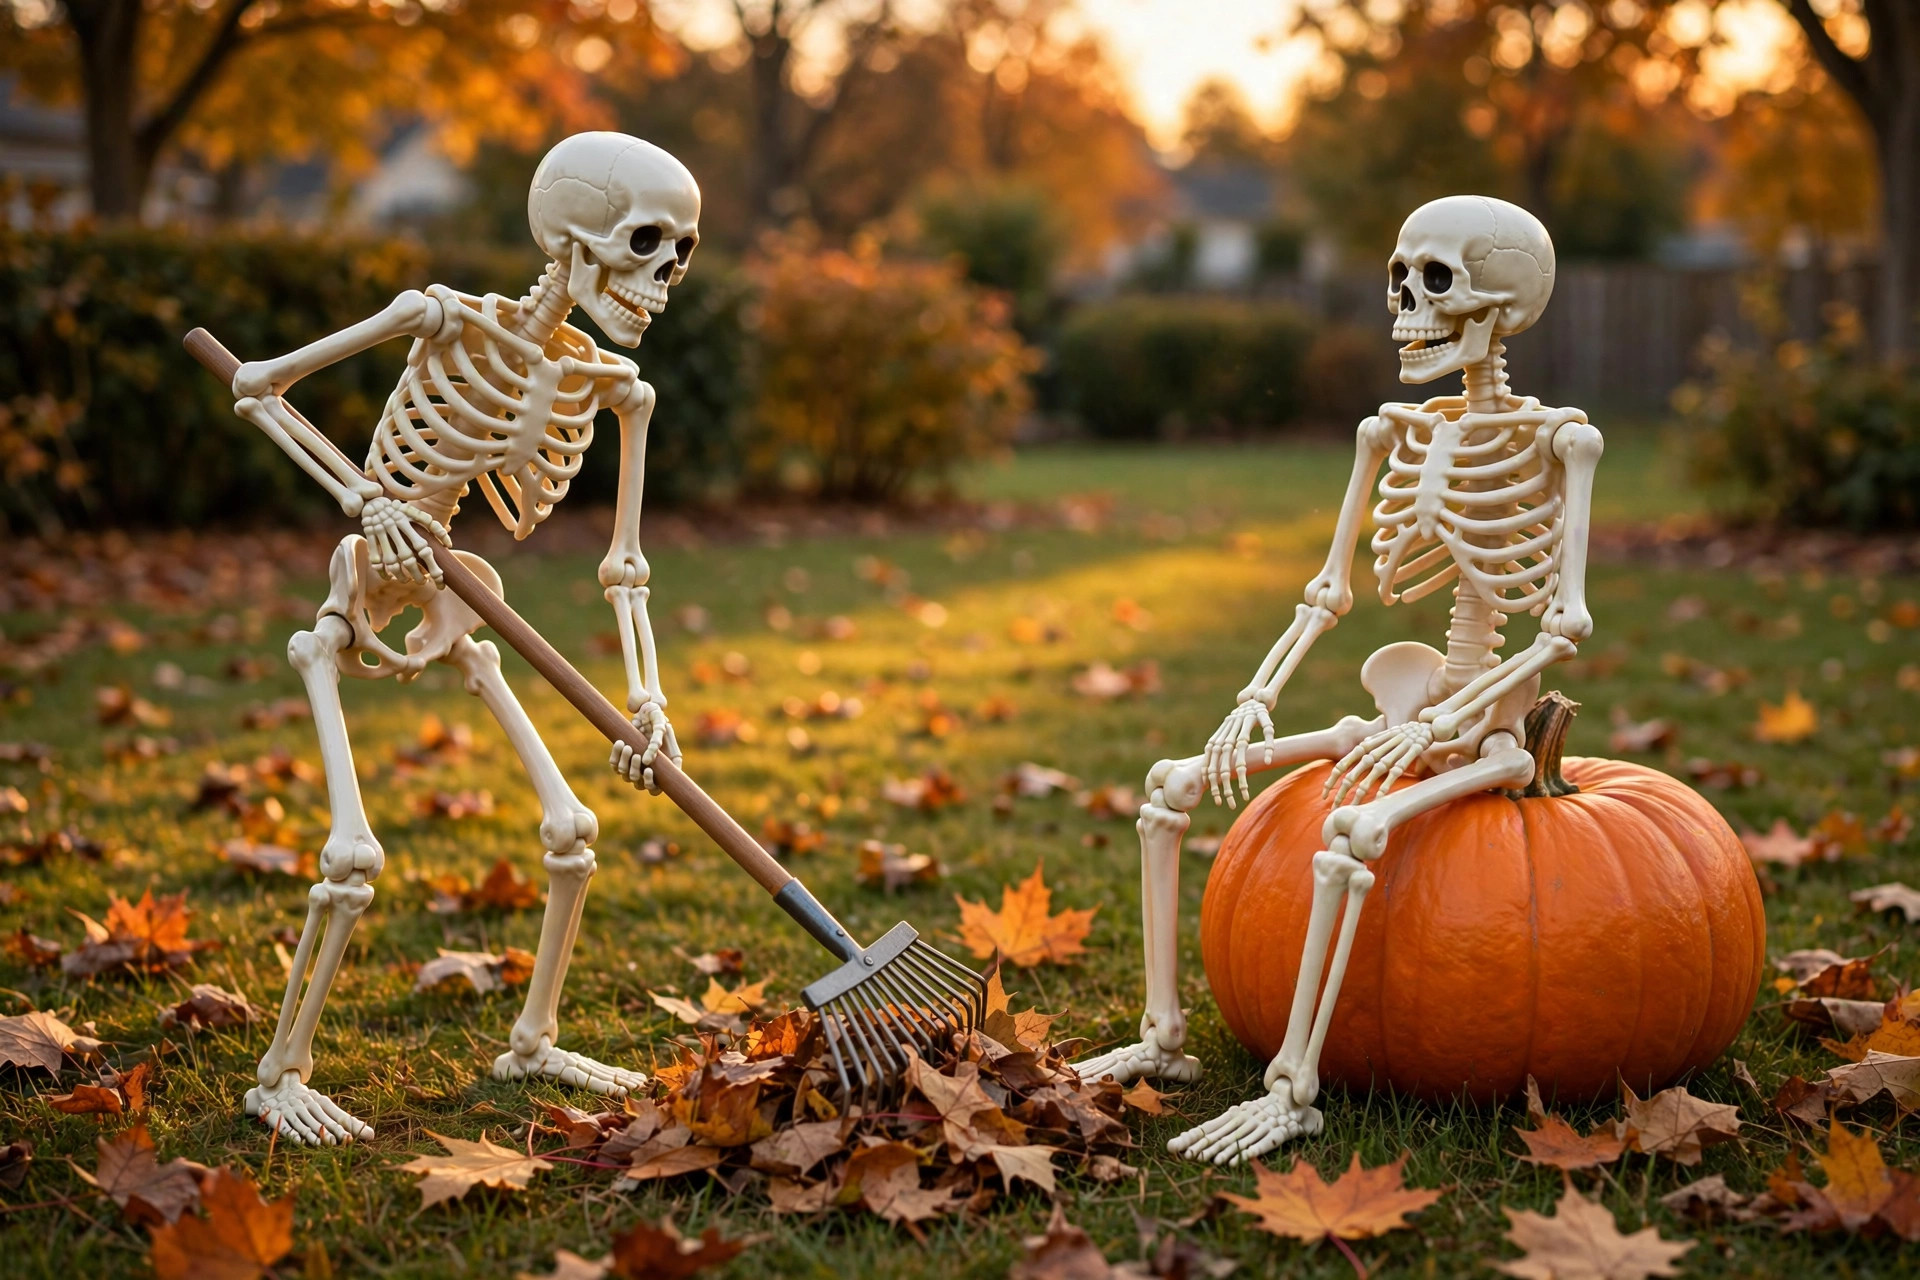
Wire the joints loosely with zip ties if your skeletons flop over. Most are top-heavy, and a windy night will rearrange your scene. Set heavier scenes low to the ground where they are stable, and save climbing poses for sheltered spots. A bag of zip ties and a few wooden stakes will keep any skeleton scene standing all month.
11. Hay Bale Scarecrow Display
Nothing says harvest season like hay bales, and they make the perfect base for a bigger display. Stack two hay bales, dress a scarecrow in an old flannel shirt and jeans stuffed with straw, and surround the scene with pumpkins, mums, and corn stalks. It works for all of fall, then gets spooky fast when you add a few of the tombstones or ghosts from this list.
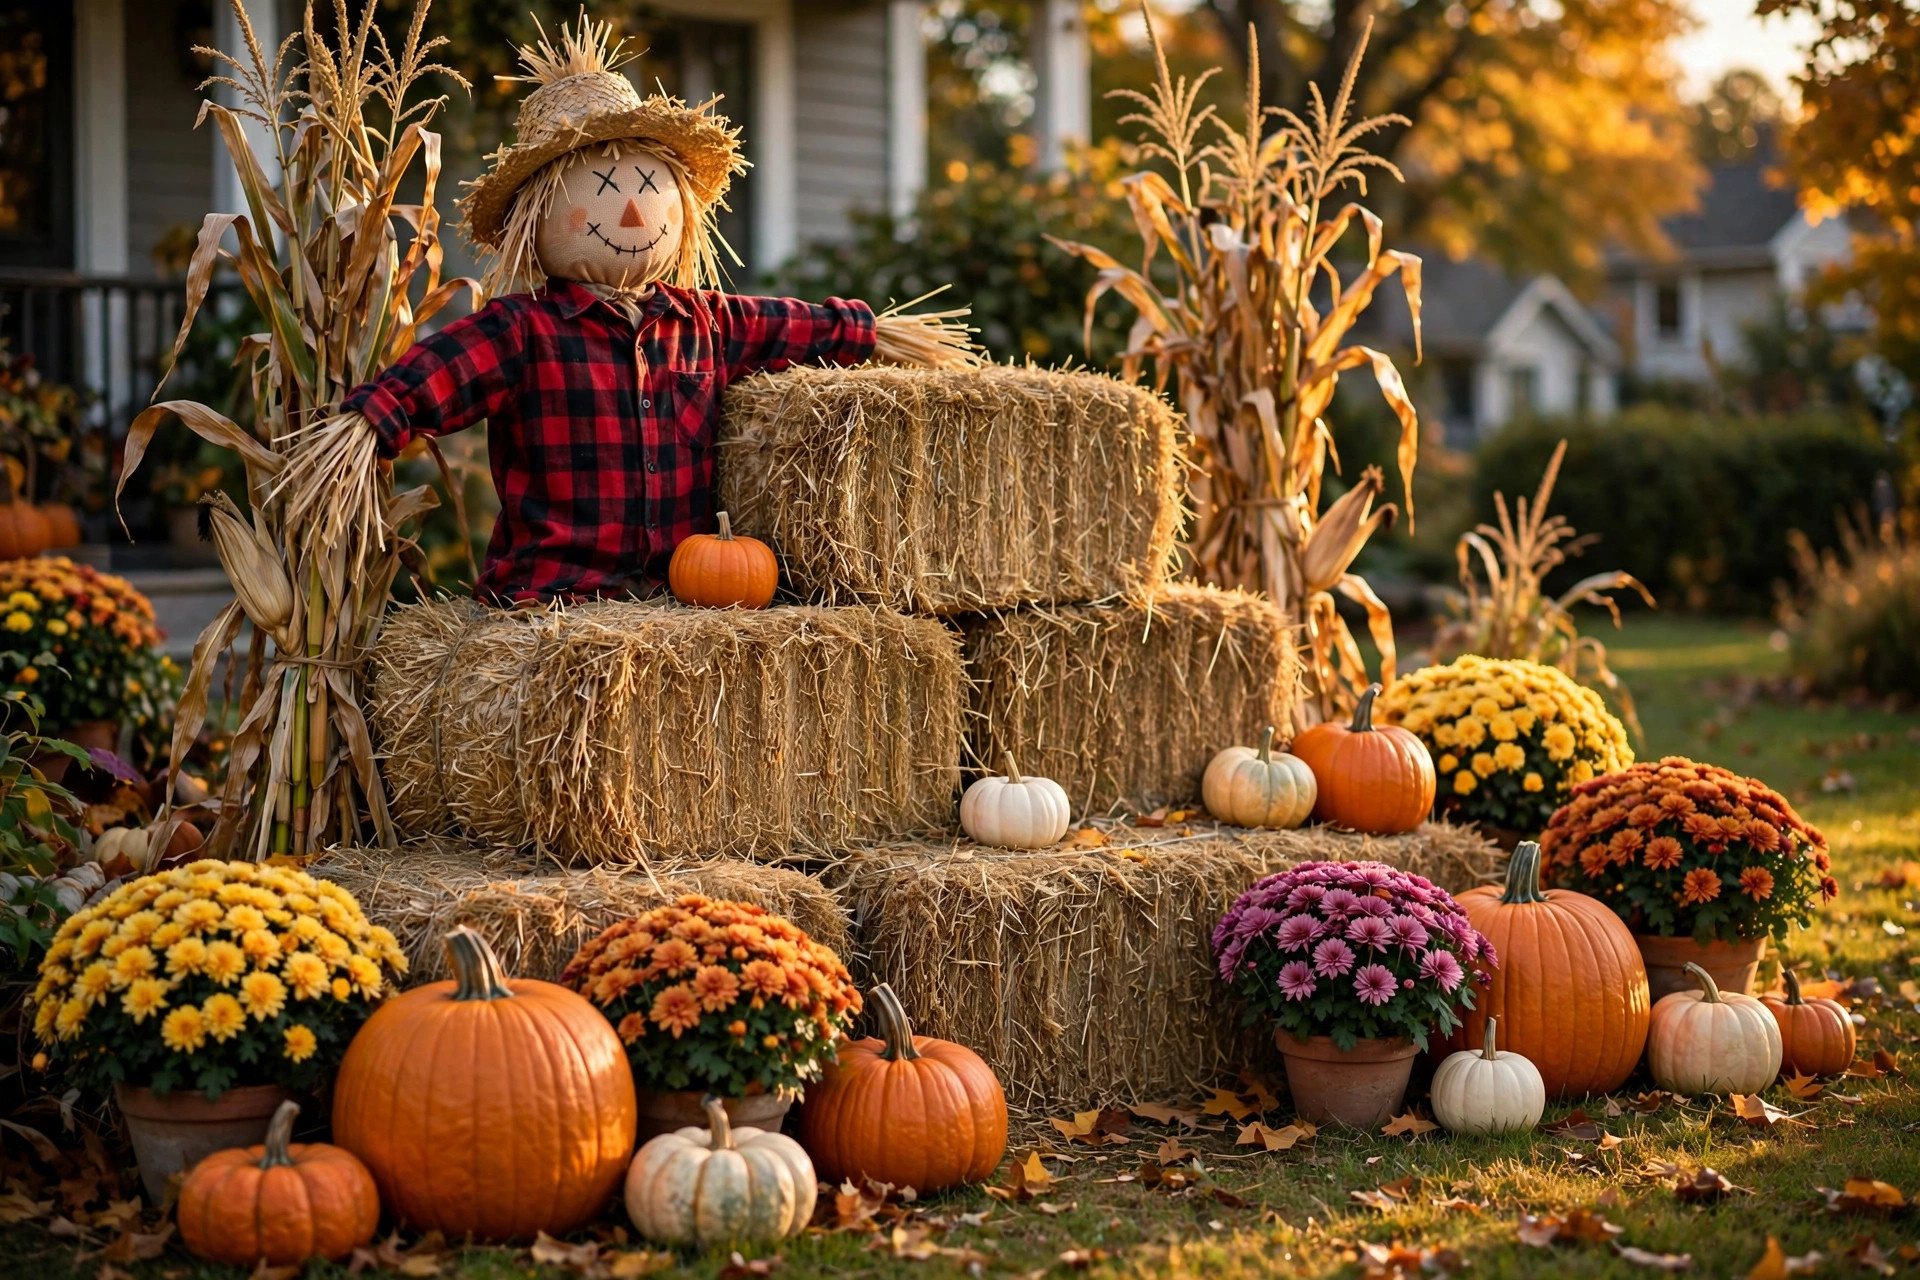
Set hay bales on pallets or a tarp so they do not soak up ground moisture and rot. A scarecrow head is just a burlap sack stuffed with straw and tied off, with a painted face. No sewing needed. This display carries into Thanksgiving, so you get two holidays out of one weekend of work. For more autumn ideas that last past Halloween, see our easy fall decor ideas.
12. Window Silhouettes
Turn your house itself into the decoration with black paper silhouettes in the windows. Cut witches, bats, cats, bare trees, or haunted house shapes from black poster board or craft paper, tape them inside your windows, and leave the indoor lights on after dark. From the street, every window becomes a glowing spooky scene.
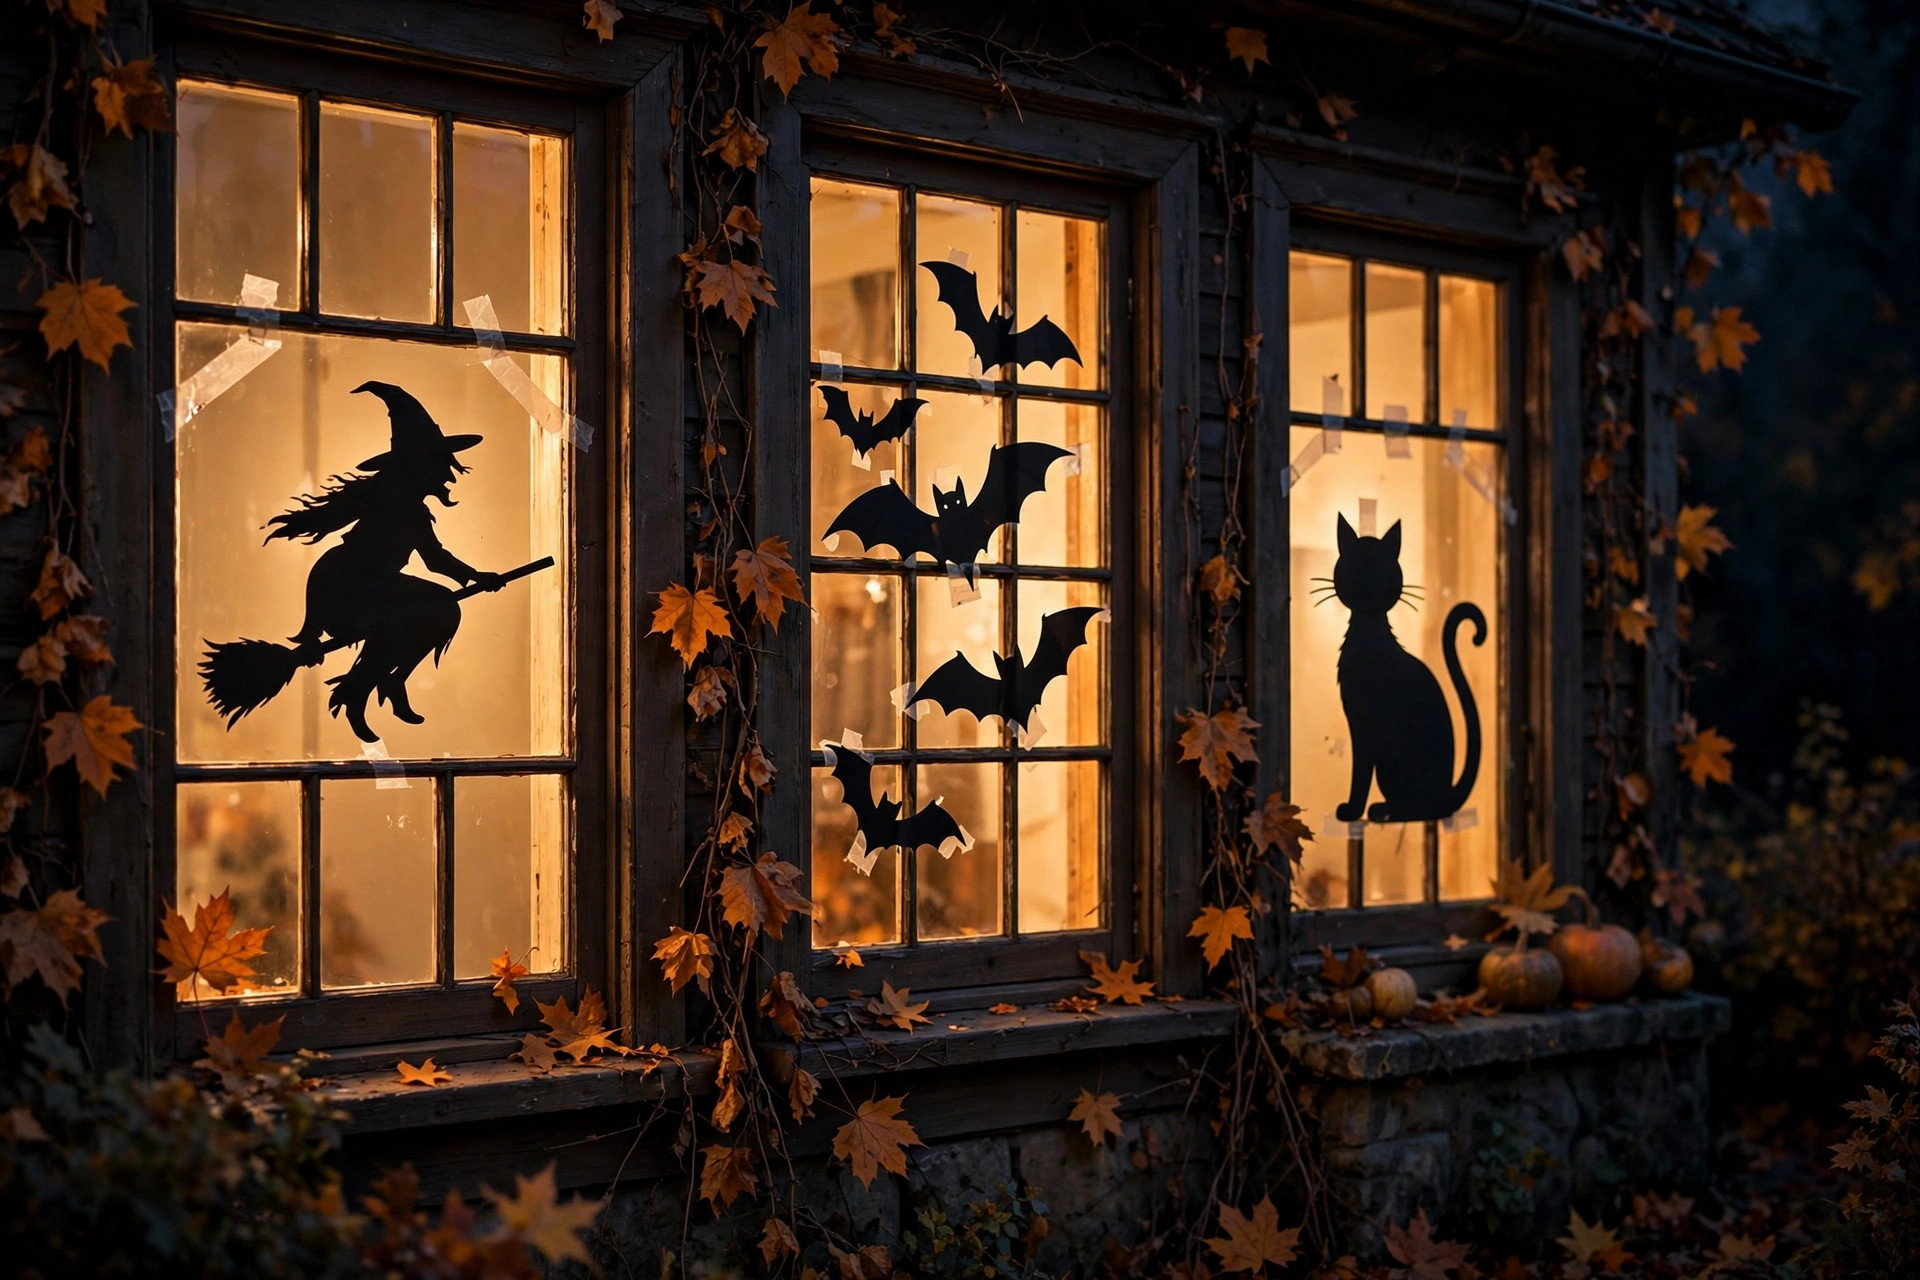
Keep the shapes simple and bold. Fine details disappear from the sidewalk, but a big witch on a broom reads instantly. Tape the silhouettes flat against the glass so they do not curl and cast weird shadows. This works best on street-facing windows; skip the ones hidden behind bushes. Everything stays indoors, so this is the most low-maintenance idea here. Let the kids design one window each for a personal touch.
13. Paper Bag Pathway Luminaries
Paper lunch bags become elegant glowing lanterns with almost no effort. Fold down the top inch of each bag for a finished edge, add two inches of sand to the bottom, and set a battery LED tea light inside. Line them along your driveway, walkway, or the edge of the yard. The warm glow through the paper looks magical.
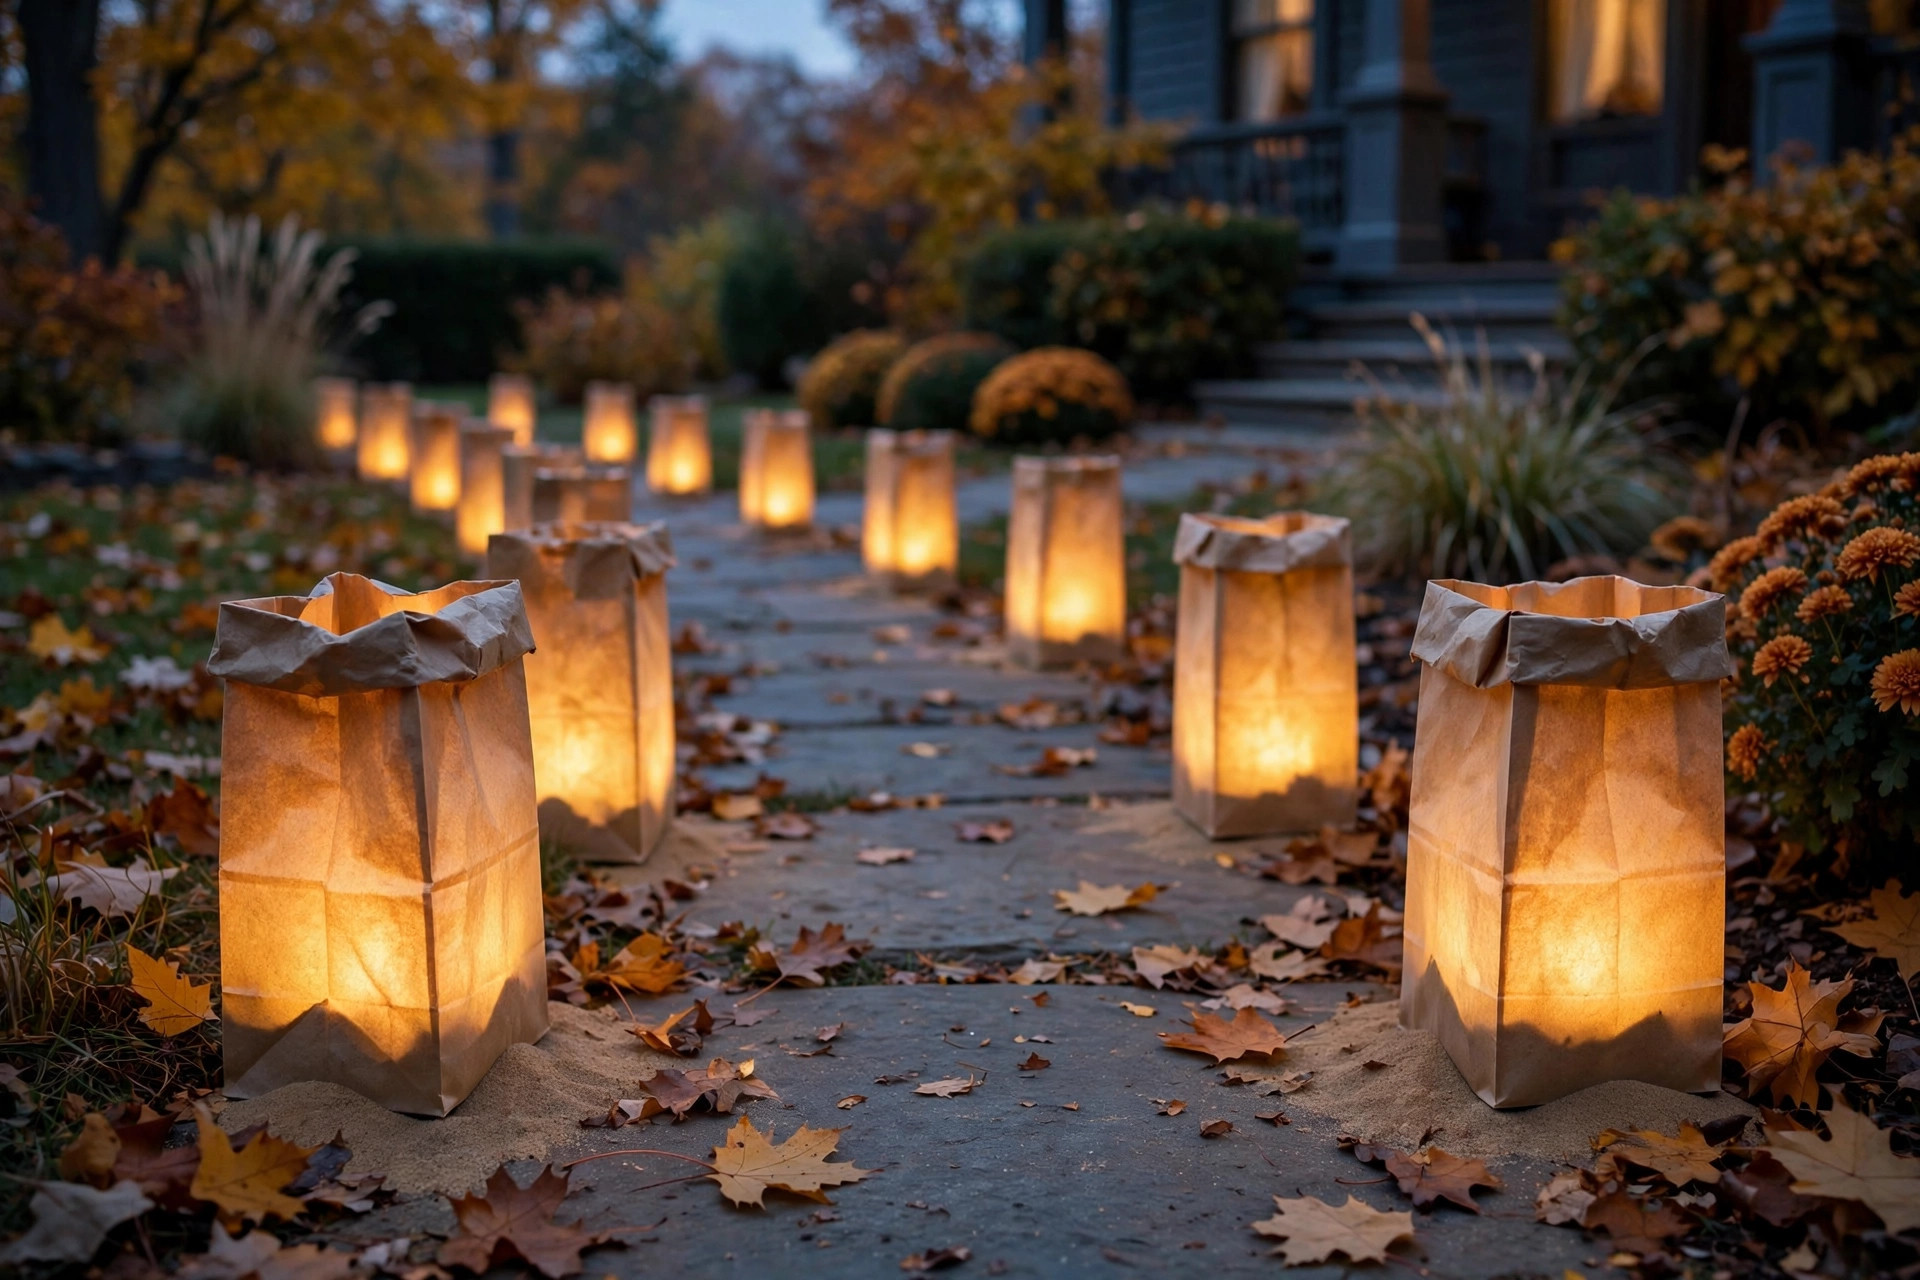
Never use real candles in paper bags. The LED versions give the same glow with none of the risk, and the National Fire Protection Association’s candle safety tips explain why flameless is the way to go outdoors. The sand keeps bags upright in wind. Set the bags out just before guests arrive and bring the lights in afterward; the bags themselves are cheap to replace each year. Space them about two feet apart for an even, welcoming glow.
14. Mummy-Wrapped Pillars
If you have porch columns, fence posts, or even sturdy tree trunks, wrap them like mummies. Wind white crepe paper streamers, torn fabric strips, or gauze bandages around the pillar in overlapping layers, leaving a few ends hanging loose. Stick on two big googly eyes near the top and your pillar becomes a mummy guarding the yard.
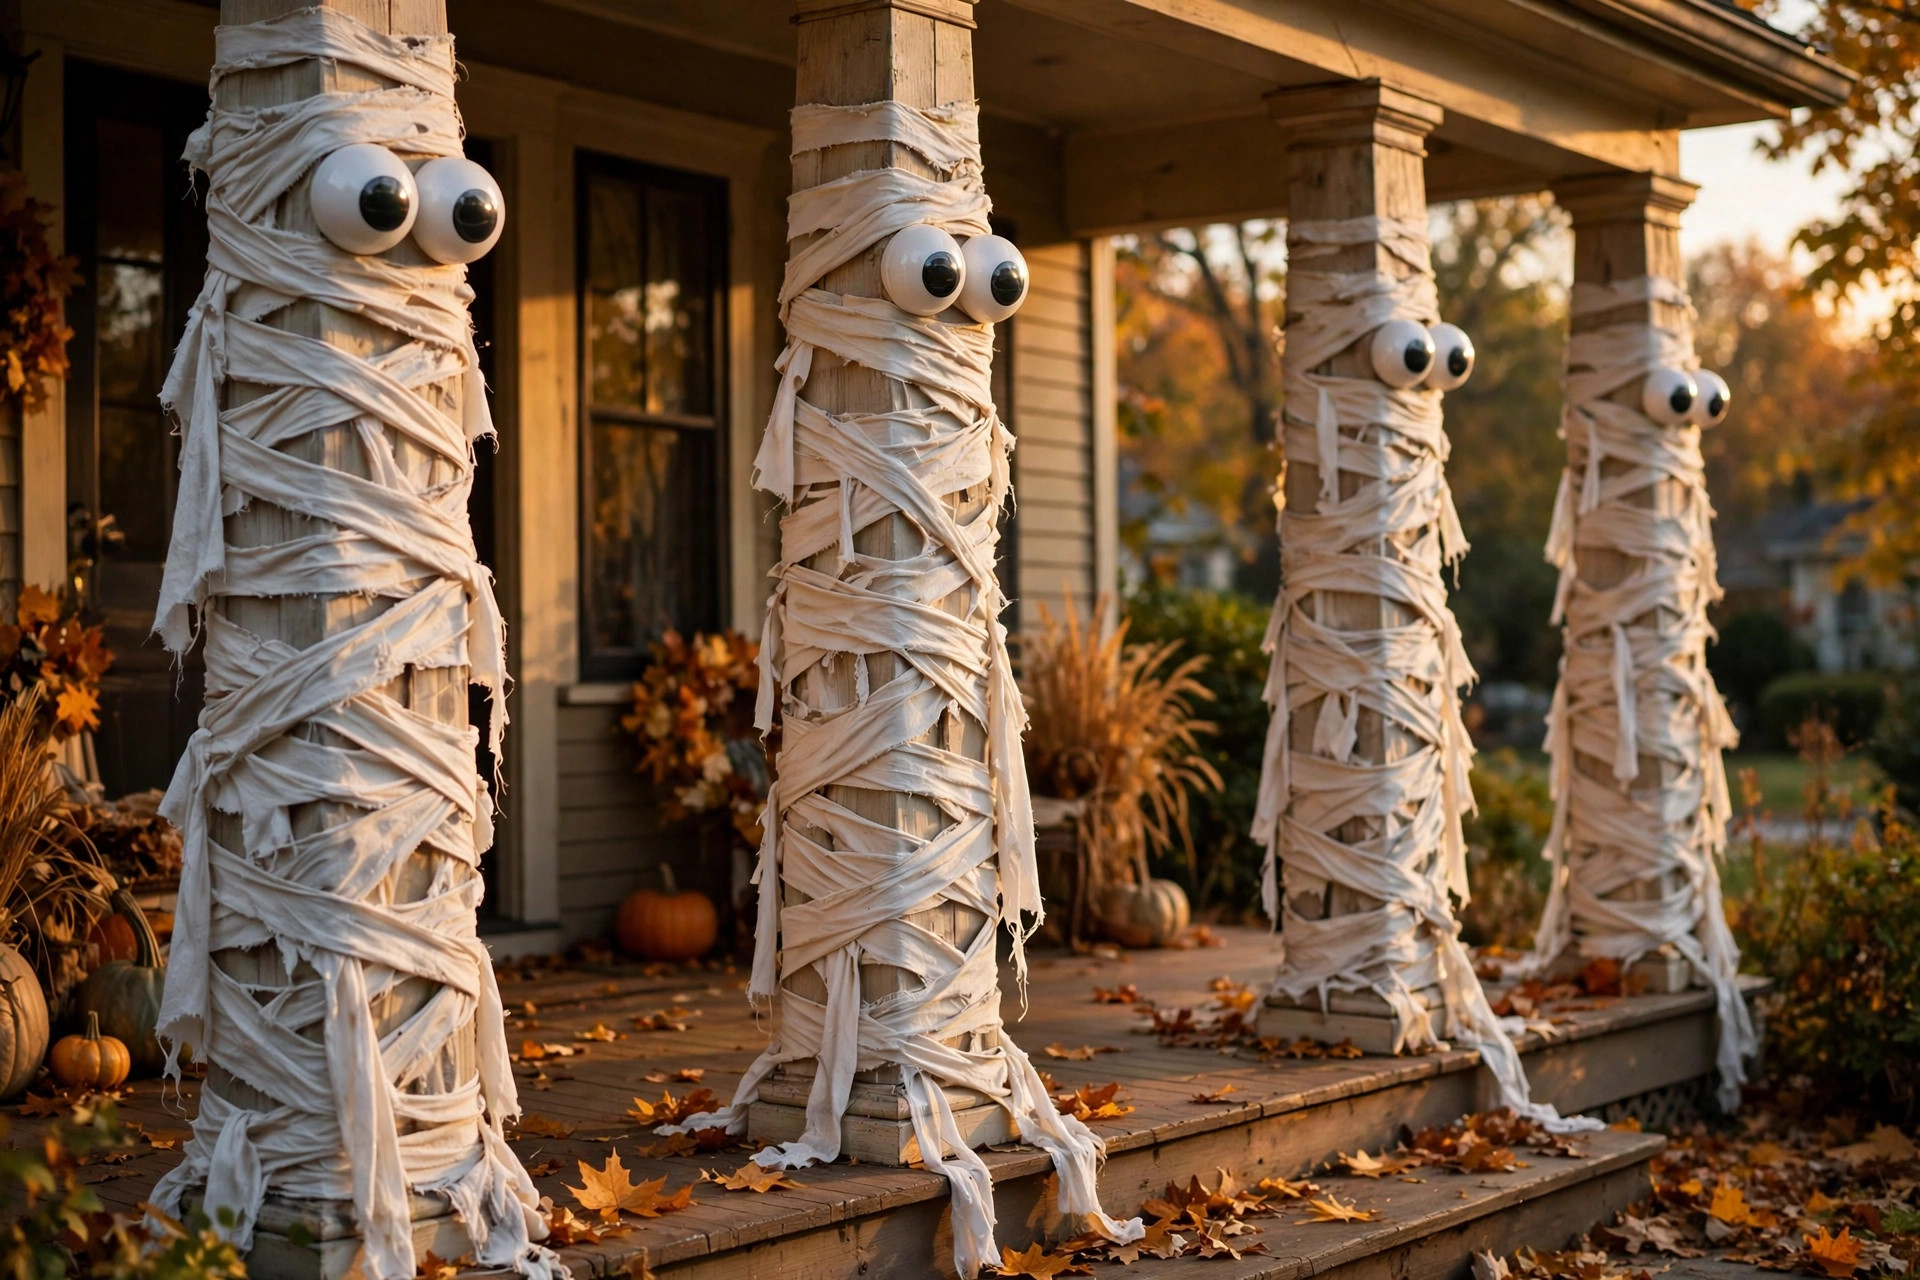
Start wrapping from the bottom so each layer overlaps the one below like shingles. Rain runs off instead of soaking in. Use painter’s tape to anchor the first and last wraps; it holds well and peels off cleanly in November. White fabric strips from an old sheet outlast crepe paper streamers in wet weather and can be washed and reused.
15. Pumpkin Crate Tower
Stack wooden crates into a tower, tuck pumpkins into every opening, and you have a display with real presence. Start with the biggest crate on the bottom, stack two or three more getting smaller as you go, and fill each level with pumpkins, gourds, and dried corn. It looks like a harvest sculpture and assembles in minutes from pieces you may own.
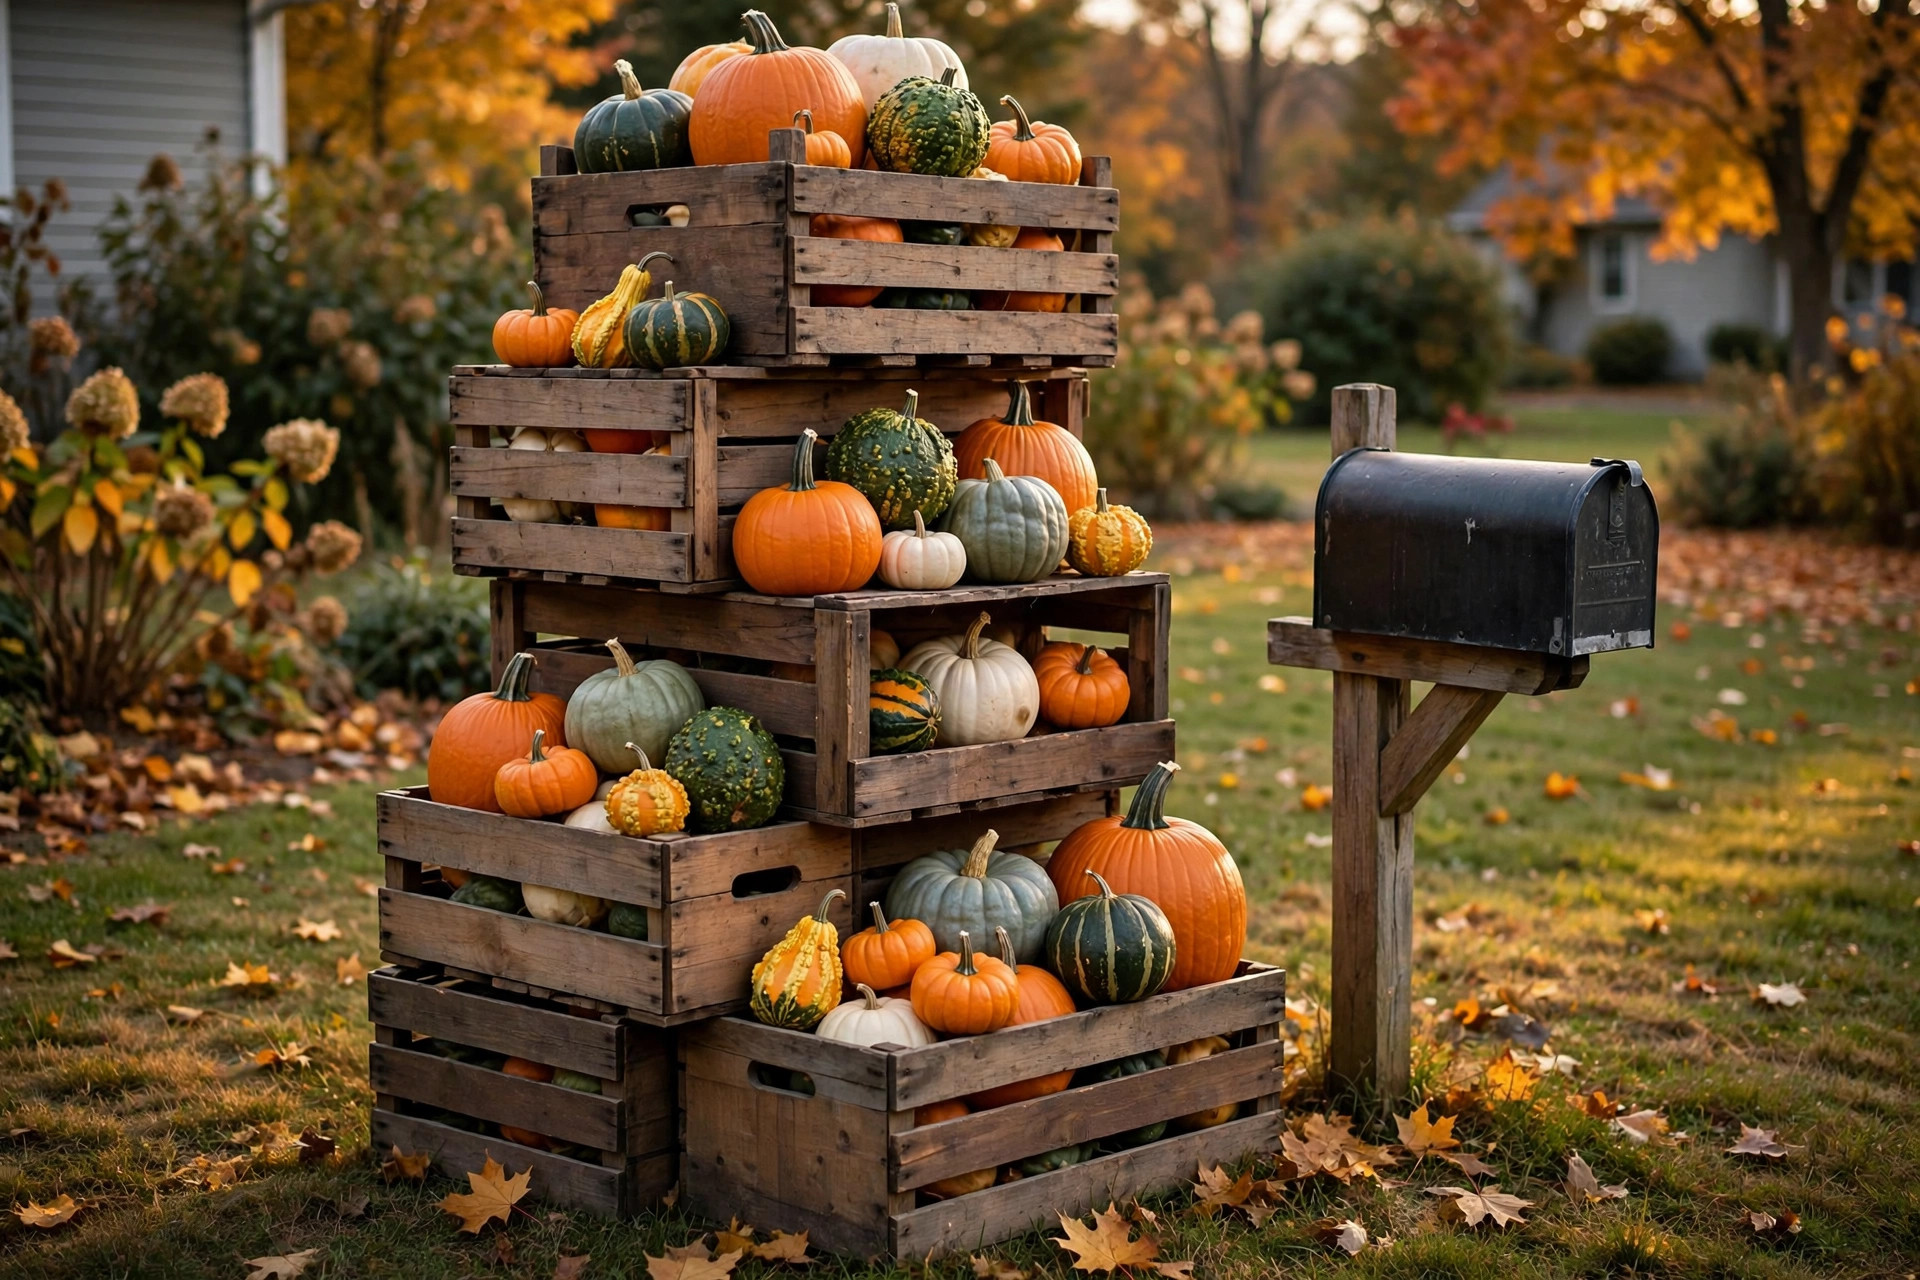
Screw or zip-tie the crates together so the tower cannot shift. A tower of pumpkins is heavy, and you do not want it leaning. Set the whole thing where it gets noticed, like beside the mailbox or at the end of the driveway. Mix real and faux pumpkins; the faux ones on the upper levels never need replacing. After Halloween, swap in plain pumpkins and the tower carries you through Thanksgiving.
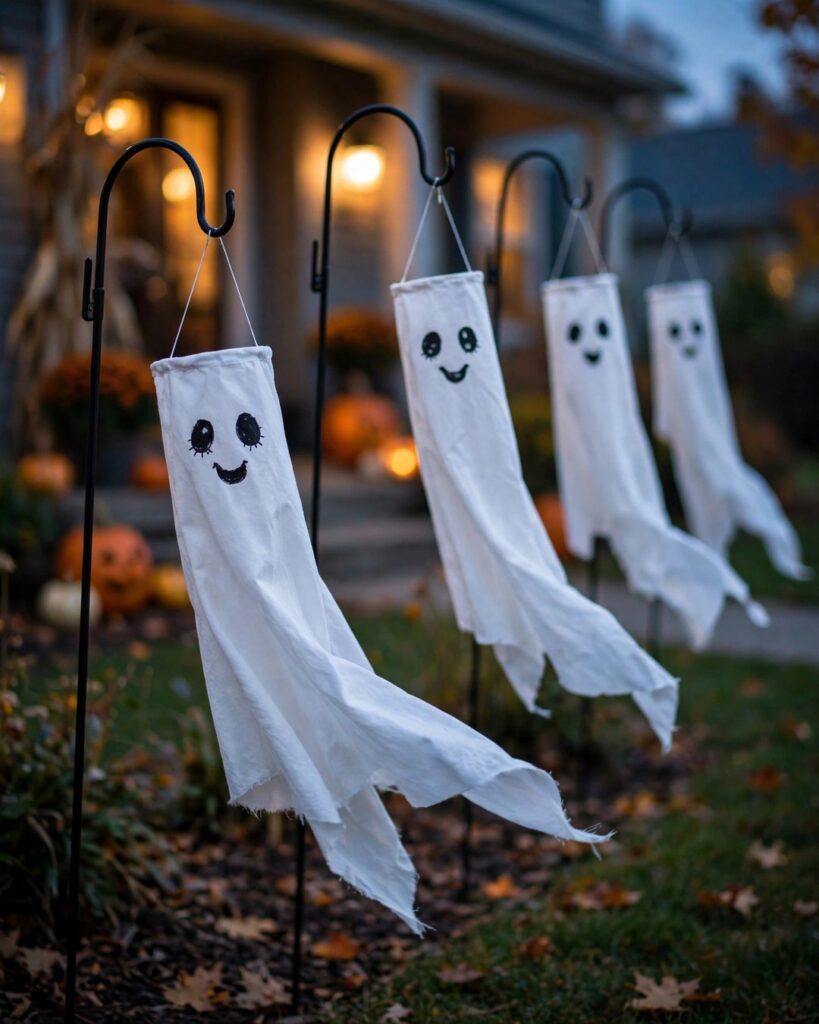
16. Ghost Wind Socks on Shepherd’s Hooks
Shepherd’s hooks plus white fabric ghosts make decorations that dance all month. Hang a cheesecloth or sheet ghost from each hook (same method as the tree ghosts, just smaller) and line the hooks along your flower beds or walkway. Every breeze sets the row swaying, which looks wonderfully alive after dark.
Push the hooks deep into the ground; a top-heavy ghost will lever a shallow hook right out in a gust. If your soil is soft, slide a short piece of rebar or a wooden stake in first, then hang the hook over it for extra grip. Solar spotlights aimed at the row turn the ghosts into glowing sentinels at night with no wiring at all.
Which Project Should You Start With?
| Project | Difficulty | Best for |
|---|---|---|
| Milk jug ghost luminaries | Easy | Walkways and paths |
| Tomato cage ghosts | Easy | Front lawn focal points |
| Cardboard tombstones | Easy | Graveyard scenes |
| Trash bag spider webs | Easy | Between trees and bushes |
| Giant trash bag spiders | Moderate | Centerpiece of a web |
| Floating witch hats | Easy | Overhead magic at dusk |
| PVC candy corn stakes | Moderate | Driveway borders |
| Glowing eyes in the bushes | Easy | Last-minute scares |
| Cheesecloth hanging ghosts | Easy | Trees and high branches |
| Funny skeleton scenes | Easy | Ongoing October fun |
| Hay bale scarecrow display | Moderate | Harvest-season base |
| Window silhouettes | Easy | Zero-maintenance decorating |
| Paper bag luminaries | Easy | Welcoming glow for guests |
| Mummy-wrapped pillars | Easy | Columns and fence posts |
| Pumpkin crate tower | Moderate | Big visual impact |
| Ghost wind socks | Easy | Flower beds and borders |
Frequently Asked Questions
How early can I put up DIY outdoor Halloween decorations?
Early October is ideal for most of these projects. The sturdier builds (tombstones, candy corn stakes, pumpkin towers, hay bale displays) easily last the whole month. Save the most delicate pieces, like paper bag luminaries and glow-stick eyes, for the final week so they look fresh on Halloween night.
How do I keep DIY yard decorations from blowing away?
Anchor everything heavier than it looks like it needs. Push stakes deep into the ground, weigh down light pieces with sand or bricks hidden inside, and use fishing line instead of thread for anything hanging. It is stronger and nearly invisible. Put the lightest decorations in sheltered spots, like against the house or under trees, and save the open lawn for the heavy, staked pieces.
Will rain ruin my cardboard and paper decorations?
It can, but sealing fixes it. Coat cardboard tombstones with clear outdoor sealer on both sides, or build them from foam board instead, which ignores water completely. Paper bag luminaries should come in during storms. The bags are cheap to replace, but the LED lights inside are worth protecting. Fabric projects like cheesecloth ghosts just need to dry out, and they are usually fine by morning.
Are DIY luminaries safe to leave out?
Yes, as long as every flame is fake. Use only battery-operated LED tea lights or solar lights in milk jugs, paper bags, and pumpkins. Never use real candles around paper, plastic, dried corn, or hay. Keep anything with a light away from direct contact with fabric decorations. The National Fire Protection Association recommends flameless candles for outdoor decorating, and their candle safety tips are a quick, useful read before you set up.
How do I light my yard without outdoor outlets?
Solar and battery power cover almost everything here. Solar spotlights stake into the ground and charge all day, which is perfect for highlighting ghost rows, pumpkin towers, and graveyard scenes. Battery-operated fairy lights with built-in timers handle witch hats, luminaries, and wrapped pillars. Set the timer once and they light themselves every evening.
Which of these projects are good to make with kids?
Milk jug ghosts, glowing bush eyes, window silhouettes, and paper bag luminaries are the best kid-friendly picks: no sharp tools, no heavy lifting, and plenty of drawing and cutting. Let kids design the ghost faces, cut the eye shapes, and draw the window scenes while an adult handles anything that needs a ladder or a staple gun.
Your Yard Is Ready
These 16 DIY outdoor Halloween decorations prove you do not need a big budget or special skills to have the most talked-about yard on the street. Start with three or four projects, anchor everything well, and let the display grow through October. When Halloween night arrives and the luminaries are glowing, you will be glad you built it yourself. Happy haunting.