
18 Christmas Tree Decor Ideas

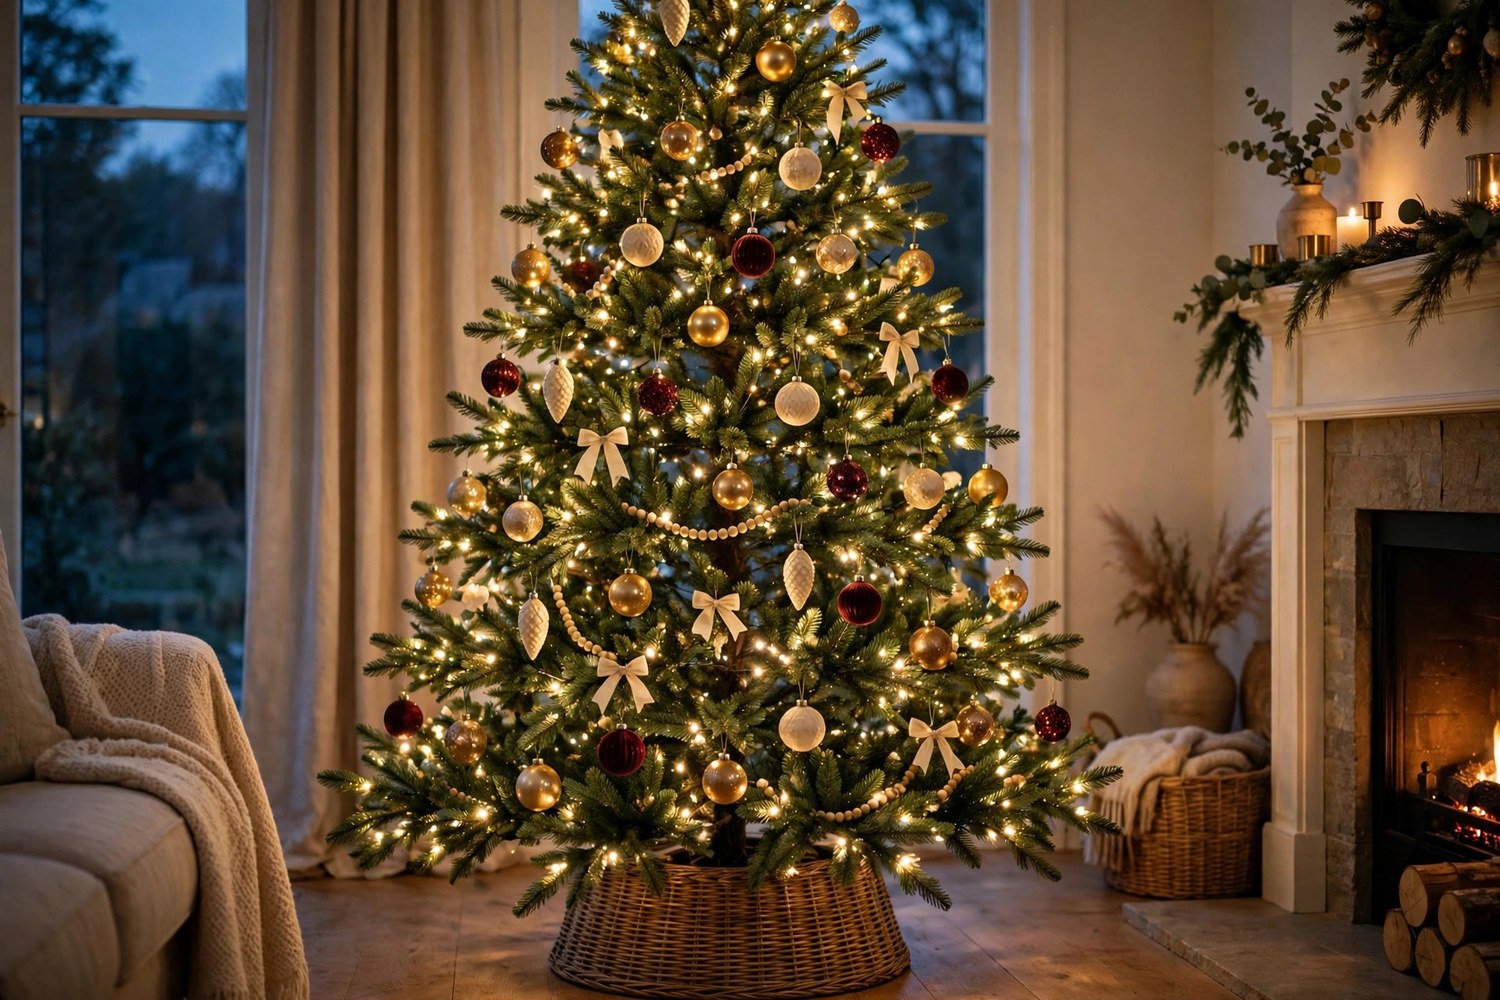
A decorated tree can go two ways: pulled together and glowing, or a little bit random, with every ornament you own competing for the same branch. If you are looking for christmas tree decor ideas that make a full-size tree look styled rather than stuffed, the secret is choosing a direction before the first ornament comes out of the box. The 18 ideas below each give a tree a clear identity, from jewel tones and mixed metals to dried orange slices and oversized bows, and each works on a real or artificial tree in the 6 to 9 foot range. Pick the look that fits your rooms, borrow a detail or two from another, and stop there. Prefer a calmer approach? These simple Christmas decor ideas take the season in a quieter direction.
Key Takeaways
- The strongest 2026 trend is personal: story-led trees built from heirloom and sentimental ornaments lead the season, ahead of any single color.
- Rich color is back — jewel tones, burgundy with bronze and taupe, and softened cranberry red with antique gold are the palettes to know.
- Technique matters as much as ornaments: filler picks first, a few oversized pieces for scale, and thousands of tiny warm lights change how a tree reads.
- Every idea here is sized for a full-size tree (6 to 9 feet); small and tabletop trees get their own guide in this series.
- Finish the tree at both ends: a deliberate topper and a collar or styled base make the whole thing look intentional.
1. Lead with the Story: Heirloom and Sentimental Ornaments
The most decorated tree of 2026 is not the most matched one. Personalization tops this year’s trend lists: trees built from family heirlooms, handmade ornaments, travel souvenirs, and keepsakes collected over years, with a few new pieces chosen for meaning rather than coordination. It cannot be copied from a catalogue, which is exactly why guests stand in front of it longest.
Build it deliberately so the collection reads as curated, not cluttered. Give the most meaningful pieces the front of the tree at eye level. Then support them with plain filler baubles in one finish, say all matte gold or all warm white, tucked deeper into the branches. The simple background makes the story pieces glow, and the tree stays cohesive however mixed the collection is.

Tip: Group story ornaments in small clusters of related pieces, a souvenir near the photo ornament from the same trip, rather than scattering them evenly. Clusters invite people to lean in and ask.
2. Go Rich with a Jewel-Tone Palette
Emerald, sapphire, ruby, and amethyst on deep green branches is the boldest color story of the season. Jewel tones work because they share the tree’s own depth, so the ornaments read as richness rather than noise, and brass or gold accents warm the palette up. This is the tree for a room that can take drama, where the tree is the undisputed centerpiece.
Layer the colors evenly instead of zoning them, so every side of the tree carries all four tones. Mix finishes within each color, velvet and matte alongside gloss and glitter, because flat color at this saturation can look heavy. Warm white lights are the right partner; they deepen jewel tones the way colored lights never do.

Tip: If a full jewel tree feels like too much commitment, run the palette on one side of the color wheel only, emerald and sapphire with gold, for the same richness at half the intensity.
3. Try Burgundy, Bronze, and Taupe — the New Warm Neutrals
Burgundy has quietly become the season’s red, and it looks best the 2026 way: grounded by bronze, warm brown, and taupe instead of bright gold and white. The result feels like candlelight and old wood, sophisticated without going dark, and it suits homes with warm neutral sofas, leather, and wood furniture, where classic red can look a little shouty.
Build the base with taupe and bronze ornaments, then let burgundy be the accent that carries the eye. Velvet-finish burgundy pieces work especially well because the color goes deeper in a matte pile. Keep metals in the bronze and antique-brass family so nothing reads shiny-new against the muted palette.
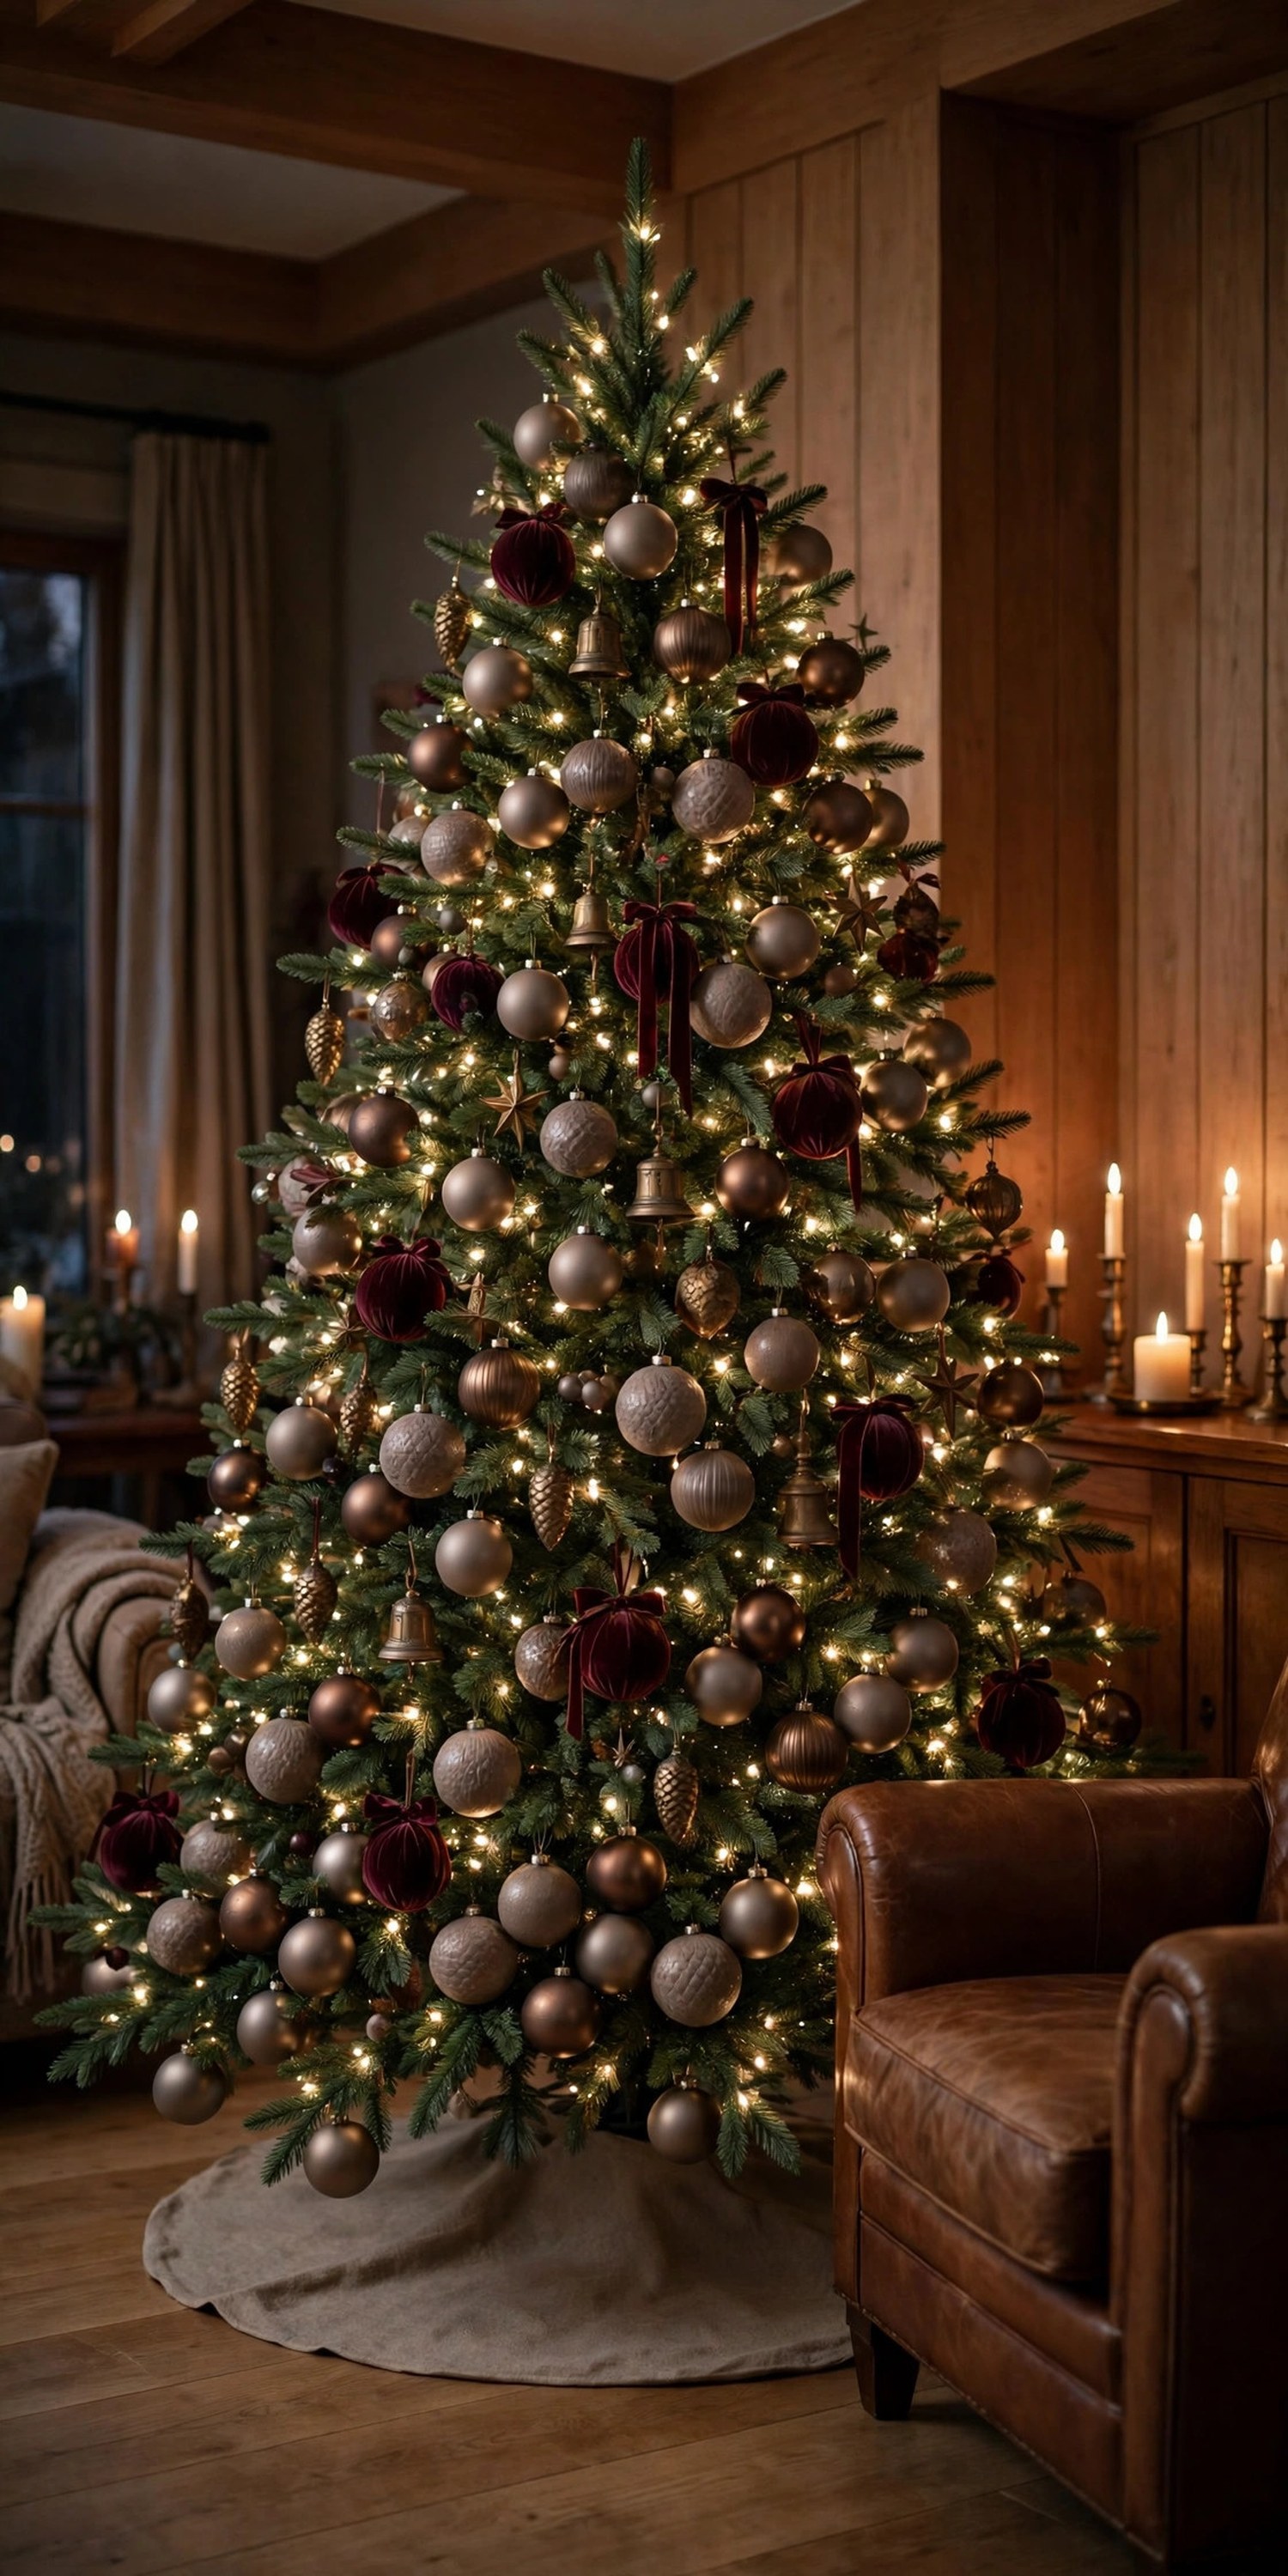
Tip: Test the palette in daylight before committing. Burgundy and bronze can merge into one brown blur under dim warm bulbs, so add a few champagne pieces if the tree needs separation.
4. Soften the Classic: Cranberry Red and Antique Gold
Red and gold never actually leaves, but the 2026 version is softer than the glossy fire-engine pairing of years past. Think cranberry, faded brick, and berry tones instead of primary red, and antique gold with a brushed, slightly aged finish instead of mirror shine. The tree still reads as traditional from across the room, just gentler up close.
This is the easiest refresh on the list if you already own a classic set: keep your red and gold ornaments and change the supporting cast. Swap bright white lights for warm ones, add a few deep cranberry pieces to shift the red family’s centre of gravity, and retire anything chrome-bright for the year.

Tip: Sort red ornaments into true red and cranberry piles before hanging. On the tree, use the cranberry pieces in the spotlight positions and tuck the brightest reds deeper in, where branches mute them.
5. Mix Your Metals: Gold, Champagne, and Copper
A tree decorated entirely in metal finishes, gold, champagne, copper, bronze, and a touch of rose gold, in gloss, matte, and glitter, creates depth without a single bright color. Metallics bounce warm light around the branches, making this an especially good look for a darker corner or a room with little winter daylight.
The technique is contrast, not matching. Place a matte champagne bauble beside a glossy gold one and a brushed copper one, and repeat that trio all over the tree. If every ornament shares one finish, the tree flattens into a shiny mass. Keep lighting warm white only; cool white turns golds grey and cheapens the effect.
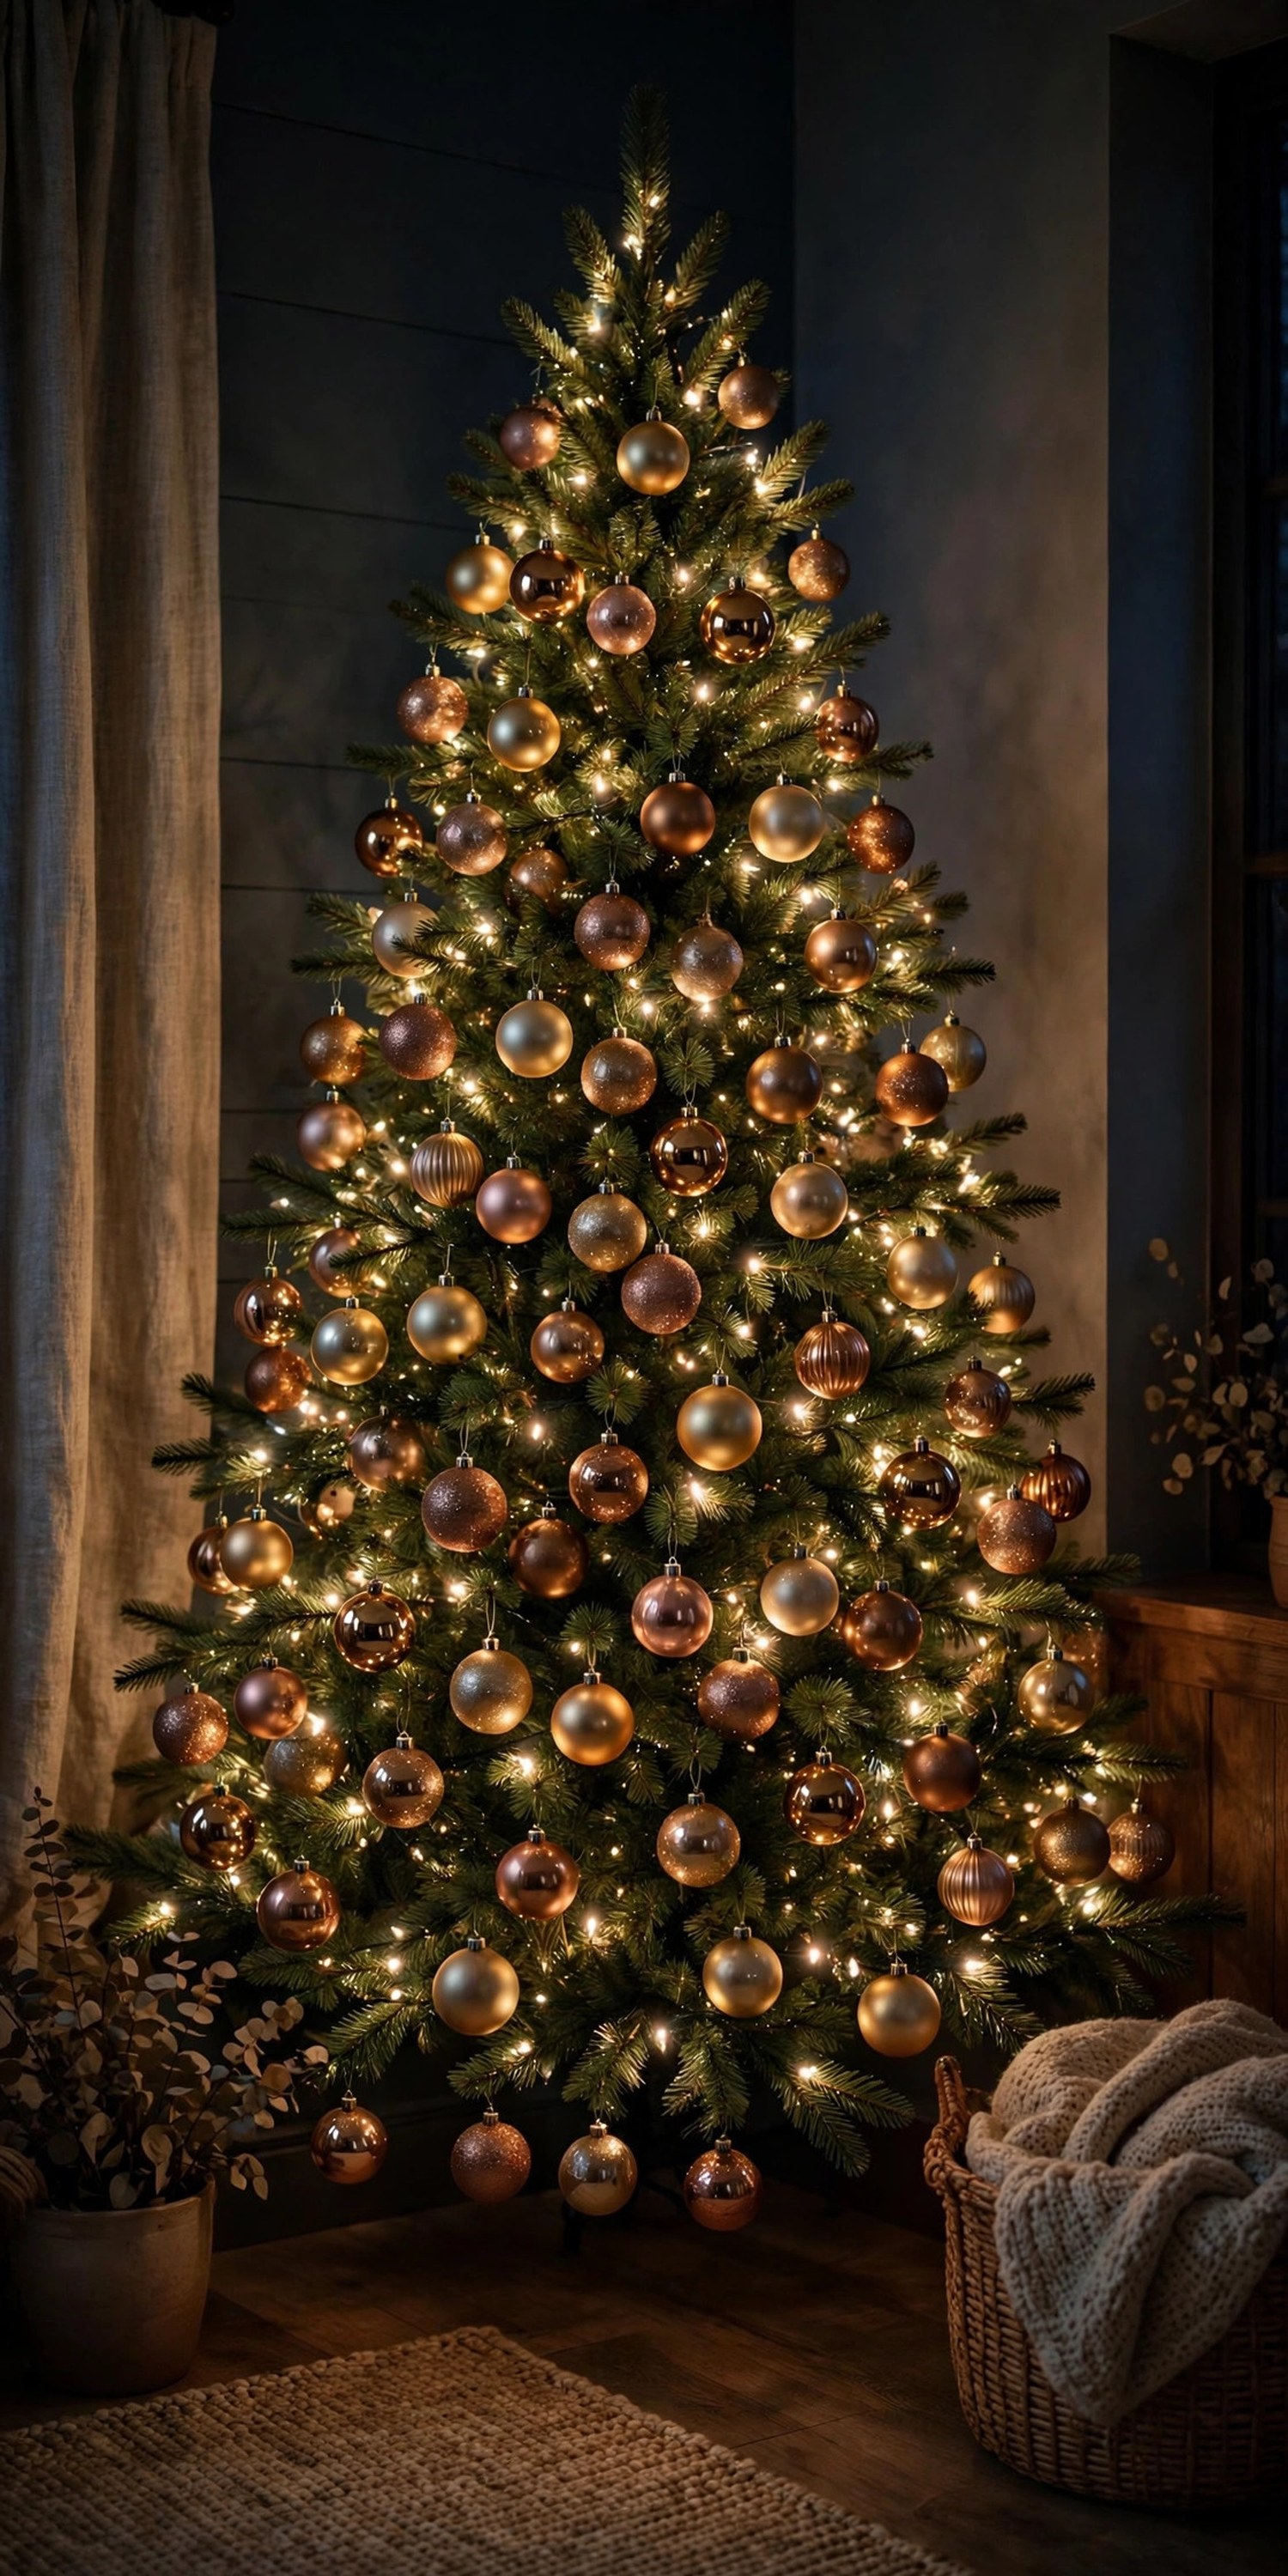
Tip: Hold one metal back as the accent, used at roughly one ornament in five. A mostly gold and champagne tree with occasional copper reads designed; equal parts of everything reads undecided.
6. Borrow the Ralph Lauren Look: Plaid, Velvet, and Warm Gold
The old-money holiday look keeps gathering momentum: deep red and hunter green, plaid, velvet bows, pinecones, and warm gold, all of it polished but unmistakably cozy. On a tree, it reads like Christmas at a country house, layered, traditional, and completely unbothered by minimalism.
Anchor the tree with a plaid element that repeats, ribbon worked through the branches or plaid baubles in the same tartan family, then build around it with deep red and green ornaments, gold accents, and natural pinecones. Velvet is the texture that sells the look, so favor velvet-finish ornaments and bows over anything glossy or glittered.
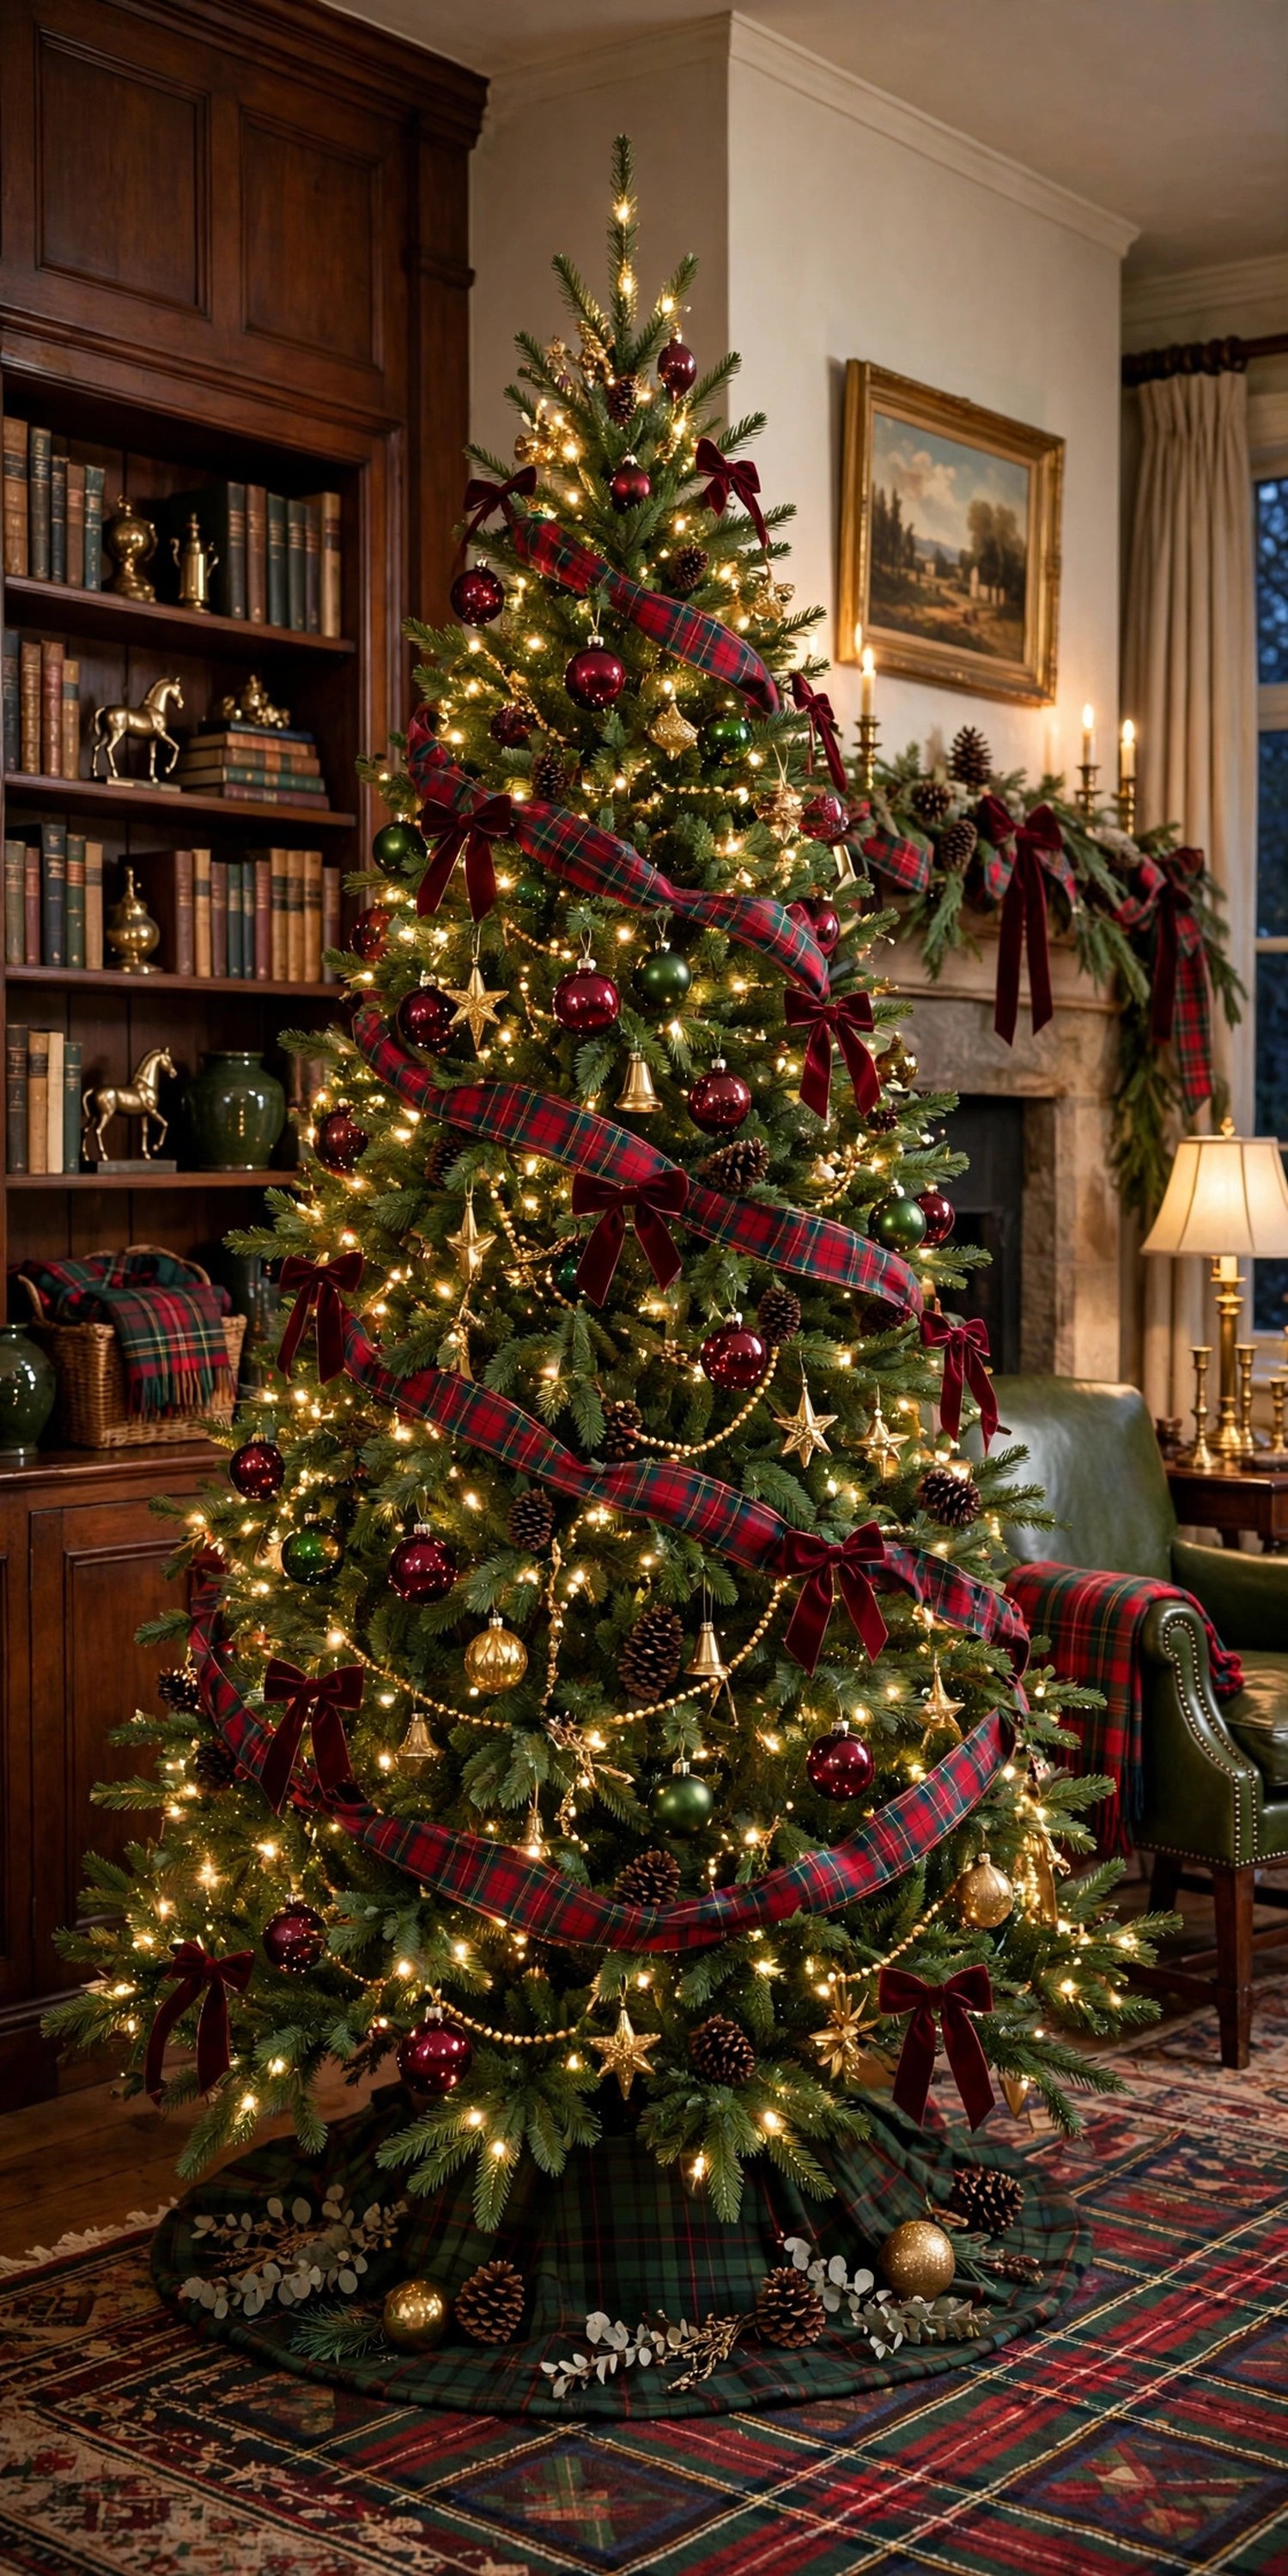
Tip: Keep the plaid to one scale. One tartan pattern, repeated, looks tailored; two different plaids on one tree fight each other and the whole effect turns busy.
7. Bring Back Vintage: Retro Ornaments and Mercury Glass
Neo-nostalgia is having a real moment: shiny retro baubles in the mid-century style, mercury glass with its soft mottled glow, indented reflector ornaments, and shapes that look inherited because many of them are. A vintage tree feels warm in a way new sets rarely do, and secondhand hunting makes it one of the friendliest looks for a budget.
Mix genuine vintage finds with good reproductions, since old glass is fragile and rarely survives in full sets, and hang the real pieces on the higher, safer branches. This is also the one tree where multicolored lights feel historically right: a strand of retro color gives the mercury glass something playful to reflect.
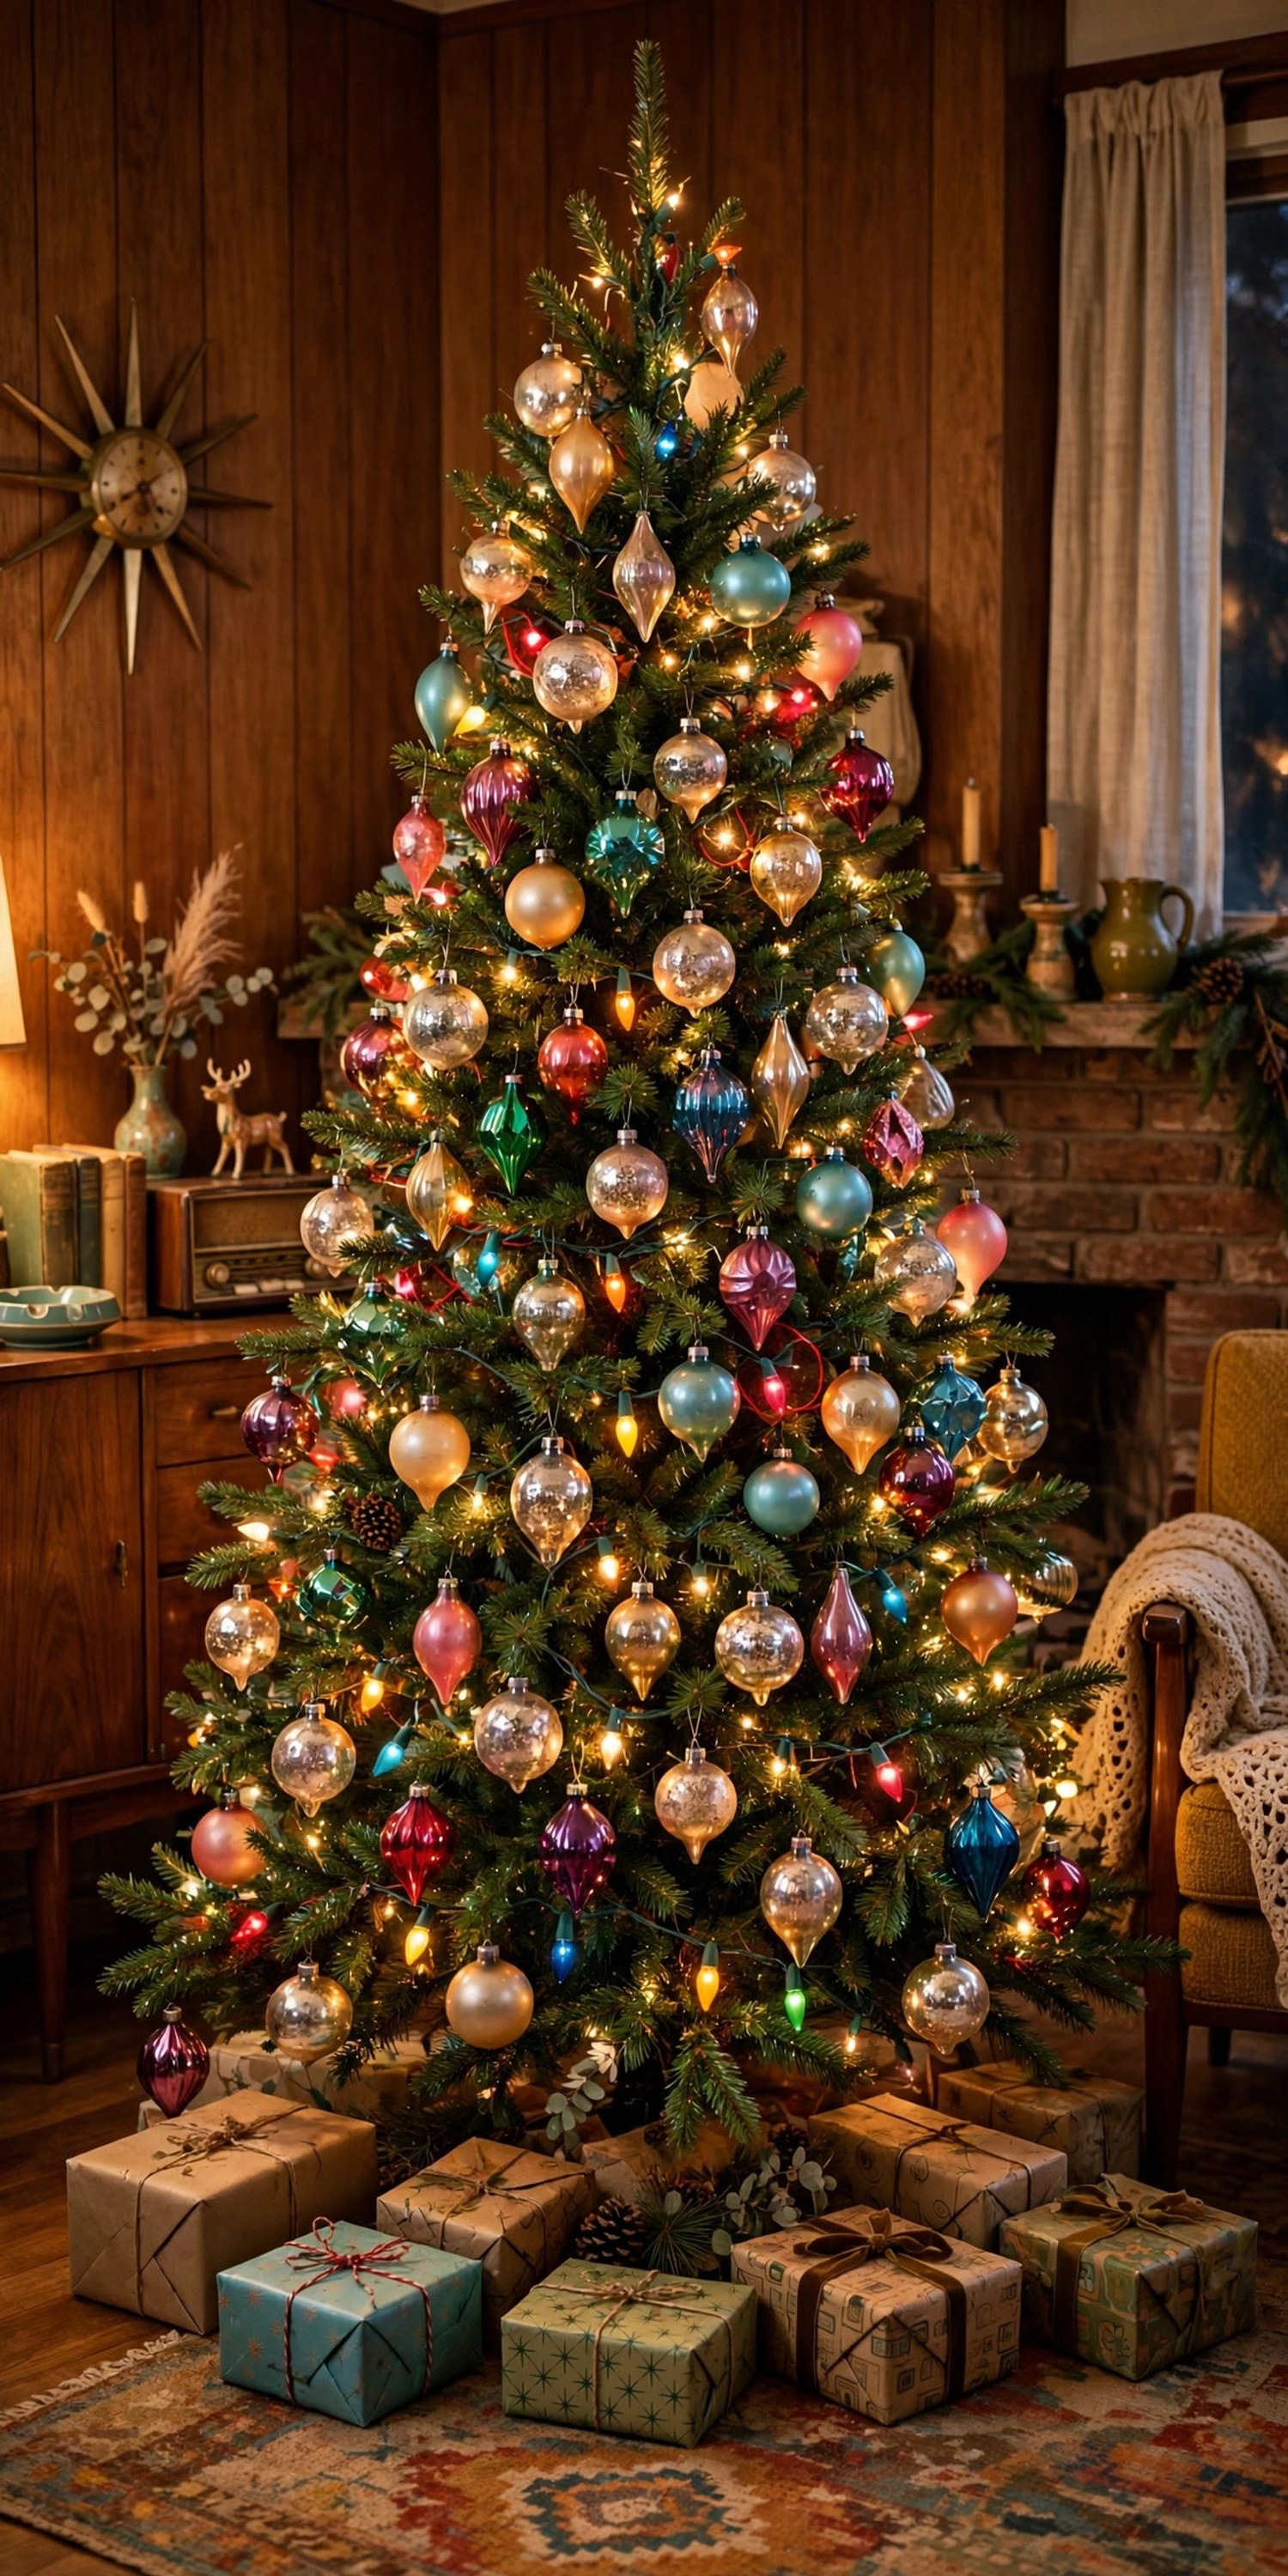
Tip: Check vintage ornaments for worn caps and cracked necks before hanging, and re-cap any that wobble. Most vintage glass is lost to a failed hanger, not to the tree.
8. Go Natural with Dried Orange, Pinecones, and Wood
The natural tree builds its palette from the woodshed and the kitchen: dried orange slices that glow like stained glass against the lights, pinecones, unfinished wood ornaments, felted wool pieces, and twine instead of wire hooks. Warm browns, creams, and deep greens keep it earthy, and almost nothing on it is plastic.
Texture does the decorating here, so vary the surfaces deliberately: rough cone, smooth wood, translucent citrus, soft felt. Dried orange slices earn their place near lights, where they light up amber. A few cinnamon sticks bundled with twine add scent as well as shape, especially on a real tree where the fragrances mingle.

Tip: Dry orange slices thoroughly before hanging, until they feel papery and light. Under-dried slices can go moldy by the third week indoors; properly dried ones keep for seasons in a sealed box.
9. Pair Artisan Glass with Matte Ceramic Ornaments
Some of the most beautiful trees this year are studies in texture rather than color: hand-blown glass ornaments with the slight imperfections that prove a person made them, hung beside matte ceramic pieces in the same palette. The glass catches and throws the light; the ceramic absorbs it and looks calm. Together they give a tree a depth that matched plastic sets never achieve.
Choose one palette and hold it across both materials, ivory and gold, or sage and cream, so the contrast lives in the finish rather than the color. Distribute the glass where light reaches it, on the outer third of the branches, and let the heavier ceramics sit slightly deeper, where branches support their weight.
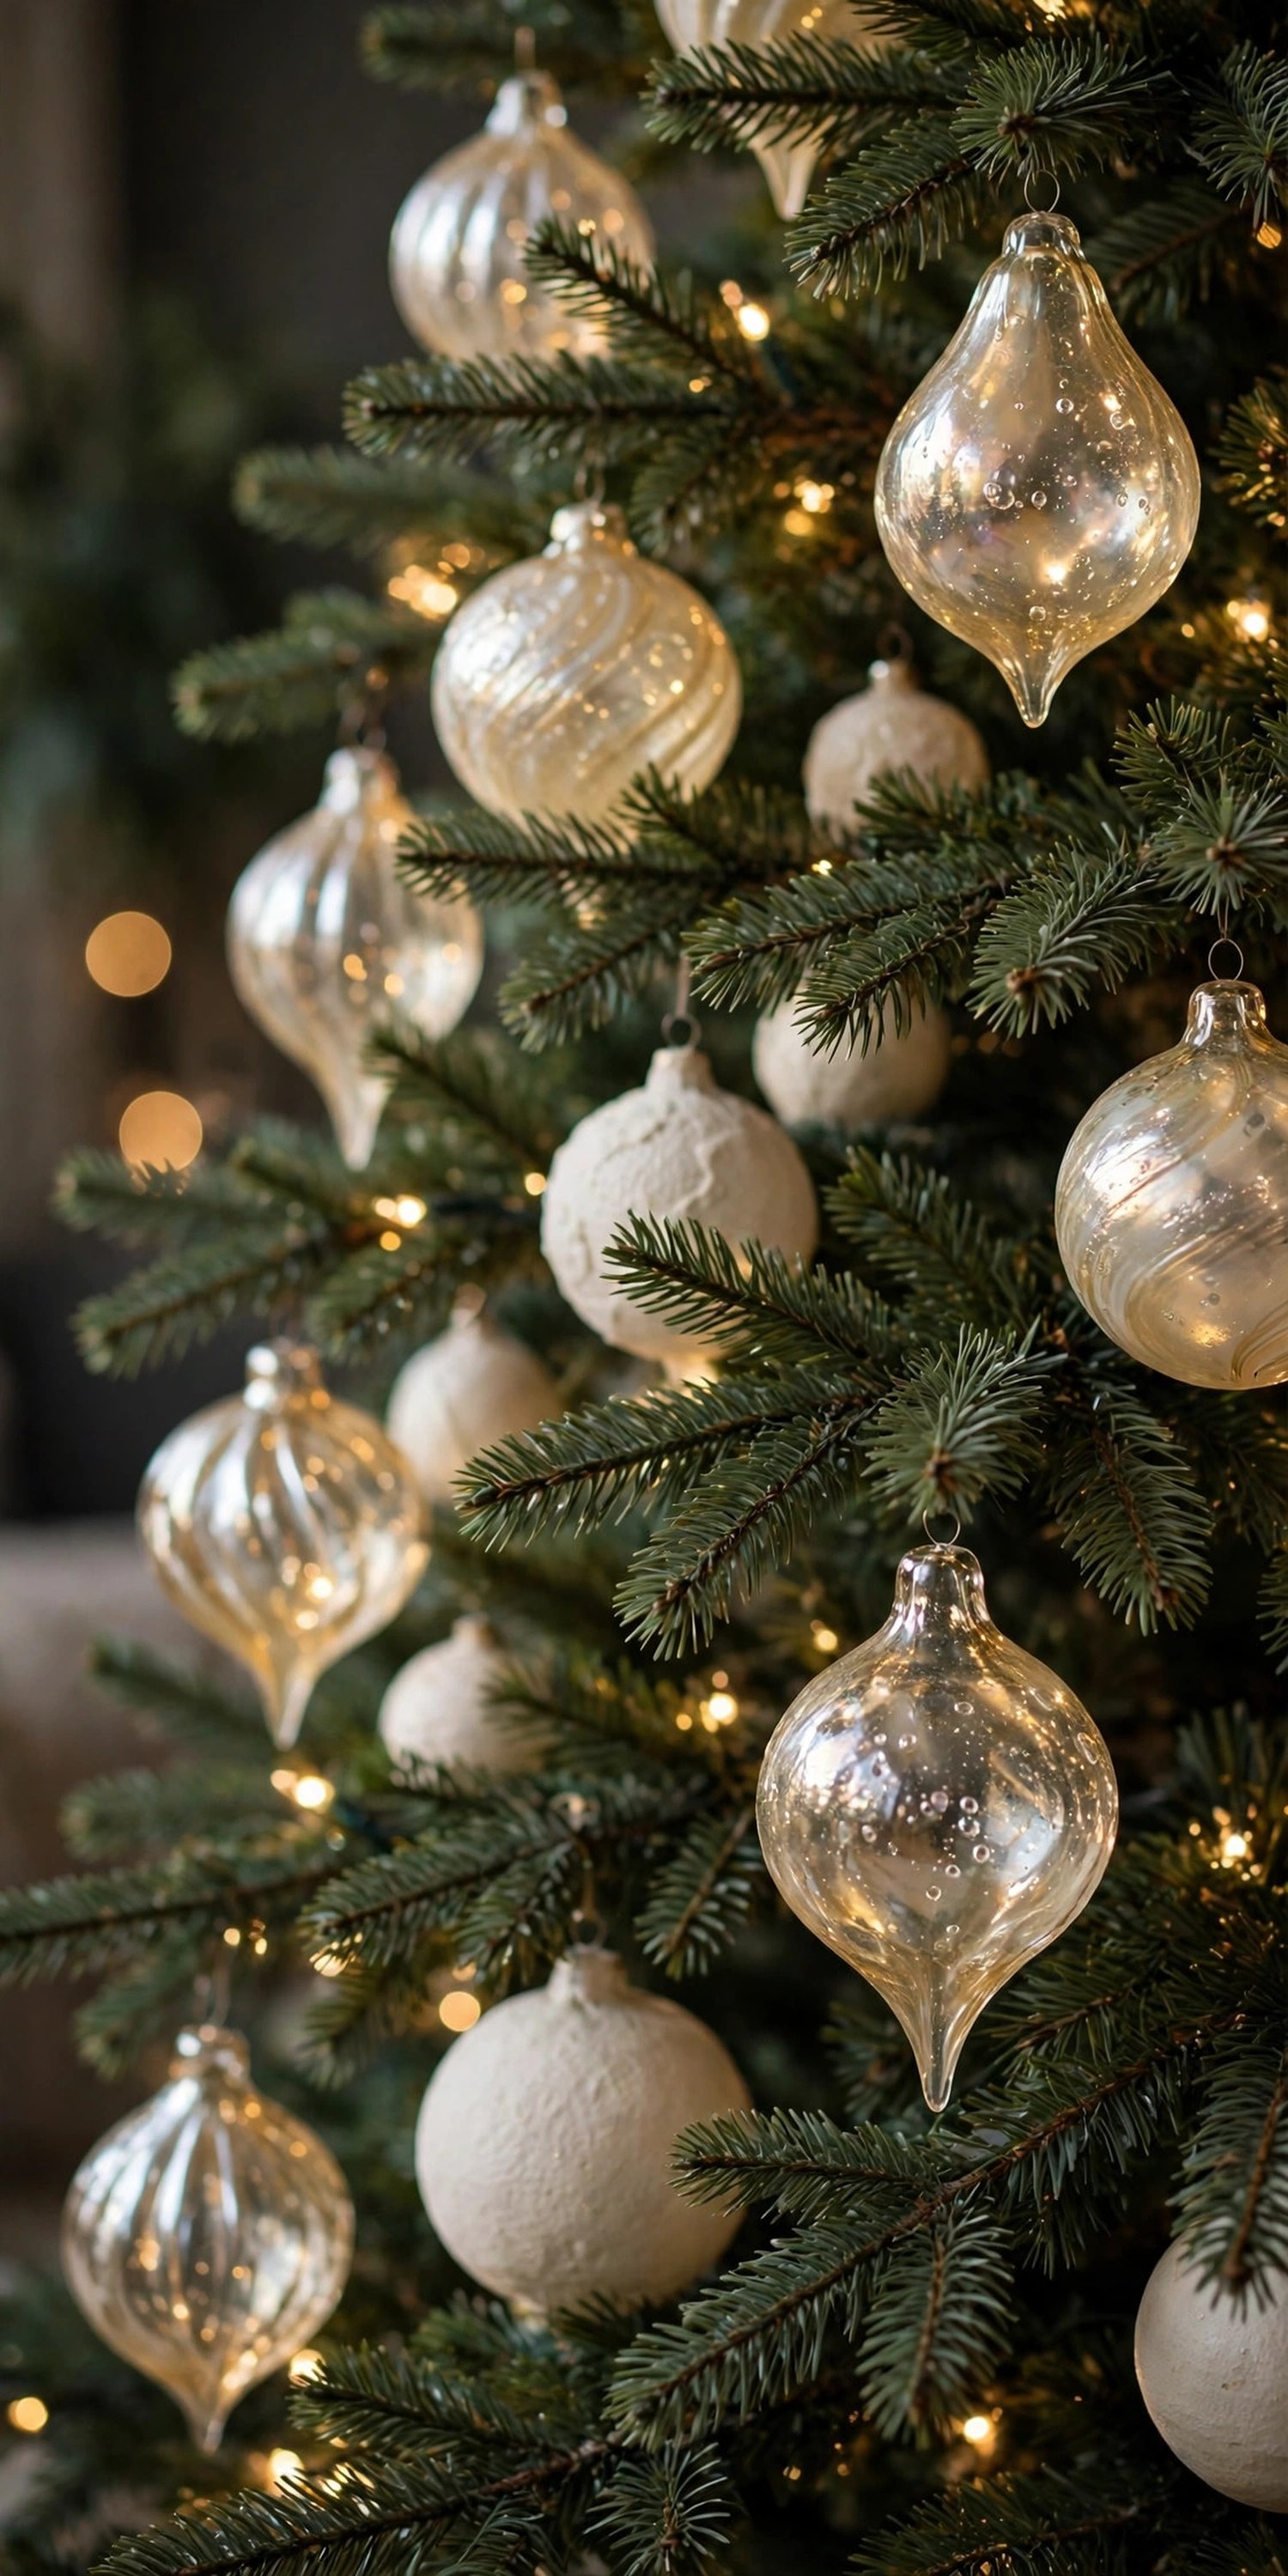
Tip: Ceramic ornaments are heavier than they look. Hang them on sturdy inner branches close to the trunk, and keep the featherweight glass for the delicate outer tips.
10. Supersize a Few Ornaments for Designer Scale
Stylist trees almost always cheat on scale: a handful of ornaments far larger than standard, two or three times the size of regular baubles, placed first and treated as the tree’s architecture. Big ornaments fill visual space fast, create the generous, abundant look of department-store trees, and make everything hung around them look more deliberate.
You do not need many. Place the oversized pieces evenly at staggered heights, slightly deep in the branches so they nestle rather than perch, then fill in with standard ornaments at normal spacing. The contrast only works if the big pieces stay the minority; once a third of the tree is oversized, nothing reads as large.

Tip: Put the single largest ornament at the tree’s visual centre, about chest height on the side facing the room. That one anchor piece organises everything hung after it.
11. Arrange Ornaments in an Ombré Gradient
Instead of mixing colors evenly, arrange them in a slow gradient: deepest shades at the bottom, lightening through the middle, to the palest ornaments at the crown. An ombré tree photographs beautifully because the eye travels up the color change, and it gives mixed collections a structure that makes them look planned.
Sort every ornament into three piles before you start, dark, mid, and light, and be honest about borderline pieces. Within each zone, mix shapes and finishes freely; the color discipline is doing the organizing. A close cousin works too: crisp horizontal color blocks, three distinct bands stacked up the tree, for a bolder, more graphic effect.

Tip: Photograph the tree from across the room once the gradient is hung. A phone picture exposes a muddy middle zone instantly, and swapping six ornaments fixes it.
12. Fill First with Picks, Sprays, and Florals
Fullness is mostly technique, and the technique is filler. Floral picks and sprays, berry clusters, poinsettia heads, magnolia leaves, gilded branches, tucked into the branches before the ornaments go on, close the gaps, add a second layer of texture, and make an ordinary tree look lush. It is how a sparse or older artificial tree gets its second life.
Use one pick style throughout, or one per zone, inserting picks at a slight upward angle so they read as growing out of the tree. Fill the interior first, where the eye catches dark holes, then the silhouette edges. Ornaments hung afterwards sit on a finished background instead of floating in gaps, so you need fewer of them to look abundant.

Tip: Count picks in dozens and buy for the tree’s front first if the budget is tight. A tree standing in a corner only needs its visible two-thirds filled to look complete.
13. Choose a Sparse, Sculptural Alpine-Style Tree
After years of hyper-dense conical trees, the shape itself is changing. Alpine-style trees have open, layered branches with real space between the tiers, modelled on mountain evergreens. The architecture is the appeal: each ornament hangs free and visible instead of wedging into a wall of green, so individual pieces, especially beautiful or large ones, finally get seen.
Dress an Alpine tree like a gallery. Favour ornaments with silhouette and presence, finials, drops, icicles, and artisan shapes that use the vertical space between branches. Keep the color story tight so the openness reads sculptural rather than unfinished, and let a few branches stay bare on purpose.

Tip: Long ornaments are the Alpine tree’s best friend. Drops and finials that would disappear inside a dense tree hang to their full length here, so save your longest pieces for it.
14. Crown It with an Oversized Bow
The topper of the moment is not a star or an angel but one generous bow, made from wide wired ribbon in velvet or satin, with tails long enough to trail into the top branches. A bow topper softens the tree’s point, suits almost any color scheme, and has a handmade warmth that suits this site’s whole approach to the season. It is also genuinely easy: one great bow does the work of a dozen ornaments.
Scale is everything. A topper bow should look slightly too big in your hands and exactly right on the tree, loops fluffed fully before it goes up. Let two long tails hang through the top third of the tree, wired loosely to branches so they drape instead of sticking out. Match the ribbon to your palette: burgundy velvet for classic trees, champagne satin for metallic ones.
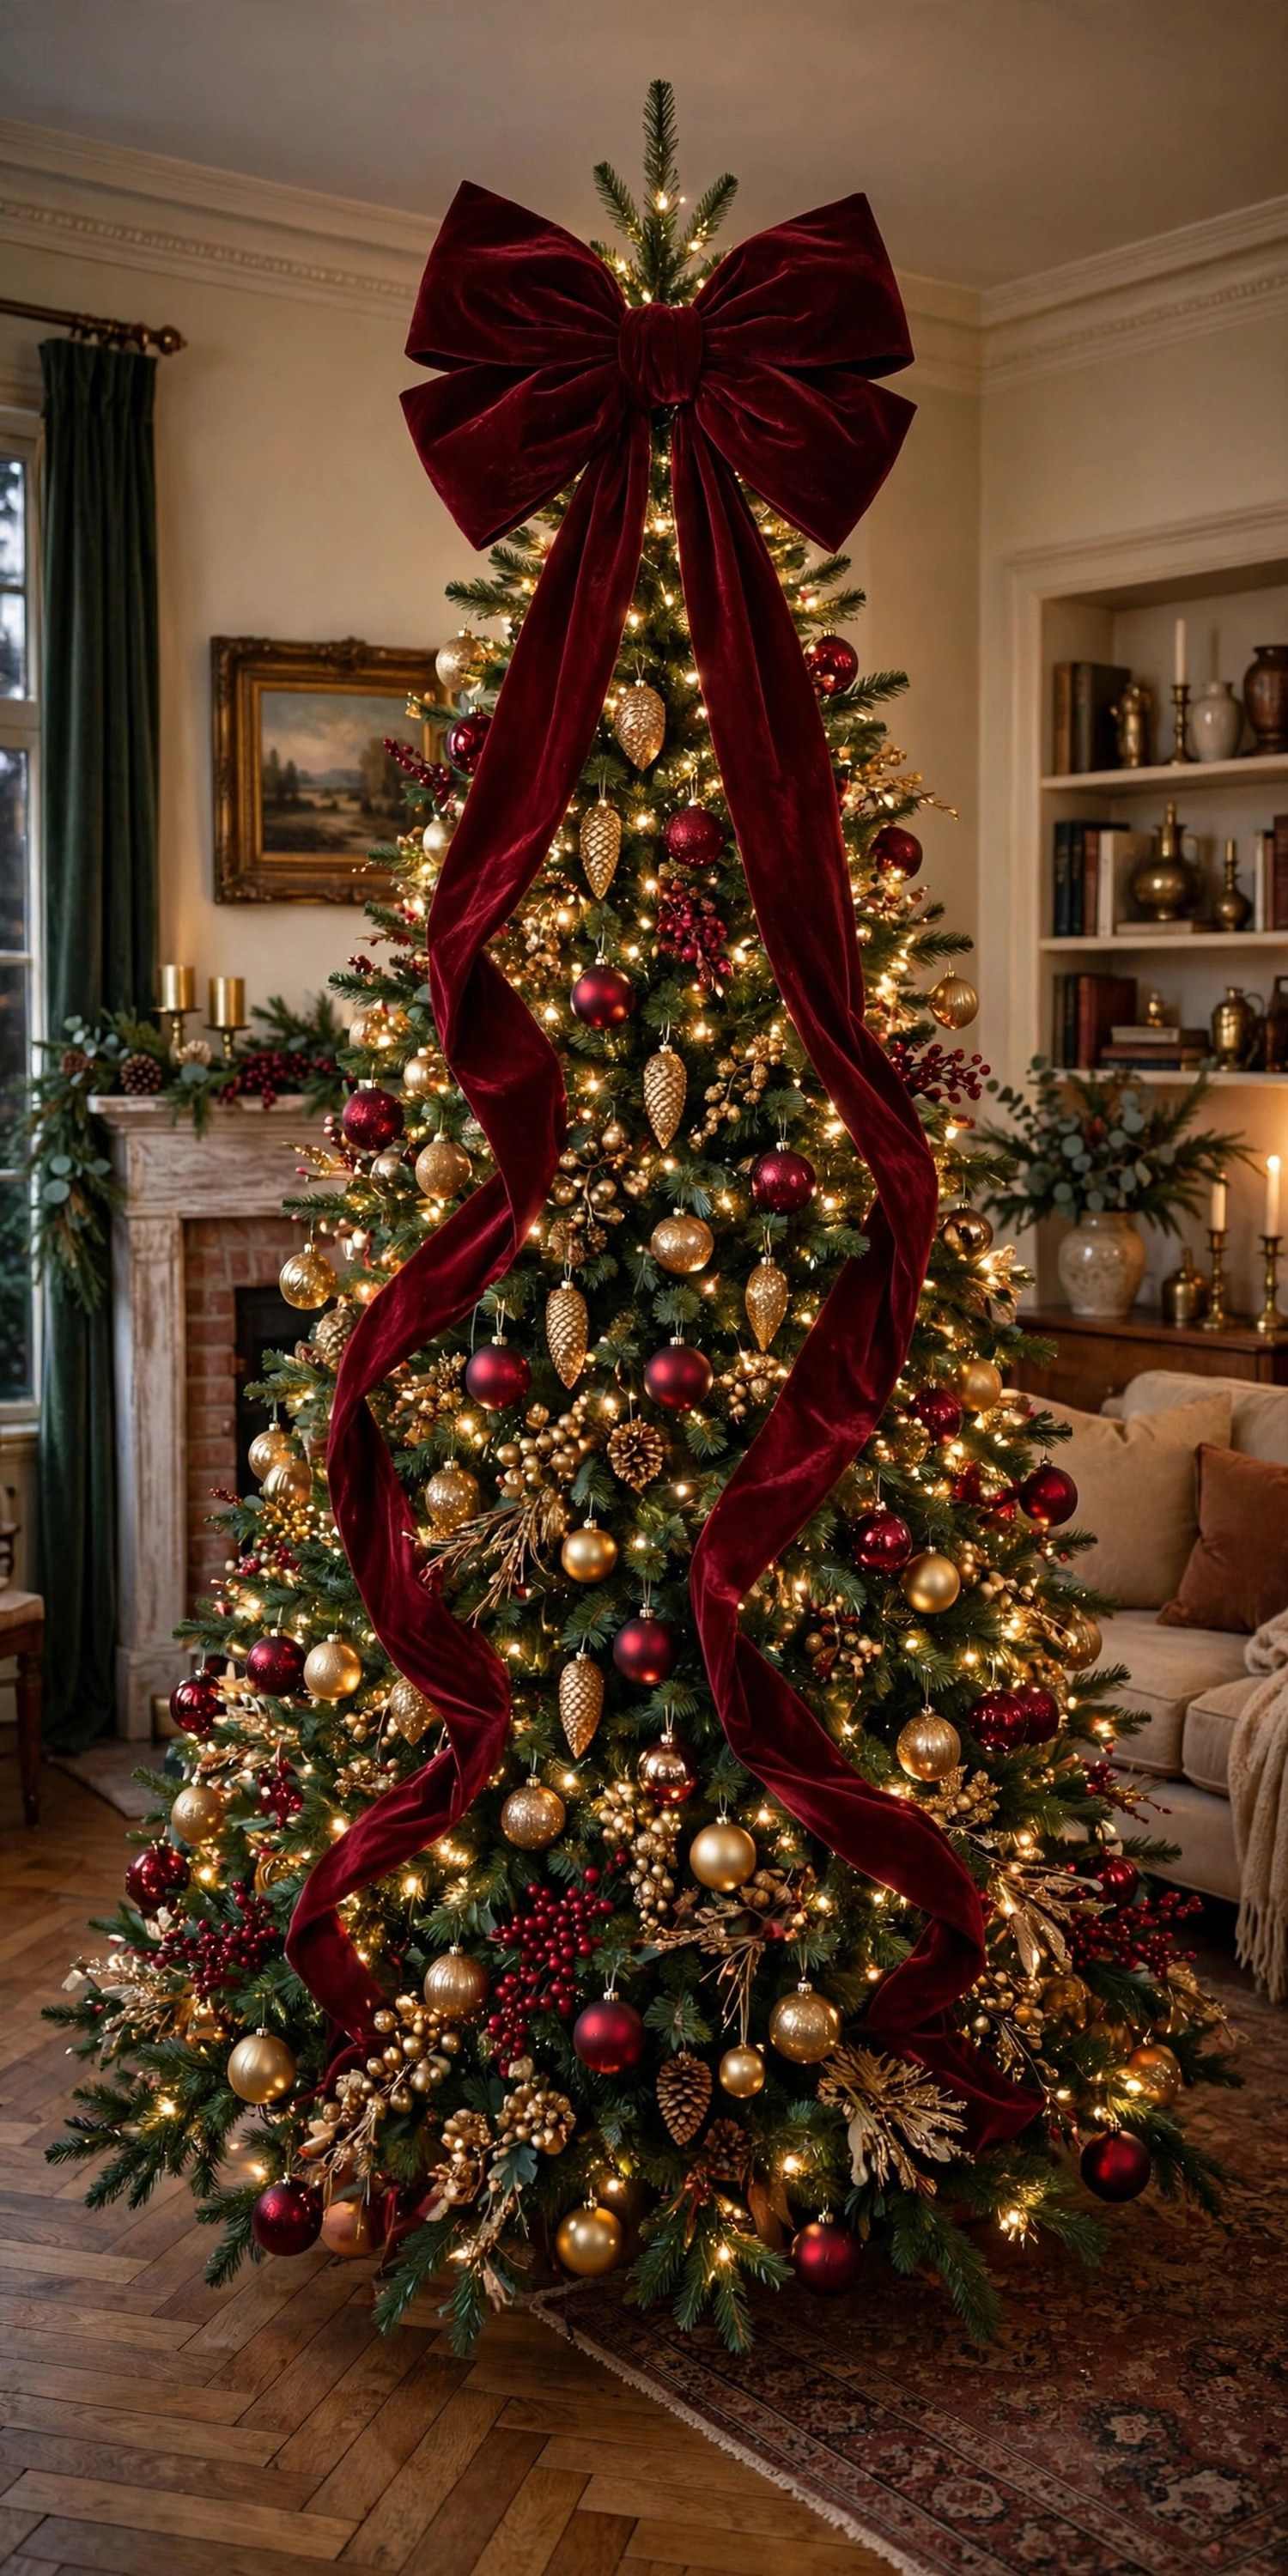
Tip: Make the bow off the tree, on a table, where both hands and a mirror are available. Shaping loops at the top of a ladder, one-handed, is how good ribbon gets wasted.
15. Layer in Thousands of Tiny Warm Lights
The lighting trend of 2026 is not more color, it is more points of light. Ultra-warm micro-LED and cluster strands carry thousands of tiny bulbs that read as a glow inside the tree rather than dots on its surface, closer to candlelight than to the spaced bulbs of older strings. A tree lit this way looks finished before an ornament touches it.
Layer rather than replace: keep a base of standard warm white strands for coverage, then weave micro-LED strands deeper into the interior, where their tiny bulbs create depth behind the ornaments. Smart, app-controlled sets are the flexible option, shifting from a soft dinner glow to a brighter twinkle for a party, but simple warm strands layered well get most of the effect for less.
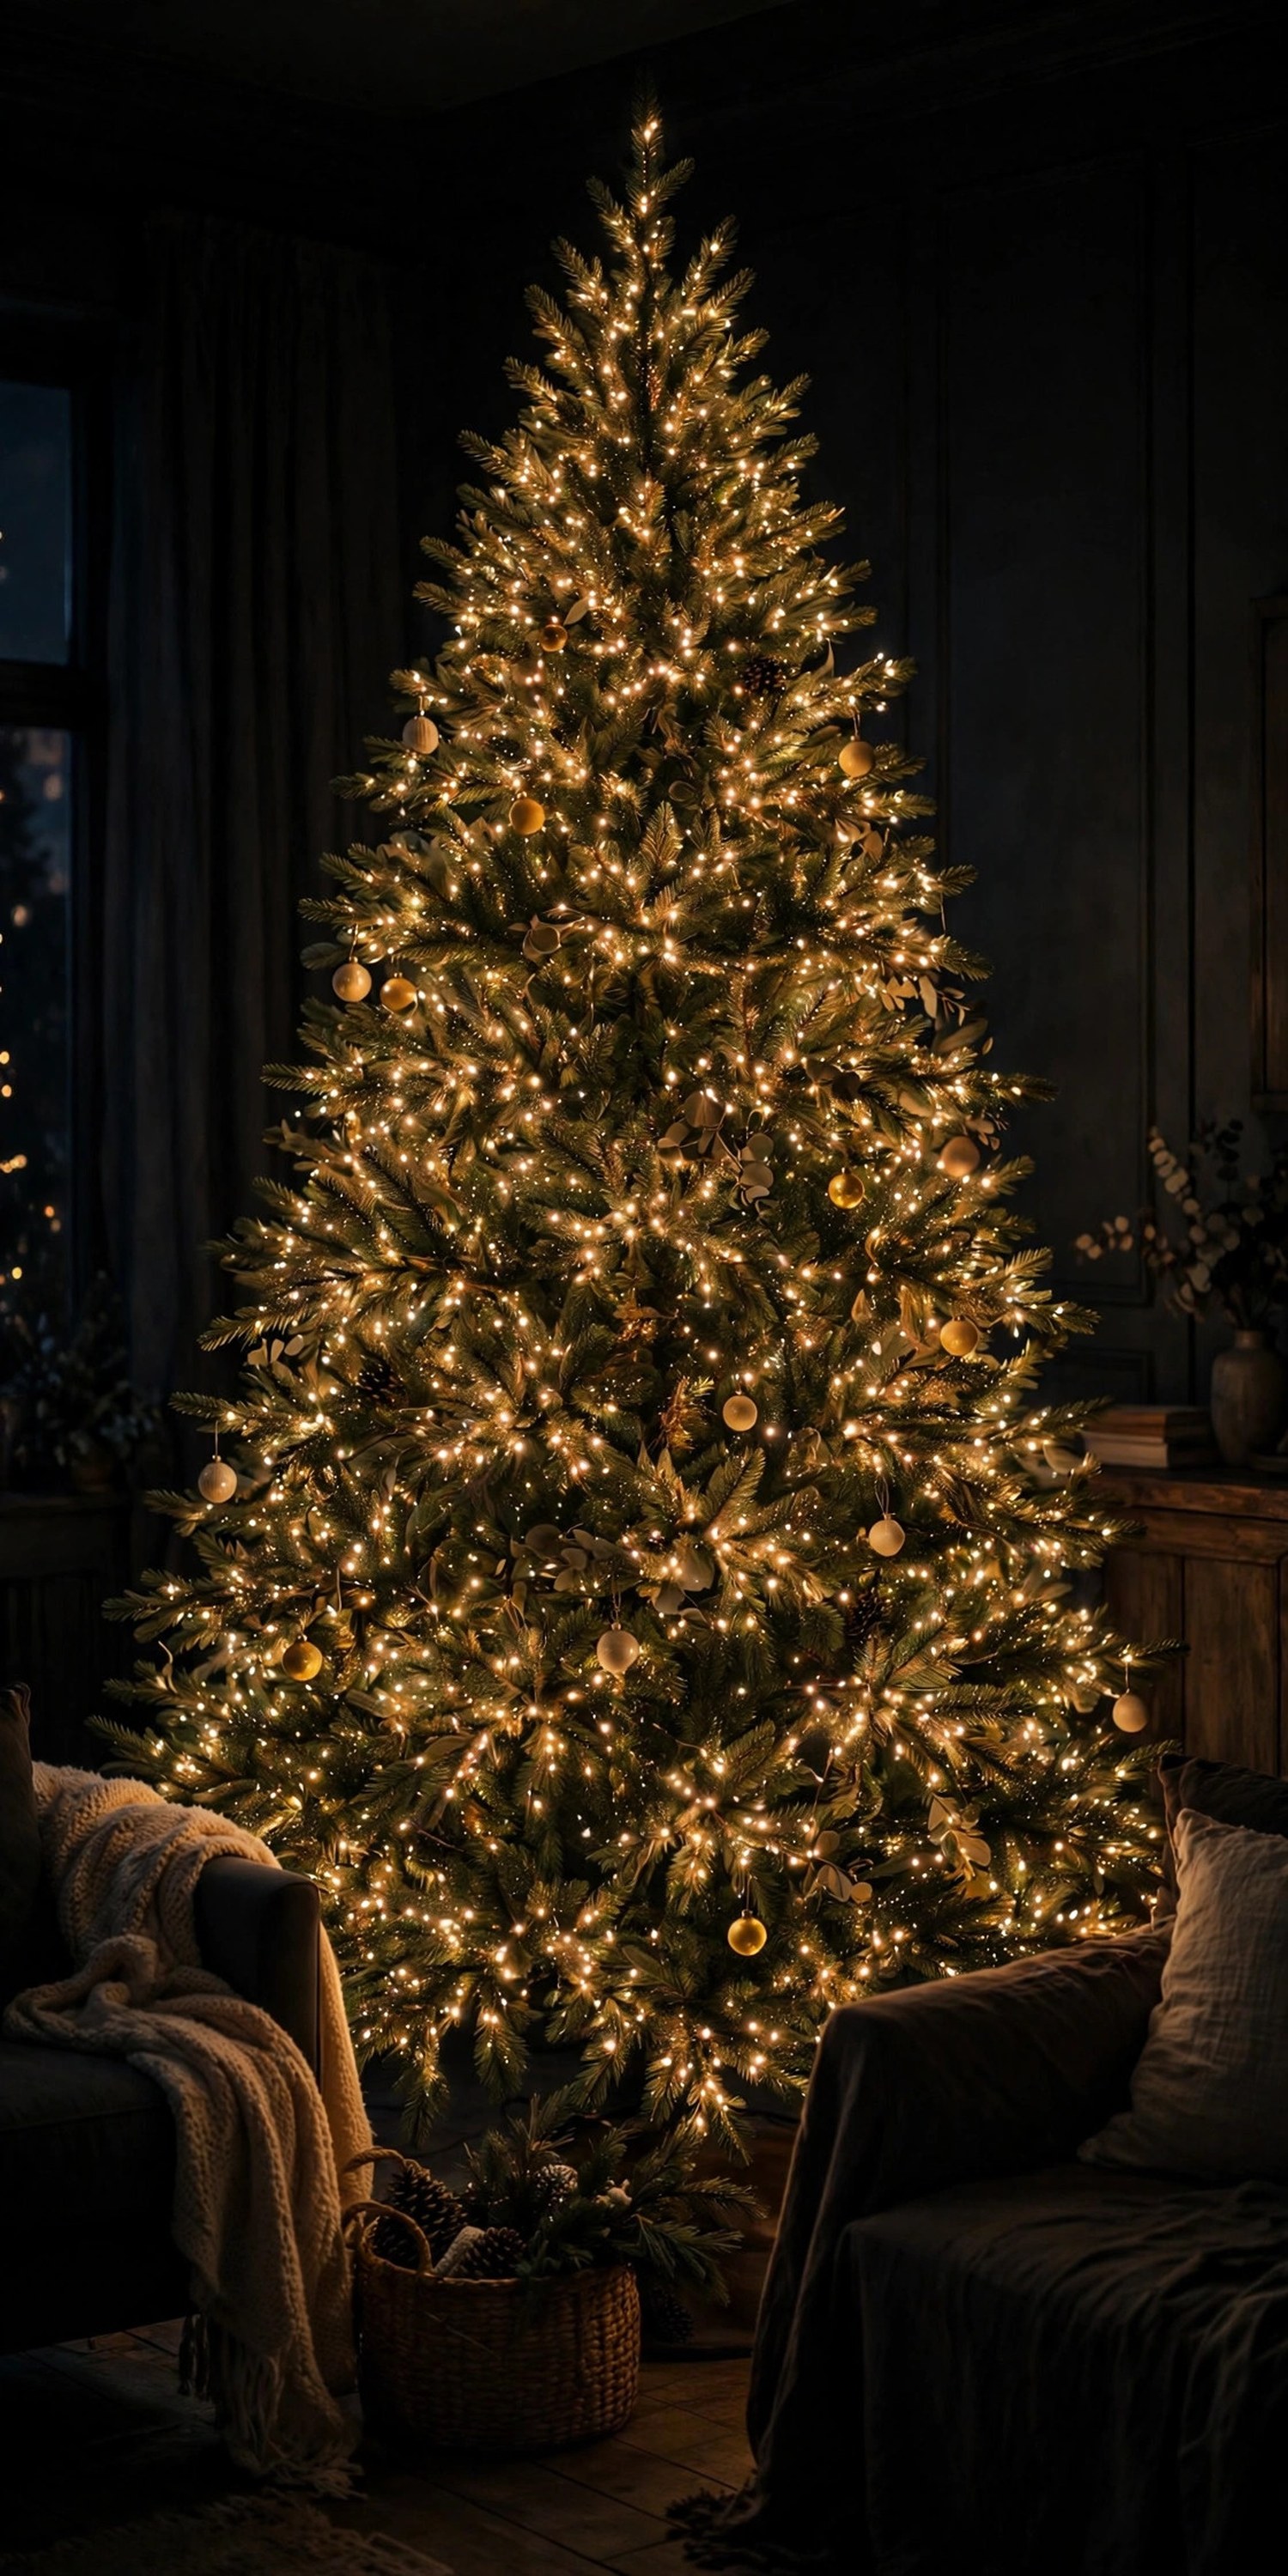
Tip: Judge your lights at night with the room lights off, the way guests will see the tree. Daylight hides thin patches that show the moment the room goes dim.
16. Swap the Skirt for a Tree Collar
The base of the tree finishes the picture, and the structured tree collar, a ring of woven seagrass, wicker, galvanized metal, or wood that hides the stand, gives a cleaner line than a pooled fabric skirt. It reads like furniture, photographs neatly, and never needs re-arranging when someone walks past with a gift bag.
Choose the material against the tree’s theme: woven textures for natural trees, galvanized metal for vintage looks, smooth wood or matte black for jewel and metallic trees. Check that the collar’s opening fits around your stand before the tree goes up; retrofitting one under a decorated tree is a miserable job.
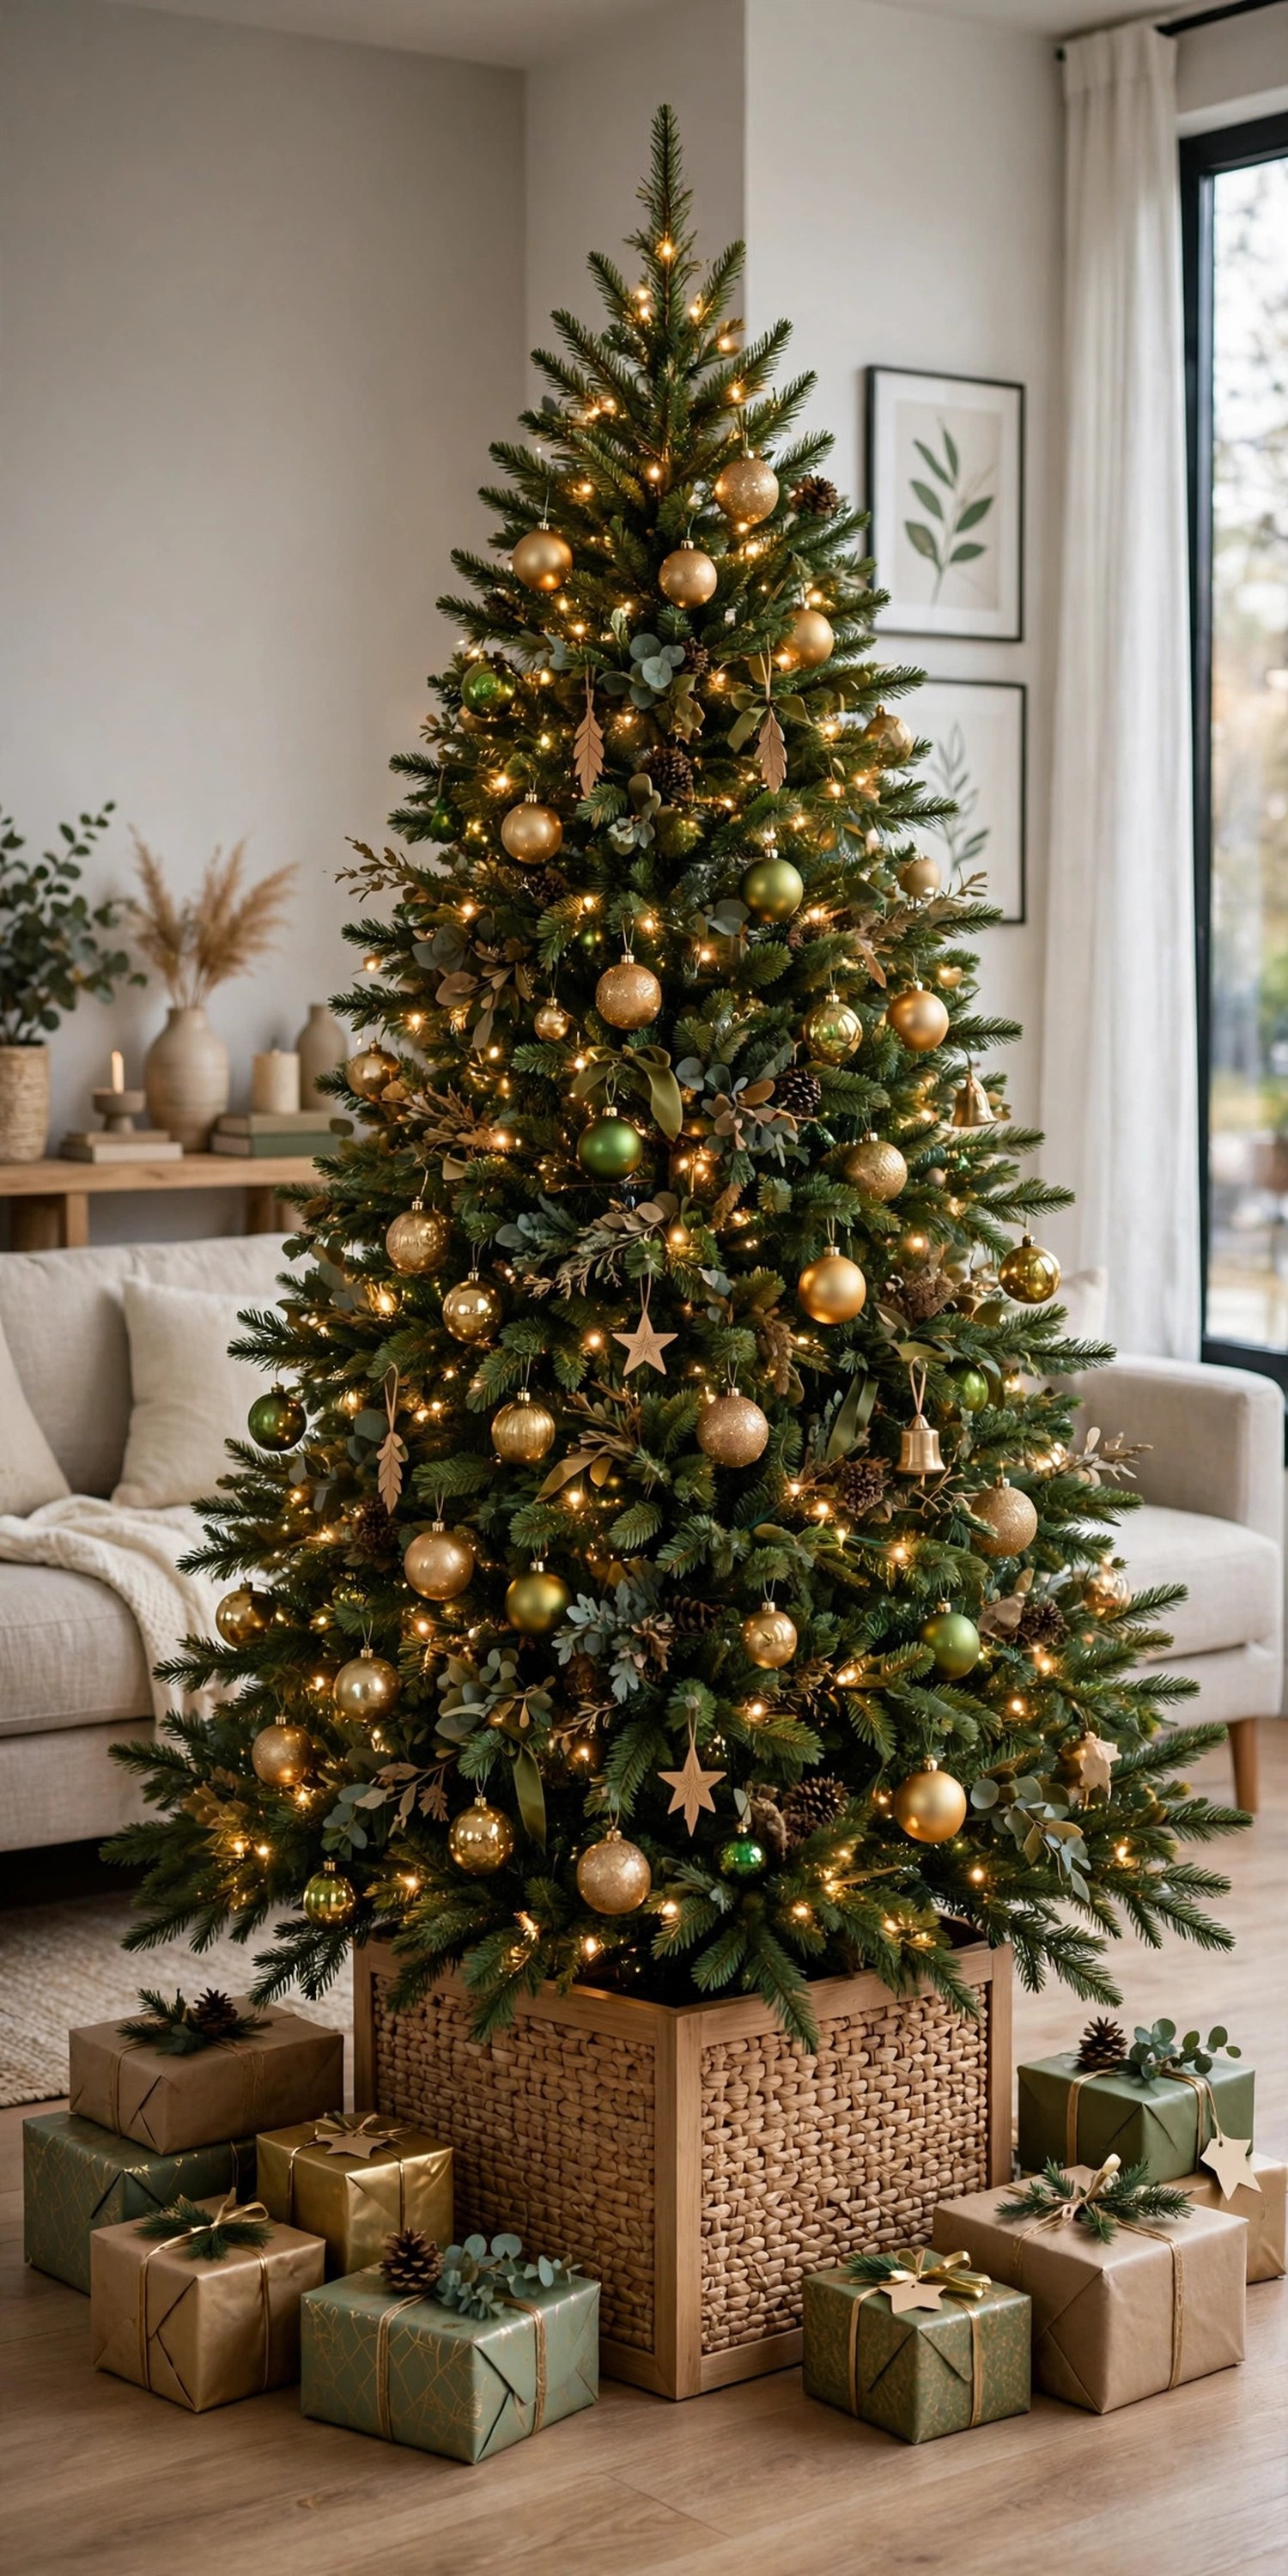
Tip: If gifts will cover the base anyway, a collar earns its keep twice: it looks finished in the weeks before presents arrive and still tidy after they are opened.
17. Style the Corner, Not Just the Tree
A full-size tree earns a stage. Placement decides how grand it feels: a bay window frames it like a picture, the corner between sofa and fireplace puts it inside the room’s conversation, and a dining room tree turns December dinners into occasions. Wherever it lands, give the spot around it the same attention as the branches.
Anchor the corner with one or two supporting pieces, wrapped gifts in the tree’s palette or a lantern at the base, and let the rest stay clear. Keep the tree well away from fireplaces, radiators, and heat vents; heat dries a real tree out quickly and is a genuine safety concern, not just a freshness one.

Tip: Sit in every seat in the room before you call the tree done. The untested armchair’s view is the one with the bare patch and the visible stand.
18. Unify Mismatched Ornaments with One Finish
Most ornament boxes are archives, not sets: school makes, gifts, survivors of three different color schemes. They can still make a beautiful tree if one element works as the referee. Pick a single finish, warm gold, matte white, or natural wood, and add enough plain ornaments in it to appear in every section of the tree. The repeated finish stitches the mixture together.
Work in this order: hang the unifying pieces first, evenly spaced, as the tree’s background rhythm. Then add the mismatched treasures in the gaps, grouping neighbours by color so nothing clashes with its branch-mates. Anything that still shouts can retire to a garland or a bowl on the table this year. The goal is not a matched tree; it is a mixed tree that looks meant.

Tip: Lights are the cheapest unifier of all. One consistent warm white temperature across every strand quietly harmonises ornaments that share nothing else.
Which Christmas Tree Style Fits Your Home?
| Style | Palette | Best for |
|---|---|---|
| Story-led heirloom | Whatever you own, plus one unifying finish | Families with a collected ornament archive |
| Jewel-tone | Emerald, sapphire, ruby, amethyst, brass | Big living rooms and drama lovers |
| Warm neutrals | Burgundy, bronze, taupe | Warm, wood-toned, calm interiors |
| Softened classic | Cranberry red, antique gold | Traditionalists who own a red and gold set |
| Mixed metals | Gold, champagne, copper | Dark corners that need reflected light |
| Natural | Browns, cream, deep green | Budget-friendly, low-plastic decorating |
| Vintage | Mercury glass, retro brights | Collectors and secondhand hunters |
Frequently Asked Questions
How many ornaments does a Christmas tree need?
A widely used rule of thumb is 10 to 20 ornaments per foot of tree height, so a 7-foot tree takes roughly 70 to 140. Fuller looks sit at the top of the range. Filler picks and sprays (idea 12) close gaps without buying more ornaments, and oversized pieces (idea 10) cover more visual space per ornament.
How do I keep a real Christmas tree fresh all season?
University extension guidance is consistent: saw about half an inch off the trunk base before setting the tree in its stand, use a stand that holds at least a gallon of water, and keep the water level above the base of the trunk at all times, checking daily, because a fresh tree can drink a gallon or more in its first day. Plain water is all it needs; additives are unnecessary. Keep the tree away from fireplaces, radiators, and sunny windows. The University of Illinois Extension tree care guide covers the full routine.
Is a real or artificial tree better for these ideas?
Every idea here works on both. A real tree brings scent and tradition but needs watering and drops needles. A good artificial tree costs more once, then returns for years, holds heavy ornaments on wired branches, and often comes pre-lit. Choose by your household’s tolerance for maintenance, and buy the best quality you can if you go artificial; it is a decade-long purchase.
How do I decorate a tree safely with small children or pets?
Put shatterproof ornaments on the lower branches where small hands and wagging tails reach, and save glass and heirloom pieces for the top half. Anchor the tree so it cannot tip: a sturdy stand, tightened properly, plus a discreet tie to a wall hook for tall trees in busy rooms. LED lights stay cool to the touch, lowering both fire risk and the drying effect on a real tree, and cords should be tucked where they cannot be chewed or tripped over.
When should I put up my Christmas tree?
Late November or the first weekend of December is the common pattern. An artificial tree can go up in mid-November for the longest season, since nothing dries out. For a real tree, early December is the safer start so it stays fresh through the holidays; freshness matters more than tradition when needles are involved.
Final Thoughts
Eighteen ideas, but the real advice is simpler: choose one. A tree with a single clear direction, story-led, jewel-rich, natural, vintage, always looks more beautiful than a tree trying to be everything in the storage box at once. Let the palette, the texture, or the collection be the point, support it with good filler and warm layered light, and finish it properly at the top and the base. Then plug in the lights, step back, and let the tree make the whole house feel like the holidays have properly arrived.